| Day103 |  |
Installing starboard side steps |
| Day103 | |
Installing starboard side steps |
| The second go
at the steps was much easier than the first having done
it already! But the grinding dust made me look about the
same, black, hehe ( pic above ) The best way to start is to get all the pipe pieces cut first, then mark up their position, outside first, then inside, and tack them all in, outs then ins. Each outside pieces center was measured as steps are, equally on both sides from the top. When I first tryed this, I thought they were all crooked and out of line, but they were perfect. I realised that knowing some technique here would be really helpful, and quicker too! |
|
| To
get the position of the inside 1/4 pipe, I first drew a
line to get the 1/2" offset from level. Then crossed
that with the vertical again using a level. The inside 1/4 pipe was then layed in to equally ( as it is close to 90 degrees ) touch the two lines. Once lightly tacked on, I checked them but standing high above and checkeing to see that they all looked one over top of the other and they were! |
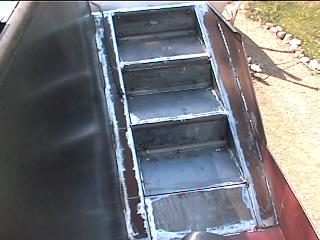 ..port steps finished and ready for final welding |
| At one point I worried about the side plates not being even, that is, running a straight edge across from one side to the other along a step edge. As the plate at the bottom basically joins them together, this became important. Wew!! They lined up great ! That was luck I think. On today's steps, I lined them up right away. | |
| I would have liked to have
made the sides rounded also, but it seems that joining
more 2 round edges in the same place ends up creating
more sharp edges again! The rounded pipe does after all
have straight sides still. This may be attempted on the
combing, but on a slightly larger curve. Gena did some fine welding on the cabintop, despite the occasional tack request from myself. |
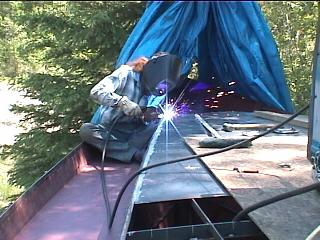 Gena final welding cabin top, side, to 1/4 pipe |
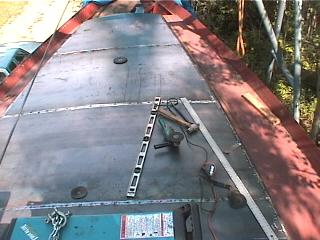

Genas work on the cabintop plates, finally closed
in!<<>> The steps before plating, looking down at
alignment
12 hours: Closed in cabintop, put in starboard side steps
to DAY 102 |
 For the BEST in service! |
to DAY 104 |