| Day 110 | 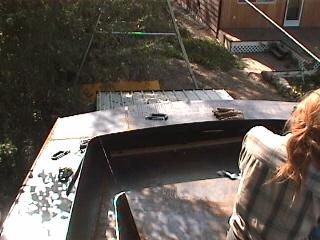 |
Aft camber and fitting transom |
| Day 110 | |
Aft camber and fitting transom |
| The aft curve in my opinion, needed to be the same as the curve on the coaming. As can be seen in the pic above, this worked out quite nicely! | ||
| The measurements from the
coaming were taken, marked, and a flatbar on the easy
edge placed to continue the curve beyond the coaming to
the sides. The sides were then checked for distance from
the last frame and it was within 1/4" amazingly! The next logical thing to do is to put in the transom! Unfortunatly, we don't have a motor yet ( soon! ) so all we can do is fit it in. |
 |
| After reading
many books on steel building, we found the least covered
subject was how to make the transom fit! At first we were
thinking of doing the same thing for this as we did to
put in the bulkhead aft of the pilot house. ( Using wood
sticks glued to a 2x2
) But after some looking at it, we realised this wouldn't
work ! We had no way of knowing where the wood tips
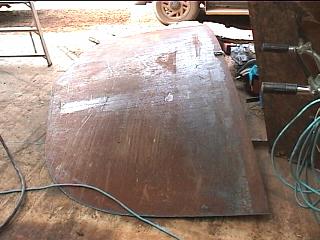
should butt into the sides and bottom. To make things even more unknown, the transom is curved in at the sides ! Here's what we did. -First,
I used the aft curve we have just cut to make another
piece of plate What a relief that's done. We have to leave it out for awhile as the motor will have to go in here. |
|
 |
<
The bizarre curve that resulted after we took out the
transom! Transom > waiting to go in |
 |
Day 110:
10 hours - curved aft plate, fit transom.
 Tough Radio Repair job? |