| Day 115 |
 |
Plating back of swim deck |
| Day 115 |
|
Plating back of swim deck |
| It took a while
to decide how the sides should come in to the bottom, and
obtaining the max width on the swim deck is priority. I
origionally wanted the sides to come down equally with
the hull shape, but even a 4" thickness there would
have substantially chewed space off the deck width. We have left some curve in the sides to minimize need for support framing. The bottom plate was cut to fit into the hull plate just as were the sides. It was pretty easy to do considering the whole piece actually twists as it approaches the center. All that worry for nothing! |
|
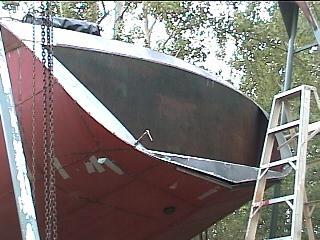
| In the photo to the right,
you can see the solution for smoothing off the join. As
all the aft adges are going to be left fairly
"sharp", using a piece of split pipe here
probably would have looked out of place. Some
"humanization" is required though as I imagine
we'll be sitting on this for diving preparation, boarding
the dingy etc. 3/8" steel rod will make a nice prompt rounded edge. |
 |
| The plate can't be welded in yet as Gena painted the inside and it needs the dry! Once this is on we will no longer have access to the area inside. It is a huge open space, and although it's tempting to use for a storage area, we won't. Cutting a big hole from inside would weaken the structure ( we think ) and after having read about the constant problem of external lockers leaking and filling with water, we definately won't be accessing it from the outside. | |
Day 115:
6 hours - Cut and fit bottom plate and trimmed side plate
to DAY 114 |
Motorhome CB Installations That Work! |
to Days 116+ |