| Day 197 |
 |
Bow wow! |
| Now that's a smooth
transition! |
||
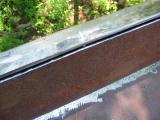
| The rail
bulwark smooths right into the solid bulwark. If one worries enough about how something will come out, it seems it comes out just fine every time! This once again demonstrates how important the foundations accuracy is to everything built on to it afterwards. The deck was a very predictable surface, thus the height of the bulwark was also predictable. There is also a slight curve upward, only 1/4" dips in the center, almost not worth doing but " I " would know it was flawed even if no-one else noticed. |
 |
 |
To the left
the fit of the inner wall can be seen ( 1/8" ). It
is positioned to slide under the flatbar easing the
effort of finishing. Before these plates are installed, a
slot will be cut so they can be also welded to the
frames. Much like the aft end of the keel was done. Many builders we have encountered don't put in a "wall" here, just framing like on a ship. We find that unsightly and a possible sharp edge to be scraped clean of paint resulting in rust problems. ( Not to mention the toe-stubbing factor hehe! ) The problem after welding these in will be the possibilty of water getting in now. A small hole will probably need to be drilled once the anchor roller assembly is in place to allow any water to drain out. It will be covered but water always seems to find a way in. |
| Inner bulwark plate |
 |
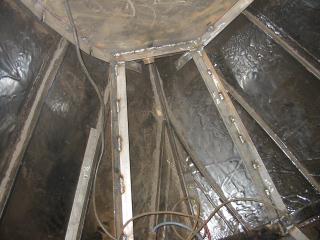
Once again
Gena and I went off on separate tasks today. As I was topsides, she was below, putting in a solid framework for the floor in the bow area (left) and associated framework. We had to stop early to go vote and get me some birthday prezzies! |
Day 197:
4 hours - put on bow bulwark tops and cut plates for the inside,
framed in floor area of sail locker