| Day 296 |
 |
Cockpit cupboard
Pilot house front window |
| Day 296 |
|
Cockpit cupboard
Pilot house front window |
| We had a late start today which really didn't matter except things went a bit slower. I was helping Gena by routing out slots and rounding edges so it didn't seem like I got a lot done. | ||||
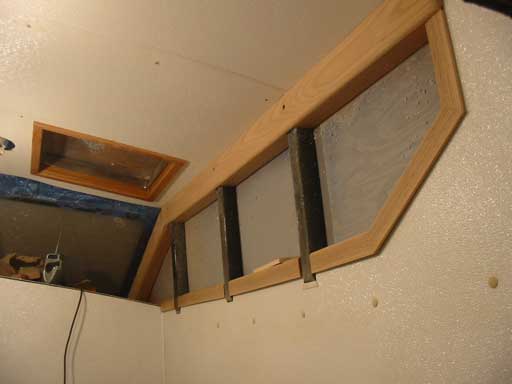
| The forward edge of the
pilothouse window frame was my target, but I had planned to do the top
headliner that will bring panel to the top front window edge. On the forward frames, the joining angle again was halved to make for consistent height. On the starboard side I messed up by somehow cutting it too short. I joined the two pieces back together with glue and dowels. It almost looks perfect. Not noticeable is the important thing. A good carpenter isn't one who doesn't make mistakes, it's one who can hide his ( or her ) mistakes! I remember that from years ago when I was just a kid. My parents had a friend, we called uncle Tony, who was a carpenter. I always had great respect for a good carpenter, but that places more owness on those of us who are not, hehe. |
 The forward frame in place |
|||
| As usual we tried to work in different
areas of the boat so as not to get in each others way. Because I'm the
router expert, I felt obligated to do all of the rounding and slotting
for Gena.
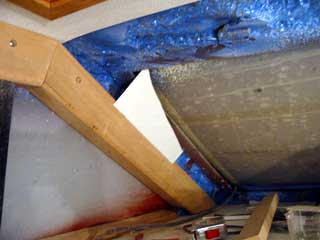
The photo to the right shows a nice edge in the entryway to the head. The whole 3/4" frame has been sunk in to fit over the cockpit support frame and to overlap the panel and plywood.
|
 View from head |
|||

|
Inside of the framework is a piece of 1/4"
oak plywood. Each frame was slotted to accommodate this. We may put a
mirror in partially, or fully, to brighten the aft up and give the
appearance of a more open and large area. This works well in our house! Mirrors are ok as long as they are glued solidly on the back to plywood. If it ever broke it would be a bugger to remove, but at least the glass stays put! The finished frame looks really nice we think -and it's not even coated yet! The corner which is along the entry companionway has been rounded as well. I bumped into it and a 3/4" round is easy on the body.
|
|||
| Blog: If we were younger, we may
have finished the whole boat 2 years ago, being able to work evenings
etc. but sometimes, especially in the winter, after a long busy day of
working mostly outside on trucks, it's nice to come home to a warm
house. Sometimes I start the heater in the boat as soon as we get home,
so I can go out there and do measurements or whatever. If there was a
220 volt timer we could have it warm already and eat supper out there
while working. We did that when we built the house, almost every
evening, then of course slept out at the house instead of in town. It
took only nine months to finish! We hope that once the aft is done, we can use the berth and sleep out there making it more comfortable to work late into the night. Maybe it's not the same thing but I think it's more of a mental state than a physical one. Besides, we will be living on this boat so what better a way to iron out possible problems than to actually live on her before launch! |
Day 296:
7 hours: Made cockpit cover frame and forward edge of pilothouse front window.
Day 295 |
 Advertise your boat site here free! (Mention "Boat" in the subject line) -approval at discretion of webmaster, must be boat related/non commercial- -link may only be active for a limited time i.e.<1 yr or on any "Day" of our choice- -link image must be provided and no larger than 160x160 in jpeg format- |
To Day 297 |
|
|


