| Day 322 |
 |
Bowsprit "floor" mounts |
| Day 322 |
|
Bowsprit "floor" mounts |
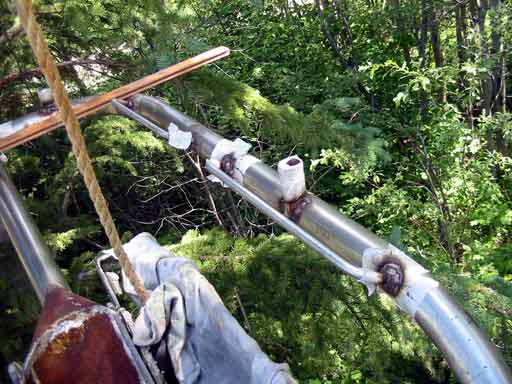
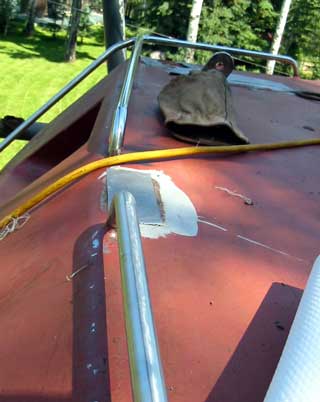
| The final bit of welding on the bowsprit is to add something to mount the floor to. At first I had planned to weld angle bar in and support the floor off of that. Unfortunately, the floor must flip up over the anchor rollers and besides, we have run out of SS angle. Mounting the little floor frame to some 3/8" rod solves the problem. | ||
|
Some clamps screwed on under the floor frame will both keep it in place and allow it to be flipped up. I'll probably need to make those as nothing one buys in a store is "real" stainless anymore. After having used the bender so much for flatbar and other rod, I ran off duplicates of the first bar ( left photo ) easily and welded them all on carefully. ( Note the masking tape in the top photo to minimize spatter from welding )
|
|
| The floor(s) will flip up and
outward allowing full access to the anchor roller adjustments, etc. |
||
 Big clutters are not good on deck! |
I really want to make them out of little
wood boards as the plastic wood looks so tacky in small places. I have
already promised to care for it! I have it pictured but haven't had any
time to do a 3d graphic yet. I remembered what I read somewhere about loose lines and clutter on deck. Treading carefully I managed not to fall off of the boat but add a little unpredictable motion and it may have been a different story ha ha! |
|
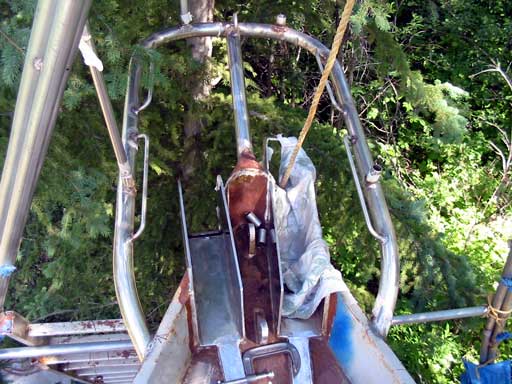
| The sprit welding is
finished off witha loop of rod welded on front and center for attaching a
flag line, hoist rig or possibly a sail ( although Gena doesn't think it's
strong enough! ) on a light winded day. It's out there so something needs to be attachable! Some smoothing of welds and then polishing is in order. |
 |
||
| As part of our power generating arsenal, a mount needs to be made for the Aquair UW water generator. It can put out a substantial 8 Amps at 7 knots. Very well built but a little heavy with cast aluminum housing and mounting holes for a fork style bracket. | |||
 |
We want to be able to
pull it out of the water when not in use for long periods or when in
foul/weedy waters. Gena came up with the idea of running a pipe through the
swim platform and then sliding a smaller stainless pipe up with a bracket
welded on for the mount. The top cap will be one of those stainless rail caps you may have seen in movie theatres used to divide people into lines while entering the theatre. They are very high quality and we found some at our local scrap dealers yard. It'll look cool and work well. |
||
 |
Pictured left is the
pipe under the swim platform yet to be welded. The right photo shows the top
of it in place. We were worried, I recall, about the seal of the enclosed space inside the swim platform shape. And Whether water would be getting in there. When Gena drilled the hole, air came rushing out as it was under pressure! I guess it was sealed after all. |
 |
|
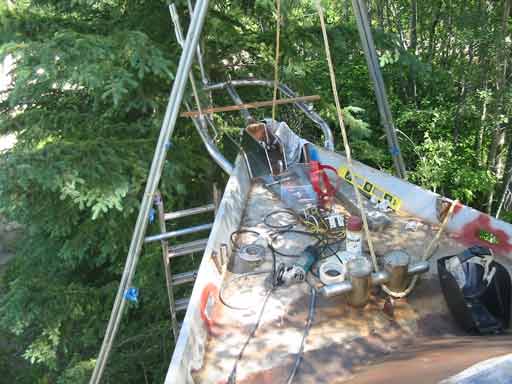
| After working with the bow sprit, I went full throttle into polishing the stainless welded on to the hull. We realised that once the light colored deck coat is on, using dark grey rouge on a 7200 rpm buffer flinging the sticky stuff all over may not be a good idea. It must be done now!! Some of the rails I was just going to sand down, but after polishing a test section, well, I was hooked. I went for 5 hours and managed to throw out my back REALLY nicely! | |||
Notice the difference between
polished and not?
..and to think I was going to skip it!!
Day 321:
6 hours:
Mounted "floor" support frames in sprit, polished SS, Put in water generator
mount, hurt back
To DAY 321 |
 Sales, Service, Installation |
To DAY 323 |
