| Day
344 |
 |
Side windows |
| Day
344 |
|
Side windows |
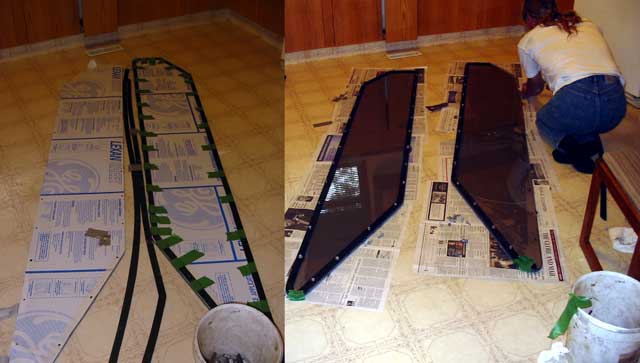
| The plastics place had cut the
windows from the wood templates we fitted. The starboard side fit like a
glove even though it was pretty scratched up near the forward edge, the
port side was quite a bit smaller for some reason. It won't be an issue
because the trim will hide it, but it will add the the job of applying
the trim. As it turns out, this thickness of lexan (1/2") is pretty easy
to cut with a jigsaw, not at all like the thin brittle stuff one finds
at a box store. The wise words "if you want something done right, do it yourself" hold true here. The surfaces may not have been so scratched up if they'd have been left whole on a pallet. |
||
| I have discovered a
method of removing deep scratches, ones too deep to polish out. It was
quite by accident as I attempted to bend a scrap piece with a butane
torch. ( For some reason I have an innate desire to bend clear plastic!
) I had made some deep scratches with a screw driver to see how easily
it scratches. The areas where I had waved the torch by briefly suddenly
had no scratches and became smooth again! I tried it again and sure
enough the deep scratches filled in. Wow! Keep in mind that this Lexan
has no mar-guard coat and I have no idea what it would do under heat.
After reading many posts about the perils of mar-guarded plastics, we
decided the occasional polishing would be better than total removal of
the crazed and checked window for replacement. It was also about $400
cheaper per sheet than the mar-guarded sheets. One must be careful not to stop moving the torch or it will burn and bubble! If you ever attempt this, using a test piece for practice would be advisable. When we took a break, Gena thought we should inflate our new tender which arrived last Friday. It has an aluminum floor but folds down to a tight size. (Very heavy though!) If the floor is removed it's about 25% lighter. It seems to be a good heavy weight design with thick transom for motor mounting. The motor, not an electric that I would have preferred, is on the way. 6 horses will move this baby!! |
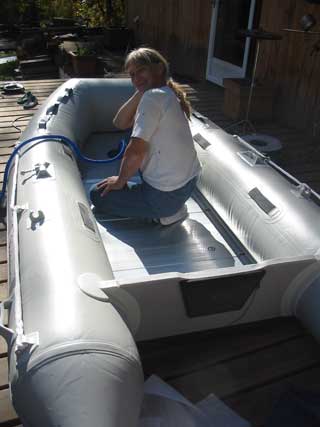 Gena playing in her new toy |
| All of the holes for mounting
the windows were cleaned out, then the windows put in place and drilled
from behind. We then took the windows into the house and lined up 1/4"
rubber gasketing Gena had cut for the occasion, and drilled holes in the
gasket. Originally she was going to use a hole punch but then decided
that drilling made just as clean a hole. Even though she used a quarter
inch bit, the bolts fit very snug. The gasket was then "glued" to the window using clear GE silicone, the bathtub variety. It isn't a really good adhesive, but will stay stuck and keep a good seal. (We hope!) |
| Some of the end holes were drilled oversize to allow for expansion. From below zero to 40 above there is quite a bit of movement. approx. 1/4" over the length of these windows. That is why, under the rubber to the window frame we used butyl calk. It never really dries so will always allow for movement without loosing the barrier seal. At least this is the theory! |
 |
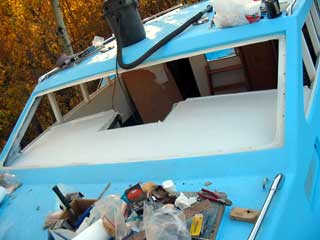 The dash "fixed" after damage from painting |
|
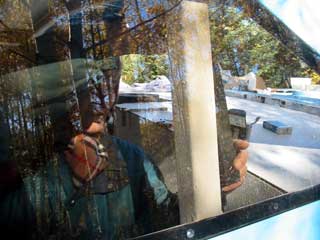
| The number of bolts
holding these windows in place seemed excessive, but after seeing how many
are on the
Dashews boat SunDeer, we may have gone a bit light. More bolts may serve
to stop so much wrinkling due to compression of the gasket. It can be seen
in the photo but pretty subtle unless one is looking straight down it.
Reflections always show even the slightest defects in a surface that would
otherwise go completely un-noticed. We had to be careful how tight to take
down the bolts. The nuts are self locking so they won't come loose on their
own. we used nylon washers sized exactly to the bolt head size to stop
"digging" from the movement of the "glass" as well as add a bit more water
resistance. |
|
| One thing we really noticed
with these large pieces of lexan is they have a tremendous build up of
static electricity! They attract bits of dirt and paint chips from a
foot away and had to be constantly wiped. ( That'll teach me for not
cleaning the kitchen floor enough! ) Wiping anything gritty like sand or
filings can be catastrophic to lexan so we had to be careful. After a
while, and some water, I'm sure the charge will dissipate, but until
then we put giant swaths of extra wide saran wrap on both sides to
protect them. Besides grit, they will be subject to much saw dust in the
near future. The front window won't be such an issue with cut and size as it will sit under a stainless frame overlapping 1/2". As can be seen in the photo (right&below) the tint, light as it is, still blocks most of the view from outside during the day. A dark tint is nice, but trying to sail at night looking through those, you wouldn't see anything coming! |
 Gena slides in support gasket for test fit . |
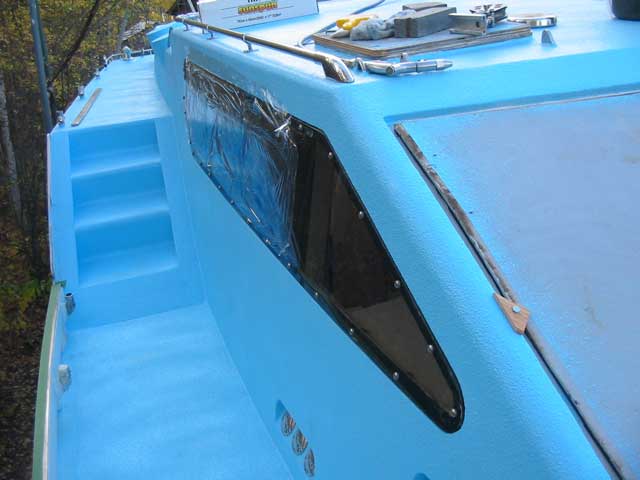 |
Window in place, nice fit on this side. Saran wrap will protect it from dust and the tarp pressing against it. |
 |
View from inside pilot house, trim removed. You can hardly see the tint except everything looks nicer! The bronze color blocks some UV. |
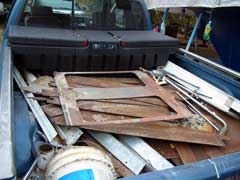
| Off to the scrap yard. We are making good on our promise to take all of our scrap to our favorite dealer. Now our yard doesn't look as much like a scrap yard. We will be selling some of the full length flatbar we never used in the spring once we're certain we can't use it! |
 |
Day 344:
9 hours - Cut gaskets, put in side windows, sanded FG on dash and painted with
plastic paint.
To DAY 343 |
Looking for gr8
cruising logs?
The Dashews SetSail.com |
To DAY 345+ |