| Day 349 |
 |
Entry Doors-hatch
portlight frames |
| Day 349 |
|
Entry Doors-hatch
portlight frames |
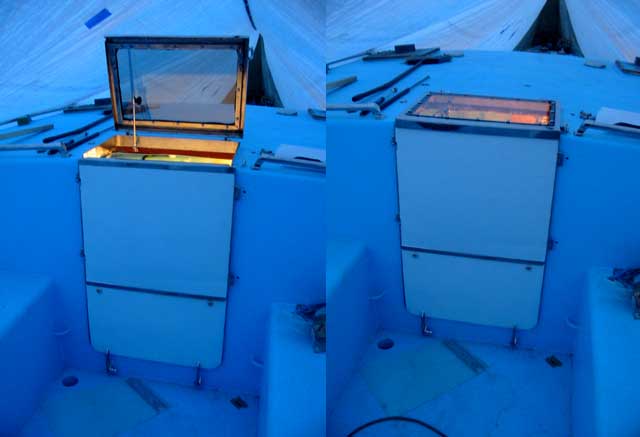
| The entry companionway doors are painted and ready to be installed. As can be seen in the photo above, the top door swings to port, and the bottom flips down onto the 2 little rubber feet. At first, we had plans to have the bottom section swing open in to the side of the seat but this would have made that part of the seat very uncomfortable to sit in, an area where one can be shielded from the weather. | |||
| This way, the doors ( that
will be open most of the time anywhere warm! ) won't be in the way. Notice the 2 tabs on the top door. These will be locked down with 2 cam latches that goes through the bulkhead, thus the holes. One thing one doesn't give much thought to when designing such things is the weight after everything is attached. The little bottom door is quite heavy and would hurt if it fell on your toes! There will be a gas shock from a pre-mounted tab to the door frame. We are in the process of finding something that will work.
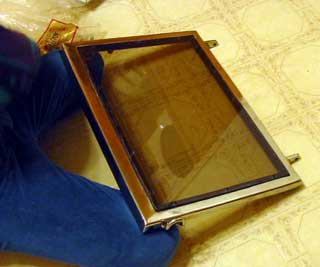
I also think it would be good to make the cockpit a hot tub hehe! Normally, these latches won't be used as the top door overlaps and will pull it in anyway. The bare metal still on the door's interior is a result of being undecided as to what kind of wood-plastic wood-whatever we will be using there. That new "fake" deck wood is nice but only goes down to 1" thick, and is extremely heavy. Probably 4 times that of wood. The top hatch, as shown during construction, posed plenty of other issues. (Shown right) Gena cut and seated some 1/2" rubber gasket on with "Goop" glue, then drilled holes through for the bolts. Butyl tape (5/16") was used in the corner to get a good seal. Like the portlights, it squashed out uniformly as the bolts were tightened. We noticed the gasket would try to squeeze out when we used gutter seal ( similar to goop glue ) as it didn't seem to adhere well to the SS. It's too soft, even when dry. The thing must be lockable while we're away from the boat, so the logical solution was to slip on a padlock through welded on loops. The weight, as predicted, is heavy enough to give one a good bruise on the head if it came down fast. Besides a hatch adjuster ( which I don't fully trust ) a short gas assist cylinder will be added. This way the hatch will need to be pulled down until the pivot point is passed when closing. Right now, with out it it's a pain going in and out, and we keep catching our hair in the nuts. The temperature peaking -15 to -25ºC every day requires it be kept closed! |
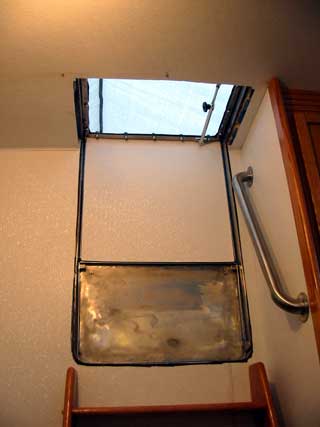 Interior view thus far
|
||
| No gasket has been installed
as a seal as we are still trying to find an appropriate material.
Gasketing is a whole different world! Seems impossible to find anything
that one can purchase as an individual, outside of home weather seal
stuff. I have found some beautiful closed cell foam that has a nice solid compression and is definitely waterproof but unfortunately it's only in 4" squares, and you have to buy the USB wireless that is packaged in it! |
|||
 |
The latching mechanism will be covered in
the near future. ( Use projects
menu in sail1.htm to see the whole thing start to finish - coming 2007!
) At last I am putting in the portlight frames in the galley dining area! The photo to the left shows the frames drilled, blasted, and painted with simulated "rock-finish" Speckle Stone by Excel. We have used this stuff on out customer countertop at work. It has stood up for 12 years, and we trust it. That was on wood though, this is on
stainless. After 8 hours of drying, the test piece exhibited a tough
durability, and survived the fingernail scratch test (which is amazing
if you ever saw my finger nails lol!) |
 |
Once in place, they look pretty nice! The
SS truss head screws are on nylon washers to inhibit tearing when
tightening. I'm not sure if that was a good idea or bad as it further
isolates the screws from the frame so they have nowhere to distribute
their cooler temperature to. Some of the screws are completely warm (
Outside it is -25ºC at testing time) while others are fairly cold.
This is probably because some have more butyl on the threads, thus
adding insulation value.
Condensation is a continuous consideration on a steel boat. To minimize it is paramount. If they become a problem ( we won't know until the boat is in the water and in conditions where condensation is maximum ) the washers can be removed easily. |
 |
While I had fun with the portlight frames, Gena drilled the hatches for their hatch-adjuster mounts. We have decided to put 2 on each as the larger hatches are heavy - and just to be safe. |
Day 349:
10 hours (total) - Prepped and painted portlights for galley/dining areas,
mounted companionway doors and hatches.
To DAY 348 |
Follow
Soccer France with TV5.ca In French and English! |
To DAY 350 |