| Day 372
|
 |
Sail locker door &
wiring forward |
| Day 372
|
|
Sail locker door &
wiring forward |
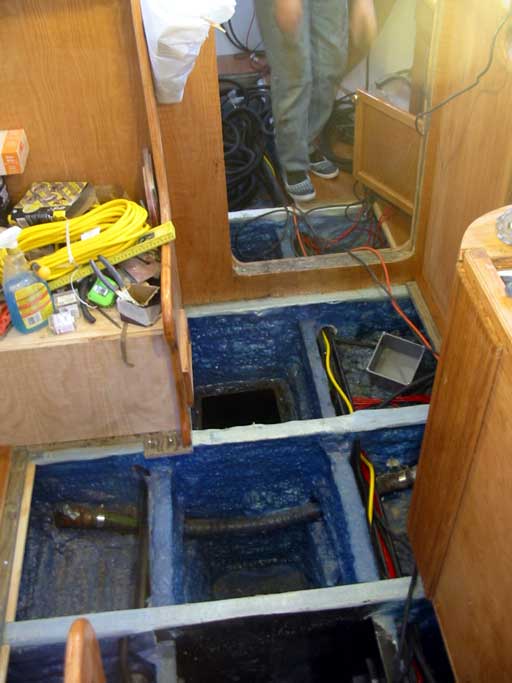
| The wiring tray was ready to be filled to the brim today, and Gena was armed with a new barrage of cable to lay forward. At first a 2" conduit seemed plenty, but because of the thickness of wire and the sheer number of them, it has become fairly small. | |
| The wiring ( it has been decided ) will
not branch from a single central point of the then 'main' breaker panel
in the pilot house, but will be distributed between 3 smaller panels.
The one forward is what Gena worked with today. The forward panel will spider out to my desk/studio/electronics bench, the fans/lamps/lights in the forward stateroom, the lights in the sail locker, and the mast power ( for lighting etc. ) The forward bilge will not be powered from there as it is always a good idea to run a separate circuit directly to the battery box for that. As the box will be sealed (AGM batteries!) it's a bit safer than an exposed panel to keep that pump running in the case of unmentionable circumstances. The photo to the right shows Gena toiling in the battery box with a hole saw through 3/8" plate. Ear protection is very necessary! There are several large cables coming out of here so the hole must be quite large. Also one large hole is easier to seal than many small holes. |
 |
| Here's a run down of all of the large ( 2
gauge to 2/0 gauge ) cables coming from the battery box: 1) to the dashboard breaker panel 2) to the forward panel in my desk 3) aft to the panel in Genas' desk 4) to the windlass 5) to the power inverter 6) to the 12 volt microwave 7) to the overcharge load diverter Then the smaller cables to the forward and central bilge pumps and battery monitor take-offs. I think I have them all! Gena will be sure to correct me if I haven't :) |
|
| BLOG: Each of the
large cables are terminated with a, well, large lug. We believe in
soldering the ends of cables. Some people laugh at this, due to
corrosion problems with different metals. Their opinion is well founded
as we have seen copper and lead/tin solder interact in a moist
environment. Our theory is: If the solder is well heated so it
penetrates the copper wire entirely, and the exposed copper is sealed on
to the solder using liquid tape (or rubber) under heat-shrink tubing, it
will last a long long time, and with a better connection. All of our
crimps are also soldered and sealed in the same way. If the seal holds,
there will be no problems. As a good example, 8 years ago we connected our 120' deep well pump using this method. The pump became clogged and burned up so we had to replace it. Upon removing the sheathing, the copper wire inside was shiny and new,just like the day we put it in. That join was under water for 8 years! I suppose only ocean time will tell. Some builders like to use tinned copper wire. We use it at work in the form of coaxial cable and it is definitely the best. Unfortunately, the price of 100's of feet of gauge 10 heavy insulated tinned wire would put us in the poorhouse, cruising kitty and all, so we opted for the more affordable copper. |
|
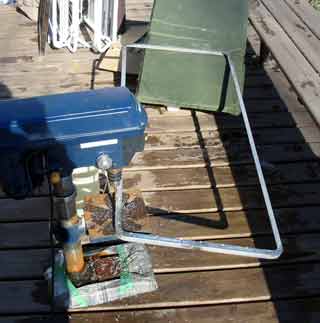 Warm enough to drill stainless! |
My task today seems menial in
comparison, but we each do what we are best at so..... The weather being fantastic these past couple of days has allowed the opportunity of drilling a door frame, outside, where I don't need to clean the carpet for 3 days after doing it inside. Water didn't freeze as I poured it on to the hot drill bit, the sun was shining so I could get some good alignment on the holes and it felt like spring might be coming. ( Later proven to be but an anomaly in the usual wx patterns here! ) This is one of the frames I made back last summer with full intention on having it in place before last winter. |
|||
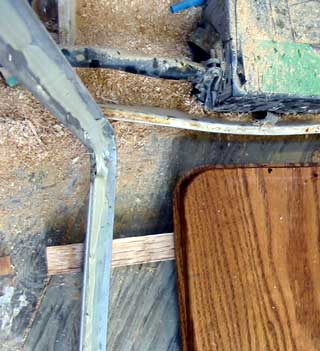 Solid oak routed along edge to seat into SS frame |
|
|||
 |
Doesn't look too bad for a
beginner. It took a half hour of rotating the two 1" thick planks to decide
whether the grains line up nicely on the side that will be seen the most.
After having it together, it seems I have seen this before somewhere...
Could it have been on a ship we were on crossing the Atlantic? Hmmm.
Anyway, there will be a nice home-made little
vent on top ( now I insist! ) for air circulation and fan mount. |
|||
Day 372:
7 hours - Made door for sail locker forward, wired main cables forward to
battery box., and microwave cables.
phpBB
up again The big boat forum is fixed ( again**sigh..) and way cooler! Come exchange your thoughts and ideas about sailing/building |
