Day 374 Door vent,C.L. cable tray
The stove needs a scoop above it to protect the panel from heat, even though alcohol stoves don't emit a huge flame, the hot steam from a boiling pot may get under the wood or accumulate in the area. The solution is to add an aluminum scoop, and it will be done as soon as we can dig out the sheets from under feet of snow and ice!  
In the mean time we will have to settle for the side panels. Nothing was square on these so I had to rely on the little plastic angle indicator I have used since the decks were welded on. It, like many of our tools, has become old, tired and difficult to read. I actually went and bought one last week but heck if I know where it is!

I also put in a divider between the 2 tambours on the right side. Gena warned me that it's common practice to put the shelf in first. Ooops! Oh well it's in there now so....

Below is two photos of my legendary vent cover technique. I just route in some shallow slots, in this case 3/4" deep. Then split some 1 1/2" casing for the slats. Once inserted with glue, The surface is framed over. I could just buy these but they are $30 to $40 each. Why? I can make one in 1/2 hour!


The size was dictated by a brushless fan that will go on the other side. A coil style cb mic cord will connect to the door jamb so the wire won't fatigue from opening and closing.

The outer door frame is something I have been looking forward to for a while. It is nicely routed round and inset 1/4" for the steel door frame lip underneath. I can't put them in yet as Gena must coal tar the bare steel yet.

 
My projects were occasionally interrupted by Gena requesting help with pulling wire and holding connectors.
 
As there will be heavy sail bags flogging around in the sail locker, something to protect the wires going to the windlass and search light was in order. A split chunk of white plastic pvc pipe makes a good wire carrier. Silicone sticks well to both, so it was used in tandem with some screws to attach to the side of the sail locker. Notice the windlass motor/gear assembly in place.
 
On the topic of the windlass, we have decided to use the throw style breaker as a switch for the windlass power. It has been placed next to the galley and has an indicator where we can see it. Ordinarily, this could be left on all the time but because of safety, and the possibility of me building an RF remote control for it so we won't need to use the foot switches to pull an anchor closer from the cockpit. The Imtra came with a remote switch panel, but this will remain in the pilothouse as it's not very waterproof.
Next, Gena must tacle the main power buss. This will be mounted inside the battery box and has manual resets for all circuits except the sump pumps. (which will be auto resets!)

She will do this mounting and isoltion plate at the shop when we aren't busy.

She found the heavy (1/4") copper flat-bars at the scrap dealer. She wants them this thick because the bolts can be tapped as opposed to using nuts. This will facilitate easier removal of faulty breakers in the future. We predict ( probably accurately) that we will become much lazier with the cruising lifestyle, so we must figure that into the equation he he!
Blog:
No thing too big or too small. Sometimes I think that certain parts of the project aren't worth posting a picture and a comment on, but every little thing is important and an integral part of the whole boat. If it wasn't important, believe me, with our time constraints, it wouldn't be added! I further reconcile with the idea that perhaps someone, somewhere may find that info useful. While there are ever growing areas of interest on the internet, it seems that still there are huge holes in the "know-how" department. I suppose it is assumed that it can be found somewhere else, when just maybe it can't be.
Evolution and development is, after all, based on the experiences of others. I haven't noticed any boat building schools around here so I guess we're on our own. ;)
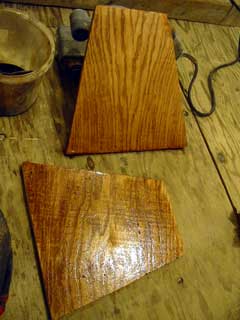
Gena also siliconed up any "cracks" in the panel. We have followed the tradition of making the forward most locker ugly with this and shoddy trim work. After all, a good seal far outweighs the appearance in this always-to-be moist area of the boat.

My idea with the above vent in the door is to suck air into this area with a fan, where it and hopefully the moist air, will evacuate through the windlass hole or slightly open hatch. The only thing that remains to be done up there is coating the floor with blue stuff effectively sealing the whole thing off, and coating the latex coated foam in the bow peak.

It was a long day today, going out after supper too, but much was done which makes us feel good.


Day 374:
12 hours total - Made door vent, ends and divider for galley cupboards, siliconed bow area, ground down welds in doorway, connected up windlass and ran cables into junction box.


To DAY 373
Hard trance/dance/techno-pop?
aimiez-vous?


Download NEW Fresh Nelly musik FREE at Dogmazic France!
20072007

See the style change in real time


www.freshnelly.com


To DAY 375+