| Day 376 |
 |
My desk & fwd.
breaker panel |
| Above is the sliding door frame I made yesterday, in place with, yes, another sliding door frame in it. I routed in the already thin (1/4") frames so they would fit the 1/8" track. I then found that the track is actually thinner yet on the other side. Must be just poor manufacturing as I can't think of a reason why this would be so! I stopped at this frame because I am now thinking that perhaps some 1/8" Lexan might be a better way to go. | ||||
|
The cool little
aluminum Nintendo™
gameboy boxes shown ( I have many, Princess Auto Parts @ 2.99 each) are
great for storing chips, and other electronic parts. There isn't enough
room for storing the larger parts trays so they'll be going elsewhere.
You may have noticed that I started with the face frame in this case, as opposed to Gena making the ply part of the galley cupboards first. I'm not really sure why, but when dealing with all of these angles, it seems to be best to get something to start at a right angle (90º) first, then build off of that. The photo to the left shows it in place. The inside edge has been routed in to accept some 1/2" ply so the inside of the cupboard is flush- easier to mount a shelf in. |
|||
| The next part of this area is the radio panel and another cupboard on the opposite end of the desk. | ||||
|
||||
| We have decided to coal-tar the
sail locker door frame before the wood is mounted finally. Unfortunately it
will take a long time to harden as the steel is conducting the cold from
outside (about -10ºC). She ran the wiring into my desk at the above frame which will house, amongst other things, the forwad area breaker panel. She finished off and mounted the breakers at work. Each "cct" circuit has a number that coresponds to the circuit in our "growing in complexity" boat schematic. |
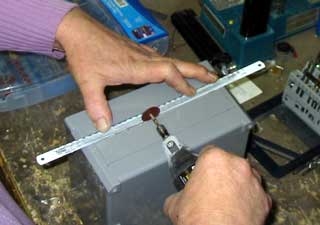
 Gena cuts hole for breakers at work |
 |
 |
| Some of the circuits
include the fans overhead, the door fan, the lights overhead, the reading
light over the berth, the relay power for the search light, the forward
junction for the sail locker lighting, my test bench equipment, the ham
radio, the WxSat receiver, the scanner, my music studio stuff, and the PC
tablet. Have I forgotten anything? probably!
These breakers are nice as they fit together and don't require a special "rack" mount. The large 1/4" copper plate is for all of the grounds. The cable from the battery box is 4 gauge. Wow! My desk is wired for sound/lights/fun! |
|
Day 376:
6 hours: finished under desk locker, started top of desk lockers. Wired to desk
panel, to berth etc, made breaker panel