| Day 383 |
 |
Pilothouse
Doors |
| Day 383 |
|
Pilothouse
Doors |
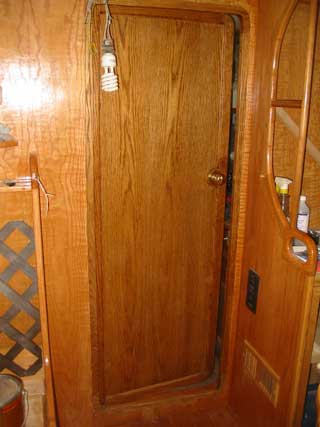
| Putting on the door to the forward stateroom marks a "clean room" so to speak. This means there is somewhere on the boat that can be completed without fear of sawdust getting on/inside it. | ||
| The radios, TNC,
antenna switch box etc can all be safely stored and mounted now. Because
I couldn't wait to make the heavy duty latches, I had decided it should
have a regular door knob. Gena mounted it in there and it looks great!
The same hinges were used on the sail locker. Standard exterior hatch
hinges. It's a fairly heavy door so there are 4 hinges, and I'm pretty
proud of the whole thing. Notice the vent near the bottom of the door on the adjacent galley cupboard. It's always a good idea to have lots of vents to prevent the dead air space. I don't much like that vent either but Gena managed to slip it by me before I could stop it! |
 |
|
| Luckily, the bottom piece was ok and fair. As can be seen in the top photo, things eventually came in ok. There are still a few problems to iron out ( ..if only we could just iron them out ha ha! ) with that section. The center of the curve has pulled away from the frames as a result of the flat section. This will have to be remedied on the next opertunity available. The very ends of the two are almost too closely butted and may cone out. | ||
 3/4" inset 3/8" into 2x2 frame 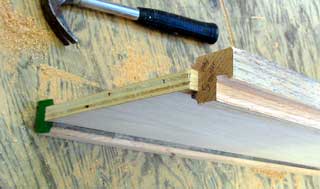 1" Gasket fits into channel routed out for seal  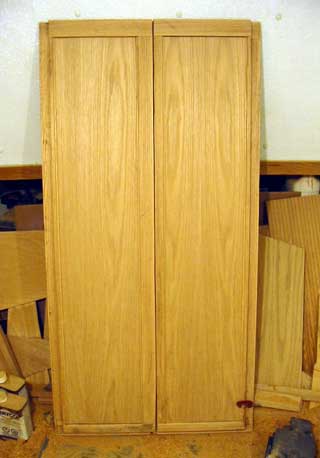
|
Change of heart.. Perhaps I just shouldn't bother making intricate plans for a part of the boat. The pilot house door I designed and planned 2 years ago, considering several designs and carefully chose parts for has changed! Originally, the door was going to be a sliding door hiding itself behind the dash.
But after seeing how the other door looked, and that the SS 3/4" angle hadn't been included in the shipment with the stanchion tubing for some reason ( surprise surprise! ) and what SS was left to work with was such a mess it wouldn't have straightened in a week, as well as Gena not being happy with the design because it took away some support for the dashboard, I decided to change the design! Whew! I realized that perhaps, just maybe, the door could be split into 2 one foot wide doors that overlap, then could be left open one pinned to the bulkhead, one to the side of the dash. In fact the area seems to be too white, like snow ( which I don't really like ) or a clinic. It needs more wood. It's amazing how much space there is right now in this area. So I set to work late into the evening. The column of photos to the left shows the highlights. Because the gasket is in the door not the frame, I thought it may be a good idea to inset the seating in but 1/8" to stop things from tearing at it as they rub by. |
|||
 |
||||
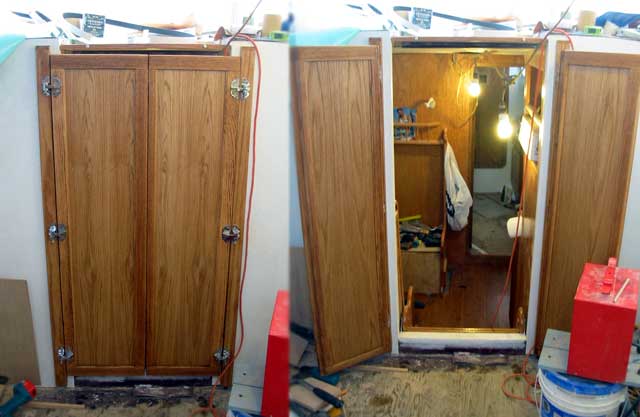
| There they are! Closed....open.....closed...open...he he! The slide board that comes out of the ceiling still needs a face on it, and some of the framing needs to be put back on, but they are basically on. Enough to stop sawdust from getting into the galley/dining area. Now that can be finished up. All the fun stuff, yay! | |
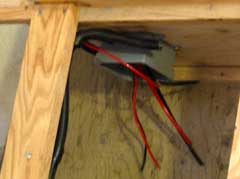
| Poor Gena is still at the wiring,
batteries connected to buss, junction box under the seat, pulling cable
through up to the all of the panels I showed yesterday, and connected
some fans etc.
She had quite a time getting the bolt connectors on the main breakers to all areas of the boat. It turned out the top battery is in the way so she had to grind down a socket to fit the bolts between the the battery and the panel. She was ready to turn it upside down! |
 |
| Batteries in place, cables connected | |
 |
 |
Day 383:
14 hours:
Made pilot house entry doors, wired to panels over dining area, around seats to
fans, breakers and battery cables soldered on lugs etc.
To DAY 382 |
|
To DAY 384+ |
