| Day 451 |
 |
Vent fans / dining
table |
| Day 451 |
|
Vent fans / dining
table |
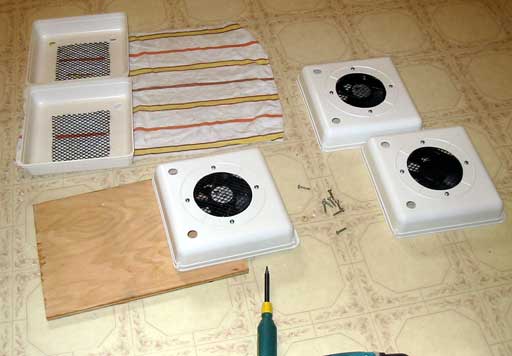
| You may recall a ways back that 6 mushroom
vents were installed by welding them to the roof of the cabins. They
came with nice round plastic inner frames, but would only work with a
through depth of about 1/2". Our ceiling, insulated and paneled is over
2", not even close. I wonder what they were thinking?! ( I must hold off
big time on this one) These mushroom vents are shaped in a way that the air flowing along the cabin top creates a vacuum and draws air out of the cabin. They are very nice with a bug screen and everything, but I wanted to take them one step further. I want fans. This way we don't have to wait for a breeze to suck the stifling air out, we can just open them and turn on the fans. This is a simple enough thing until the questions of how can they be opened if a fan is in the way and how can the cases be made? from what? Over time I devised a couple of nice designs made from oak. One would have been ok to make, but 6?! As you might have thought, I put it off. Then we bought a 2" x 2" length of oak board so I could route it out for the 6" computer fans, and make it all fit and look nice. The wood ended up getting used for something else. Now that time is running out, I started feeling pressed to get them done. They would be a lot of work and I knew it. Gena went around and used plastic garden edging outside of the plastic frames they included with the vents, and started hinting around. Then one fine day we were wandering through the Rona store looking for whatever we could use to make into whatever (we do that a lot! ) and lo and behold there was a stack of humidifier trays 1 foot square, fairly rigid, and cheap! Plus they had exactly 6 of them. Right away I saw a fan inside each one so we bought them and the rest is history. |
 |
I cut out a perfect circle (
using a compass and steady fine blade jigsawing ) then drilled holes for
switches, and the mounting screws for the fans. There are 2 switches for
high and low speed. The low speed has a 47 ohm 1/2 watt resistor across it
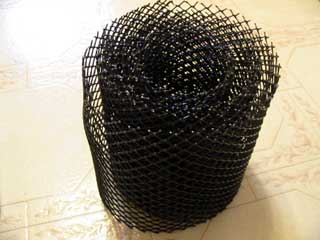
so when the switch is open, the speed is reduced to a dull idle. Some plastic soffit grilling was used for the grill so hair won't get tangled in the fan. A little glue to hold that on then #10 screws into the fan chassis'. |
 |
 |
The photo right also shows
the color isn't really white, it's a creamy color. I had bought some plastic
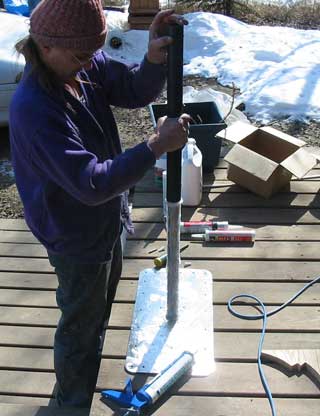
paint for something else, so used that up on the 6 cases. If you ever need to use plastic paint, clean the plastic with acetone. That softens the surface up a bit so the paint will get a better hold. DON'T sand the plastic! The scratches will show right through no matter how many coats go on. Need some little hinges, and some drawer safety latches to mount these, but looks like I have this beast tamed! Gena made/ welded the post for the dining table this morning. (photo left) It's pretty |
 |
 |
heavy duty too! A section of
plastic conduit makes a perfect sleeve for some 2" SS pipe laying around the
yard. This design will allow for extra accommodations (if we become 6
people) by sliding down the table to the seat level, and throwing an
inflatable mattress over the whole nook. She still needs to make the flange for the floor, but the table needs to be done first. Clampy clamp clamp! That thing isn't going anywhere hey? The table is to stay flat. I wouldn't want to be her prisoner, but that might do my back some good! Even though it's solid oak, It's not really that heavy. Notice the supports inset into the table. The plate will further keep things flat. -Below is a photo of the aft berth with those crazy little portlight frames on. |

The little port light frames in place!
Day 451:
7 hours- made the 6 fan boxes, made table mount and joined boards for table.
|
Listen to my newest musical
composition " Easy Sailin' " August
25,2008 or Watch the youtube sailing video the sounds were taken from |