| Day 131 |
 |
Lining up for the propshaft |
| Day 131 |
|
Lining up for the propshaft |
| This was, in a word, tricky! We toyed
around with all sorts of ideas over the last few weeks,
on how to make sure that we don't make any ugly mistakes
cutting out the aft of the keel and subsequent frames for
the prop tube. It sounds simple enough, but the precision is very necessary when the engine is sitting so low. I even made a lazer mounted on a bracket, fully adjustable and held on with magnets. This proved to be of some use, but wasn't worth the work of building it! |
|
 |
Not only does the shaft
have to be the exact angle, it also has to start at the
right hieght aft and come out exactly at the right place
at the engine, and at the right angle both vertically and
horizontally. We already had a pretty good idea where it should come through the hull to keel join, so we put a square in the transmission coupling first to mark a center on the first frame aft of the engine. I found a mop handle that would fit tightly in the hole in the flexible drive coupling bolted to the transmission flange. We cut out the hole in the first frame and cut the handle just to fit to the next frame. I then rotated the shaft to assure that it had no wobble, and bent it accordingly. |
| This marked
where the second hole would be. Now all this was roughly
calculated using the basic trig function angle*tangent*length=height or H=TAN(A)(B) where A=angle, B=base of triangle, H=height resulting In order to "guesstimate" where the exit point aft would be. I measured each frame down from the sole line ( web frame top ) to where the hole should be, the subtracted the hull to sole line to get the distance from the hull to where the hole is from the outside. This all came up pretty close when measured from the outside and marked. |
|
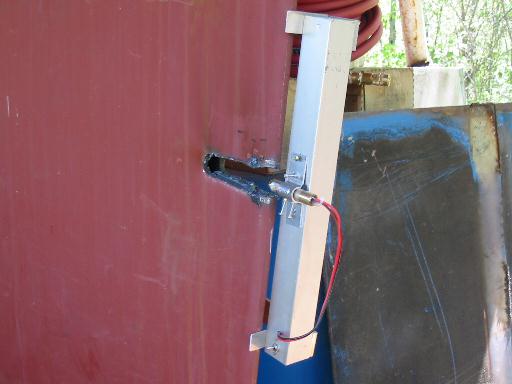
| After we were confident the
holes would all line up, I cut a section out of the aft
of the keel and inserted the laser to check for
alignment. Unbelievable! It lined up perfectly all the way through to the coupling on the transmission! In fact, the photo to right shows the relection from inside the coupling (made of machined stainless I think ) shooting the beam straight back down again! Talk about perfect! We pushed a stainless pipe up to check out the prop angle, and because it looked cool! The holes of course will be much larger when the tube is to be put in place. |
 |
| The rest of the day was spent moving the engine back out of the way after measurements were made for the prop tube length. | |

Day 131:
7 hours - put in propshaft holes, welded, measured
to DAY 130 |
Motorhome CB Installations That Work! |
to Days 132+ |