| Day 134 |
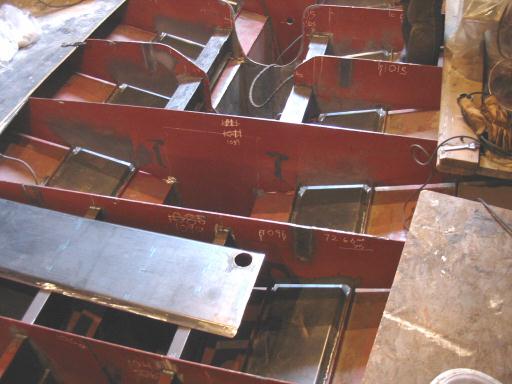 |
Putting in hull cooling units |
| Day 134 |
|
Putting in hull cooling units |
| The
sandblasting was a very messy job, and very dusty.
Because it was so difficult to see, we have decided to
use glass beads or slag next time! It was like we were at
the beach, sand in our hair, clothes, house, bathtub,
everywhere! It did get the job done wonderfully though! Something that would have been impossible with grinders.... |
 Holes cut for "in" and "out" from engine and take-up tank |
The holes for
the drains were the most difficult as they have to be
close to the hull, yet easy to weld around without
getting weld into the threads. It's a good thing Gena was reading through an artical in "Metal Boat Society" magazine ( recommended! ) that happened to mention drains in thru-hull cooling. We'd never have thought of it! Yay! The diagram shows how the
circulation will work. The holes at the ends are also the
high points ( except the fill tank ) and the pipe
connecting them must have bleeder valves to get trapped
air out apon filling. |
|
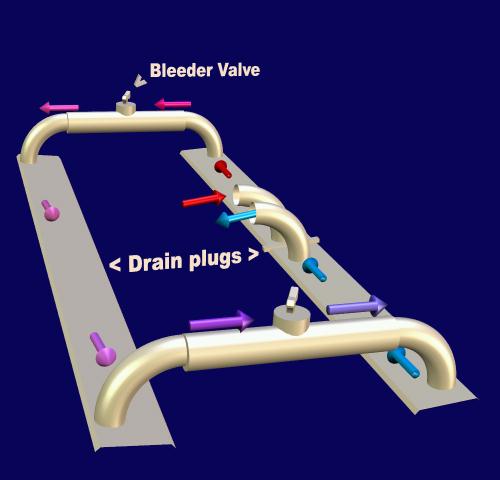 |
Wiggling
around the drain plugs was tricky as they were small and
the plug had to be removed as it was still in the way. I
held the flat of a pry-bar over it while she welded it.
Voila! Instant sunburn ( again! ) I'm not sure if I had flash that night or sand in my eyes, or both... To the left is a little ( cool 3d! ) diagram of the circulation. The take-up or expansion tank will go on the hot side, and a bypass valve. We plan on having a water coil for hot water in that little tank also. I hope that works ok, although, we probably won't need hot water where we'll be going haha! |
|
| The day left us well sanded, exhausted, but satisfied that this stage is done...well, mostly. | ||
Day 134:
11 hours:
Sandblasted along the hull where cooling tank will be. Put in
drains, welded in 32 feet of tank.
To DAY 133 |
Don't
loose hope.. Radio Repair by mail! ( Canada only ) |
To DAY 135+ |