| Day 218 |
 |
Hatch hinges,
track |
| Day 218 |
|
Hatch hinges,
track |
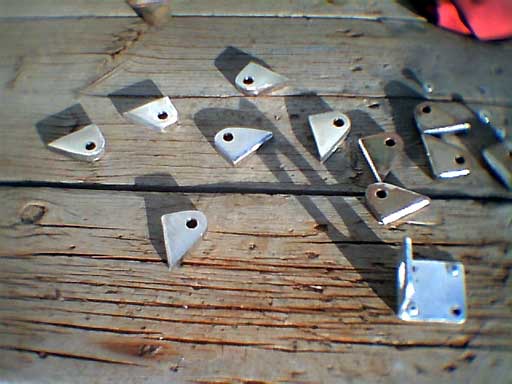
| I cut out a whole lot of little hinges last weekend and took them into work to smooth them up nicely. They aren't a chrome finish but will be able to be polished easy enough once welded in place. Did 14 of them. Don't they look cool? | |
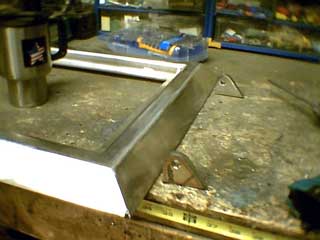 How they will sit. The roll off stops snagging of lines. |
The photo to
the left shows the general idea of how they will sit on
the deck. Off of the hatch will come another slightly
more extended shape to meet the mounted hinge. I haven't decided what to do for that part yet but the present choices are: 1/2" coming out on each outside end, joined together with a solid SS rod full length. Two 1/4" tongues coming out with only a short section of rod as the pivot. |
 |
|
  |
In any case, these must be
extremely strong. We have read about hatches being torn
off but a big wave breaking over the decks. We don't want
that to happen. We bought some hinges that are commonly used for level hatches for storage compartments and the like, thinking they would be good enough. Suddenly, apon testing them out, we realised they wouldn't meet up at the 45º angle at all. And it turned out they were plated brass not SS! So those will be used perhaps down below for door hinges or something. They didn't seem very strong anyway with their 3/16" bolts and 1/4" pivots. This will take more time but we are assured of the strength, and the larger hatches will have 3 instead of 2 hinges. The latch assemblies are still a subject of debate. There are several ways to latch a hatch down. These are called dogs. A "T" handle, a snap down, a bevelled tip screw style, or a combination of these. We have purchased adjustable slides that will hold the hatch open and the attachments still need to be welded on for these. We'll have to decide soon though, before the interior goes in hehe. The crucial fit will come when we put in a "pseudo" gasket and test for depth. They must close tight enough to be a seal, but not too tight as to over compress and flatten the gasket material.
|
|
| We have found
some white gum rubber that looks real promising. It comes
in big sheets and can be cut out to fit nicely into the
hatches. I would prefer to cut out the whole ring and
keep it as one peice with no joins, but depending on the
price of the stuff we may have to forego that. Gena lined up and drilled all the holes for the genoa tracks, 40+ per side. SS nuts were welded on underneath to accept 1/4" oval head SS bolts. ( Sorry forgot to take pics! ) The tracks of course came right back off and the holes were taped over and sure enough it rained shortly thereafter. |
||
Day 218:
7.0 hours - Mounted some of the hatch hinges, mounted genoa
tracks.
to DAY 217 |
 |
to DAY 219 |