| Day 228 |
 |
Wiring mains /
drainpipe |
| The wiring below the W.L. is next. This is the mains from where the battery box is ( The house batteries ) going out to the 2 fuse panels and the windlass. | |
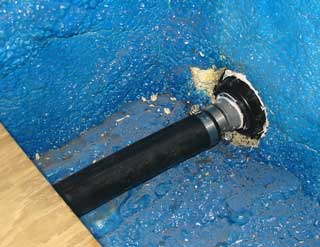
 Drain pipe fitting in bulkhead |
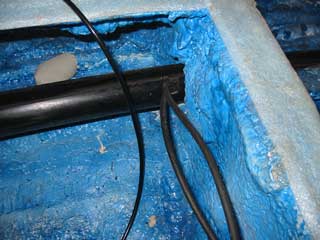
We made a "cable
tray" out of PVC pipe by slotting the top for
access. Where the pipe goes through the bulkhead is a
fitting which will be appropriately "stuffed"
with a calking material. Also, the drain pipe was run through from the bow's chainlocker to the aft sump. We tapped valves off along the way to allow water trapped in one area to flow aft. Normally these valves will be left closed, but are in easy access points. |
This pipe of
course is not related to the sink drains / or holding
tank, although the forward sump will be pumped out
through the same standpipe as the holding tank.
It is very important to know
your speed while in the cockpit, trimming sails and
riding waves to achieve maximum velocity. Plus it's fun
to know too! This speed indicator differs from GPS in
that it shows the speed the water is racing past the
hull. GPS shows your true velocity over the bottom which,
while good for viewing the effect of a current or
calculating ETA etc, is not going to tell you your hull
speed through the water, which is more fun....unless
you're moving with the current ha ha! |
||||||
  |
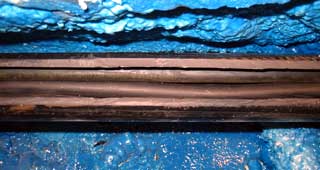
These images show the tray
with wire inside. The guages are pretty big, but are
required for reliable long-term operation. The forward
panel is max breakered at 75 amps. The cable is 4 guage
to there. The cable to the windlass is 2/0 guage welding
cable, so is the cable to the main breaker panel under
the dash. We went with 2 breaker panels because of the amount of wire it would take to run forward for what will essentially be the communication centre. One of our ham radios can easily draw 30 amps while transmitting. Plus there will be various test equipment at this location that will require intermittant high amperage. All forward lighting will be on this panel as well as the fans. |
 |
||||
| The cable tray
is getting pretty full already and we still need to
consider masthead lighting wire and at least one coax
cable coming down from the mast. The tray is mainly to
protect the cable from heavy objects flying around in the
storage areas below the floor, but also to provide some
sealability through the bulheads. You may have noticed the foam strips
on top of the webframes. This is for several reasons: We've seen all kinds of weird stuff happen in things that move, or don't, as our house must have the creakiest floor in the neighborhood! Not this time. |
||||||
Day 228:
7 hours - inserted cable tray for wire and chainlocker
drainpipe/valves etc.