| Day 254 |
 |
Rudder continued |
| Day 254 |
|
Rudder continued |
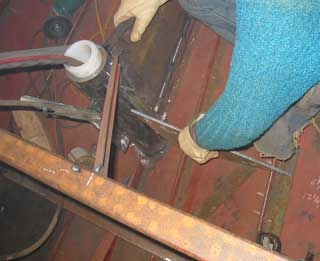
| We have noticed
a little tiny problem with the flanges. They are true
enough, and all the bolts holes line up with the
partners, but the opening between the 3 holes on one side
and the 3 holes on the other don't line up! In other
words, we can't lay the frame on to the flange ( as shown
in above photo ) on either the top or bottom! It seems like last week everything else went wrong too. This is just a residual from then. Must have been the weather! |
|
| So now only the 3/8"
plate will grace the connection for the first couple of
inches. ( Enough to allow room to get the bolts in ) The lower flange will be welded to
the frame as, in my opinion, it needs to be stronger.
Luckily the bolts on top are spaced enough to allow the
bolts to fit even with the plate between them. Gena wants
to get the holes redrilled but that would set the pattern
off. The shop that welded them on is closed for the
holiday weekend so we're hooped if we don't do it this
way. |
 |
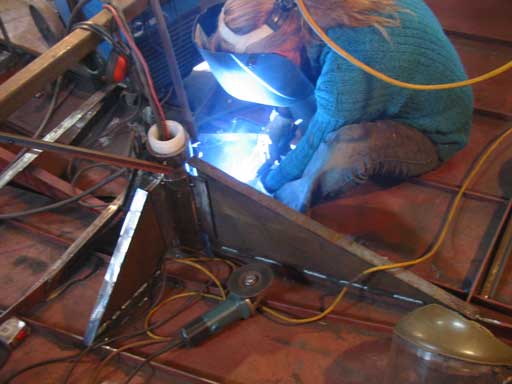
| Inside the boat, Gena has been setting up and welding the gussets that will support the rudder tube. She's doing a great job! | |
| Every once in a while she
would come down with a new pattern for me to cut out. I
had to go inside and check it out! The gussets need to be very strong, but once everything is aligned with the "real" bushings in place, several precautions must be made. 1) The heat from welding up the gussets cannot reach the "plastic" bearings or they will deform. 2) The gussets can not shrink during welding and pull the tube over one way or another. 3) They must be strong! The answer is to weld tabs on to the tube first, over lay the gussets ( which still have some bending play ) so the welds only shrink plate to plate and weld the tube in proper to the hull before the bearings go in. The bearing in the right photo is temporary, but could be used as our friend is using them on his boat. |
  |
|
| Alignment is crucial with Tordon bearings, and we don't want to mess it up hehe! | ||
 |
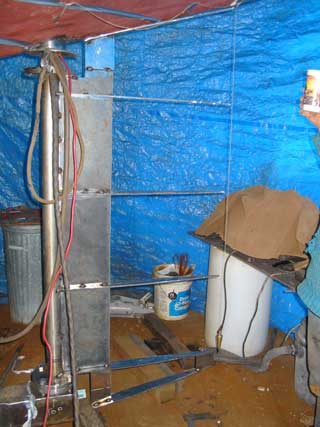
To the left is the whole
thing almost done. The hydraulic cylinder will be mounted
on it's own pedestal to the aft. We're still unsure if
the two should be connected. If they're not, the flexing
may damage the hull over time. If they are, the full
force will be on the tube structure. ( You have to think
in terms of cardboard or tin. What would it do? ) I was sort of against the idea of running the gussets straight out because where the hull is flat there is less strength, particularly when there is minimal framing height. This would be a real problem if this were a skeg type rudder. I would insist the gussets go all the way out to the radius curves on each side. Anyway, I'm sure all will be ok. |
|
| The rudder frames turned
and moved out of alignment as the tacks were put in. The
welds to the shaft must be staggered for some reason,
probably to curb the bending of the shaft. I got a really close fit of the plate to shaft, perhaps 1/32" maximum. While Gena welded I gave instructions on where to weld next ( much like we did the heel ) and we had to wait for the welds to cool to see what the frames would do next. All of them are aligned perfectly, except the one that connects to the flange, which we'll need to beat into position. Final welding on the shaft needs to be done after the shaft is removed ( easier to weld ) and layed down. I hope no more distortion happens! I am considering putting in some lateral flatbars to maybe stop this from happening, but I don't know if that even would stop it. I guess we'll see! The bottom and top frames are fairly flexible and will remain that way so the plate ( 12 guage < 1/8" ) can move them into fairness with the rest. The top frame does in fact have about 1/4" clearance ( scarey ) as instructed in the plans. Now for the plate!! |
 The rudder: Note the frames plumbed inline |
|
| Blog: We hope the opening in between the flange and the step on the second frame down won't be a problem with painting and/or corrosion. We could use fill to close up the hard edges there but again, how far should one go? It will look a bit strange though! It's already day 255, so I better get out there!! The boatcam will be on! ( July 3rd 2005 ) |
Day 254:
9 hours - Framed rudder and rudder tube supports.
 Todays cam-movie ( If ya missed it! ) |