| Day 283 |
 |
Finished entry way doors |
| Day 283 |
 |
Finished entry way doors |
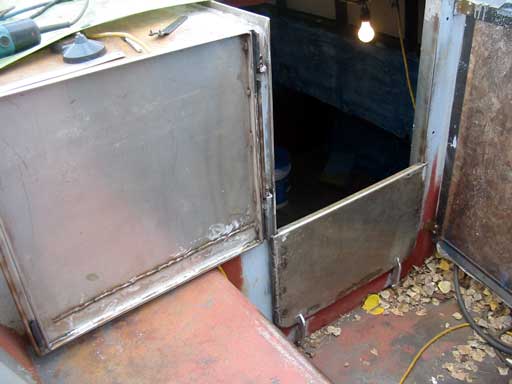
| The top door as well as the bottom bowed out in the center from welding. At first I was worried about this but it actually looks better than flat, and it's stronger. Once polished up it will look awsome! | ||
| I can still work the wood
into the inside of them by planing off the edges of the boards.
It's a bit of a shame the boards must be held in with screws through the plate. I may have a few ideas on that as well. Studs welded on and their nuts countersunk into the boards would be one solution. Glue will be used so perhaps attaching them from the sides would suffice. After all they are just for decoration really. The top hatch was by far the most complex of any hatch on the boat so far. Made up of 4 pieces of 3/4" angle, 3 bent plate ends, flatbar to get the 45º curve forward, and finally a filler for the over lapping angled plate. Even sounds complicated huh? |
 |
|
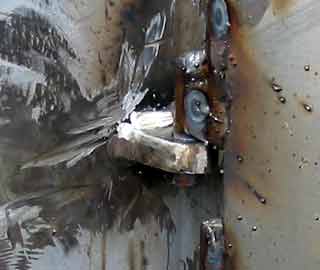
| Suddenly a huge problem came
up. The hinges for the top door weren't close enough to the edge! (Photo
below) When the top door was opened it would hit the seat back on that side! The hinges needed to be moved over about an inch. It was a bit messy as they had to be cut right off, but with a little smoothing with the grinder all will be good again. As shown in the top photo on this page, there is ample room now for the top door to swing open.
|
||
 |
 |
 |
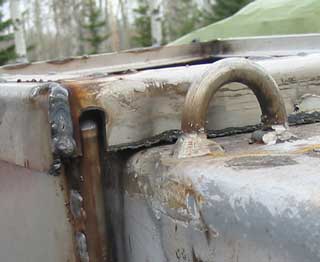
In the photo above, one can
see the over lap the top hatch provides. A gasket in this overlap will
provide a good weather seal. I'm still debating whether or not to add a
chunk of split pipe to cover that slot. It would look better and provide a
bit more protection for the gasket. In any case, I can't wait to finish it and then polish it up! Even at my age I still suffer the innate desire to make everything shiny! I still need to make the hinges for this hatch before any polishing is to be done. ( See? I have learned from my mistakes with ALL the other hatches! ) |
| Last but not least, the whole companionway must be lock-able for security reasons. I invented new and wonderful ( and dangerous! ) methods of using the flatbar bender to make this shape. Welded to the side of the hatch it presents a formidable barrier for a would-be thief. A good padlock inserted between the two U's makes it impossible to open anything. | |
 |
The top door's pins are
welded in a way that the door would need to be lifted at least 1" once the
cotter pins were removed. The bottom door must slide to the port side to be
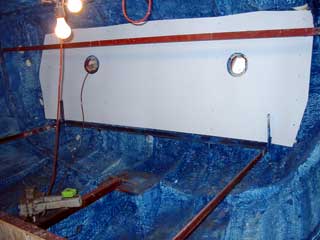
removed, ths must be completely open. Down below, Gena was beginning the interior paneling aft. A bit of a trick was getting the 10 foot panel cut to fit along the frames. The panel won't go right out to the corners as the aft chain plates are in the way, and need to be accessed for inspection from time to time. These corners will be enclosed by cupboards anyway. |
 |
The whole area is so huge!
There will be lots of storage space for clothes, blankets, and other light
materials.( Weight above the water line should be kept to a minimum.) Next the facing panel for the aft berth. Gena did a good job of fitting without using a pattern. These things come easier after having done it a few time. She just took some measurements along the rail and faired the curve in with a pen. I would like a couple of small drawers in this face on each side for items such as socks and underwear etc. There really won't be anywhere else for drawers aft the way we have it planned out. |
|
I plan to draw up a diagram of the way everything will be laid out in this area, and it will of course be posted as soon as I do! Priority for now is to get all the paneling installed. It will be cut outside this time to avoid the terrible white dust getting everywhere. |
|
Day 283:
8 hours :
Moved hinges, made top hatch frame and top door, etc etc etc, put in first panel
aft and berth face board.
|
|