| Day 287 |
 |
Stanchion mounts,
panel |
| Day 287 |
|
Stanchion mounts,
panel |
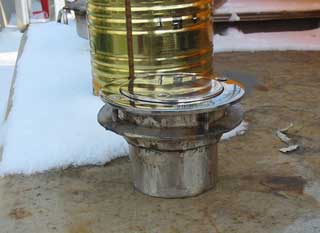
| Today was an opportunity to rebuild the heater vent as not much snow has fallen. This time everything went as planned with unmatched precision as far as my talents allowed.( ..and a bit of luck! ) | ||
| As mentioned
previously, the lower part of the vent must fit tightly inside of the
stove pipe being 3" minus the thickness if the pipe itself. I first bent
some 2" into a 2 3/4" ( 3" - 1/4" total flat bar thickness ) using the
benders' 2 1/2" roller shimmed with some fiberglass panel scrap. This
was done twice to get the two halves of the pipe.
|
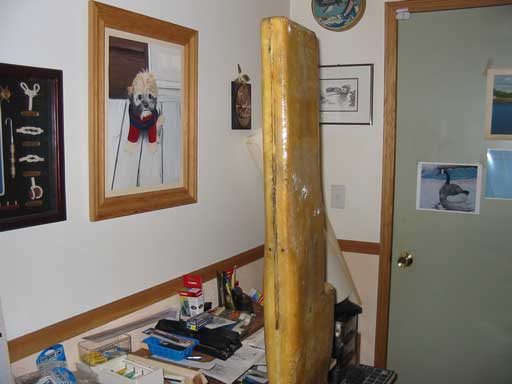 |
The photo to the left shows
the new coating and glass closing the gap along the one edge. It will be smoothed and then gel-coated white and blue as before. Before we actually found one of these, we always thought they were fairly light but with the thickness for strength, it's actually a fairly heavy thing. An eye to attach a rope will need to be added as pulling it out of the water will be quite a chore. |
| The rest of the day for Gena was spent putting in the last panel in the head. |
| Then she put in the tub again to
check for the floor height versus headroom for showering. Luckily we're
pretty short! A person of 6 feet would be rubbing their head while showering
but for us 5'8" people, there's not a problem. Becouse of the minimal clearance beneath the tub, a bit of searching had to be done to find a low profile angle connector for the drain. The drain that came with the tub (pulled from a new RV that was in an accident) has a nut and some extra thread to attach a fitting to. Problem was we couldn't find anything that seemed to fit it at all. After some time we noticed the threads weren't deep enough as if they were crimped instead of machined. The solution was to sand down the plastic angle fittings threads to allow for the shallow threads. It took several tries as we want to eliminate the nut and snug the angle connector right into the bottom of the tub. That's how tight everything is. |
 |
| A maximum height here must be maintained as there isn't a lot of fall from here to the sewage tank. According to standard practice there must be 4" in 12 feet. The distance is almost 12' so the drop must be 4". This all relies on the fact that the boat should sit level in the water haha! | |
 Foam cut out for window nuts and coated.  |
That's the trick I guess! On that
note, the drains should be as close to the center as possible. On a heal to
port, the water may be able to run from the sink to the joining T near where
the tub drain comes in, thus, running back out into the tub. On a power boat
this isn't a problem but on a sailing vessel it's a definite concern. One could refrain from using the sink during this tack but a more logical solution is to use a valve on the tub drain instead of a drain plug. We just have to get in the habit of re-closing it after having a shower or bath! My final project for this day was to get some wire overhead in the pilothouse and "blue stuff" the dash area. The job turned into a devil when I realized that before any panel can go on to the ceiling, the foam around the hatches must be cut away and coated as well. Somehow, when Gena sprayed on the blue stuff before, we forgot to mask the SS hatch frames. Blue stuff was all over it. It took a good 2 hours to buff, grind, scrape and dissolve the stuff off. Warning about this stuff: If you don't want a lot of hard and frustrating work, mask whatever you don't want this stuff to be on! It is absolutely the worst thing I have ever had to remove. A wire wheel only melted it in worse, a grinder wheel just bogged up as did sand paper, a scraper only took off the thick stuff. I ended up removing the rest with mineral spirits and a lot of paper towels. It takes forever to dissolve to a point that it's not sticky any more. |
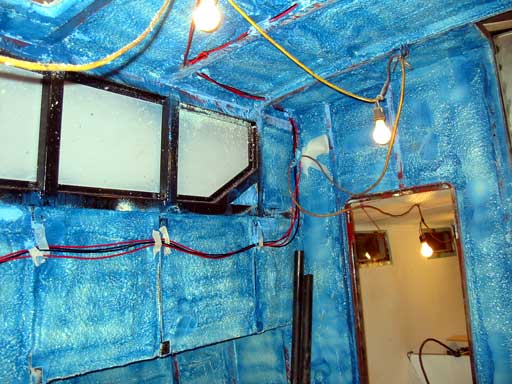
| The good thing about
Blue Stuff is that it is a really good seal and obviously bonds extremely
well to anything! Even stainless mill scale can't repel it. It's close
adhesion properties might possibly even make a good glue. It is easy to
remove within the first few minutes of application as it dissolves in water
before setting. In the photo below, the wiring is in for the over head lighting and exhaust fans. It had to be run around the windows as no allowances were made for this. In hindsight it could have gone through one of the 2x2 support tubes but would have needed to be opened sufficiently for this, then coated inside. Too much work to do at this stage in the game. Any other wiring will come out from under the dash ( just forward of the photo ) and go under the floor or along under the deck aft. There is a hole cut for this already. |
|
Day 287:
9 hours - Final blue stuff coating and finishing touches, last panel aft,
Auto-helm rudder, and built heater vent.
To DAY 286 |
Advertise on sail1
page... Great marine related exposure!
Email for more info! |
To DAY 288+ |
|
|