| Day 298 |
 |
Headliner,
Bathroom cupboard |
| Day 298 |
|
Headliner,
Bathroom cupboard |
| Ooops! I said "bathroom" instead of "head", although mentioned in the same line as "headliner" may cause some confusion ( and giggles! ) so the bathroom is actually still the head and the headliner isn't in the bathroom, it's in the pilot house, and has nothing to do with the head. Confused? Good! | ||
| The above photo shows what we
have come to know as a headliner being made. Originally it was going to
be deeper, but with the lowering of head room and the problem with
getting the wiring down from switches and controls etc, it just wasn't
worth the hassle. It is now only a couple of inches down, with a slot for panel to go forward. It had to be bent and pushed into place, with slots routed out for a partial overlap on to the hatch frames. The reason for this was because the cabin top frame is there. Next boat we'll leave a bit of space between the "T" frames and the hatch frames! Some screws were countersunk past the slot for the panel and screwed up tight into place. The 2" wide ends have been left off until the panel is in place. The ends must be removable so the framing around the side windows can be removed to allow mounting of those windows. Sometimes I wonder if the whole idea of not welding in nuts for the pilot house windows was a good idea. The amount of planning and time making the pilothouse window framing removable has been expensive. I helped Gena for the rest of the day. The photo to the right shows the frame that will hold the 2 door entry into the bathroom.( head ) |
 |
 |
That area has been pretty
tricky because the angle of the entry in relation to the space for the
door(s) to swing. On door would have worked, but would be tight to get
by once open if it swung outward towards the berth, as it would be tight
to get it closed if it swung inward. In fact One would almost need to
stand in the bath tub to close the door. A folding door won't work because it needs a 90º space to fold open. The same problems arise. A curtain style door isn't strong and would move around too much. No door is plain no good! The solution is 2 doors that lock together with the frame. One swings in, and one swings out. I know I could fit by with only the one that swings in! hehe. The latching is going to be interesting, stay tuned on that one! |
| The space in the aft seems to be dwindling away. If Gena would just stop building all of these cabinets and things, there'd be more room! But they are nice looking cabinets hey? |
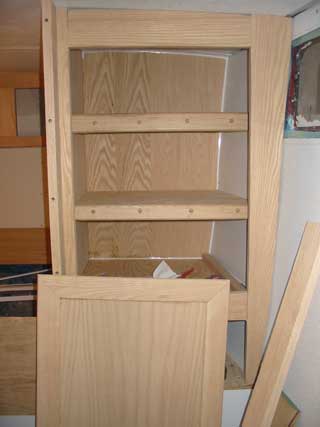 Door fits! Ready to hang.. |
My door fit perfectly ( well after
I shaved another half inch off in the inset.) and is ready to mount. We
didn't carefully monitor the height and clearance over the toilet but
luckily there's enough! This cabinet will likely be holding towels and face cloths, bathroom stuff. Notice the lip Gena put on the face of the shelves. That's to stop everything from sliding off and doing a "jack in the box" surprise feature when someone unsuspectingly opens the door. The screws are hidden with risen oak plugs. Adds a nice touch we think. The attachments to the hell panel and ceiling have been siliconed to stop movement and hidden mildew etc. |
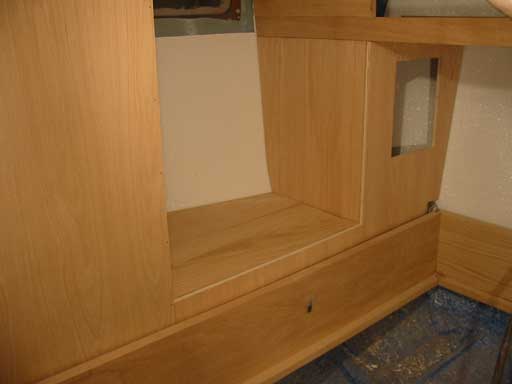 |
At the ends of the berth is a small access to the space below. between the two cupboards. The hinges will be placed along the crack. Small 1x1 frames offer support below. It's beginning to look a lot like the animation on day 292! Yay! |
| The exposed ends of ply are veneered over. Everything looks great, we can't wait to get some urethane coated on. |  |
Day 298:
5 hours - Worked around dash, headliner, cupboards aft
To DAY 297 |
Rent
marine advertising here... Email for more info! |
To DAY 299+ |
|
|
||