| Day 292 |
 |
Hatch frames, aft
cupboards |
| Day 292 |
|
Hatch frames, aft
cupboards |
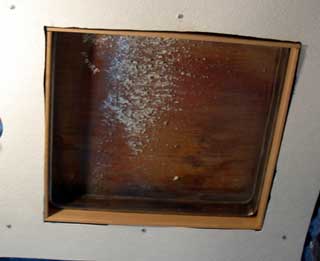
| Once the hatch frames had a couple of coats of urethane ( minwax with stain ) and had dryed, they were "pressed" into place. The bordering panel was covered with silicone to secure floppiness as before. The photo above shows a hook in a screw hole with a can of PL200 as a weight to hold the panel down. | ||
| It seems hap-hazard but
turned out to be very strong indeed after the silicone was dry. More coats of plain urethane will be put on later. In a boat, the more coats the better. After the PL400 dried I couldn't budge the frames, not one bit. I hung from one literally! I was so happy I decided to stay out late and make 2 more for the pilothouse hatches. These are slightly bigger and one was pretty tight as down below. After a couple of days I went out after work to put those two in and realised I had put one of the frames together upside down. This wouldn't have been a problem if all sides were equal but they aren't. I had to pull the frame apart and that wood glue is a real bugger! It ended up ok again, but this may be a message to not work until late at night. Mistakes can be made. I felt pretty silly. Gena (photo right) set to work on the aft cupboard face. She divided it into 4 doors as envisioned in the animation below. |
 |
|
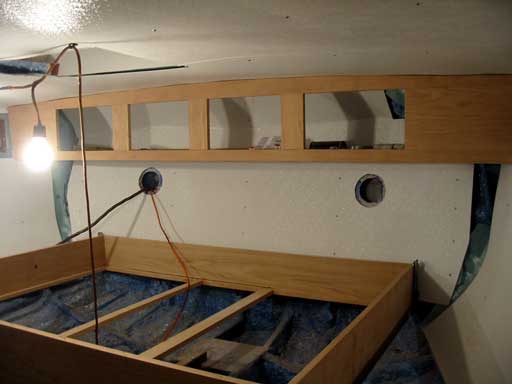
| The boards separating each
door were daydoo'd underneath to give the top and bottom a constant run.
The inside can be seen in the photo below left. That kind of work always
impresses me! The sunken in edge is cut out with a chisel. Gena has
patience with that. I would use the router he he.
|
||
 |
|
||
 |
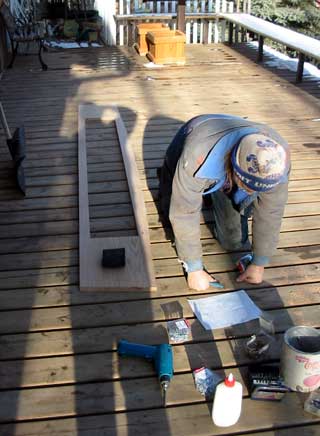
In the photo (left) my cool miter saw can be seen. I have the old box miter I used for making frames for my paintings, but that was slow and frustrating. This one is fast and accurate, has a brake to stop burring, and cost under $100. Of all the tools we have this is one I wish I could keep on the boat. It's just great! | ||
|
|
In
this animation ( excuse the cartoonishness of it lol) the way the berth
flips up is shown. Even with this, I forgot that the door in the little
cupboard sticking out would be hit by the berth once up ha ha! So much for
CADing. The little
spindle rails I think are a cool touch to break up some of the large flat
areas that will be the cupboards. The small center cupboard may or may not
exist. We still haven't decided. The cupboard on the right in the latter clip will actually be accessed from the head. |
||
|
The photo below shows the face in place. All 100%
7/8" oak. We love wood....inside the boat! We may but some of those fancy oak designs, not sure what they're called, to put on the ends but a well place picture will look just as cool. |
|||
 |
|||
Day 292:
10 hours : Mounted oak hatch frames, made two more. Made aft cupboard face.
Attached berth hinges.
To DAY 291 |
Vertex Commercial VHF, LOW $$ |
To Day 293 |
|
|