| Day 308 |
 |
Drawers hydraulics |
| Day 308 |
|
Drawers hydraulics |
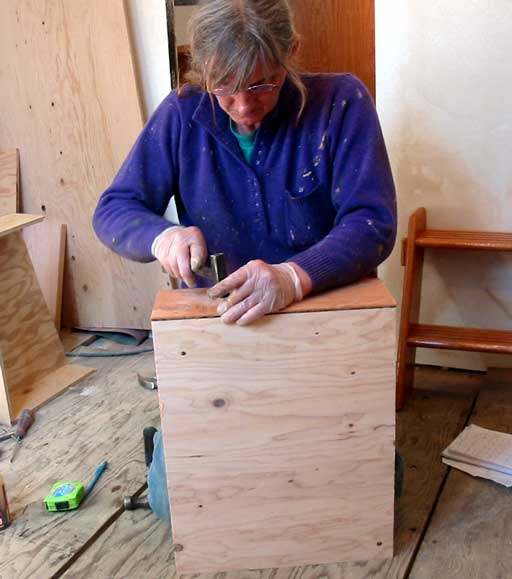
| The photo above shows Gena putting together some drawer boxes. She had me route in 3 sides of the fronts and backs so the sides and bottom could seat inset and make them sturdy. | |
|
|
The real reason I took this photo
was a little story she told me a while back. The odd looking hammer she is
using, square head, long claw, came with parts for 1000 fish crates she was
to assemble as a summer job for a $50 paycheck!
She told me how hard it was on the fingers
tapping in all those little nails day after day, and how she had to split up
her paycheck with her 2 brothers for their minimal assistance lasting only a
couple of days of the summer-long project. Anyway, when I saw Gena putting all of these boxes together I thought, "Now there's a really experienced box builder!" and knowing this story felt confident they would be strong and true. ;o) |
|
|
My parents, stepsister and family,
and some friends are coming out to check on our progress later today, so the
rush is on to finish some things up. All of the doors were put on and
stained, the boat cleaned up and sharp edges sanded smooth, even the hatch
frame aft was completed. That is until, oops! One of the sides split as I
was hammering the last nail in, and there's no more left to cut another
piece! The vertical edges are at a 70º angle to the ceiling and using a large baseboard seemed a simple solution. Because I was in a rush to get it done, I neglected to cut the board at the angle of the ceiling on the one side thinking the frame edge would just push into the ceiling as it was tacked on. |
| I never thought of the pressure of hammering a nail in over the small opening left by the square edge. The frame split right down the middle. The rest of the frame is glued to the wood, then siliconed to the ceiling panel for strength. The top edges of the base board are siliconed as well as this area will get the occasional splash of water I'm sure. | |
 |
|
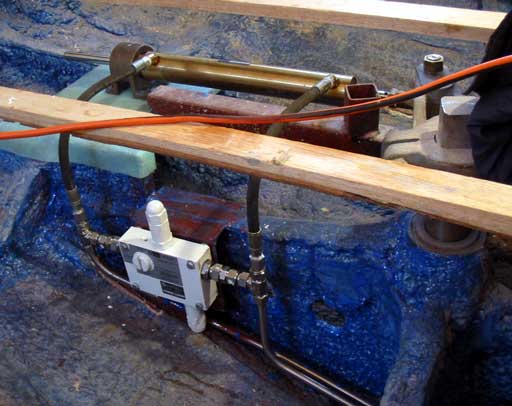
| Aside
from making drawer boxes, Gena also connected some of the hydraulic system
aft. To clean the lines, she went one better than simply blowing out the
system with compressed air. She made wads of gauze, soaked them with oil,
and shot them through into a bucket I held at the other end. They picked up
small bits of stainless that had fallen in from the cutting of pipe etc.
After 3 wads each, the pipes are clean as a whistle! A mount had to be made for the white thing, then carefully welded on so as to not catch anything on fire. The fittings are all SS Swagelock type. Cool stuff as the nuts are to be turned on just tight enough to snug against a gauge (included) and no more. Pretty high quality for the the high $$ and guaranteed to last 1000 years, or until something leaks hehe! |
|
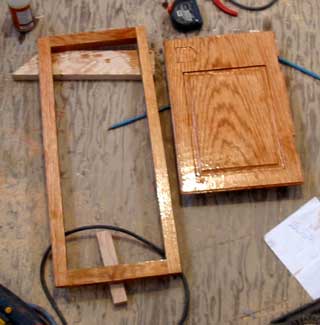 Frame for small flip up & small vanity door |
We're pretty confident the lines
are clear aft, and Gena put on the "T's" then a little baggie over to keep
them that way. I decided to move on to the little door over the sink/vanity which is small enough to make solid. (Photo left) The frame is for a little cupboard to go into the nook between the 2 bigger cupboards each side of the berth aft. |
 Desk Fixed! |
After the small hatch disaster
aft, I thought everything would be fine for showing the boat. I was wrong! While showing the forward cabin to my stepsister, I noticed the finish on my desk had started lifting off and had a huge bulge right in the middle!! I was embarassed to say the least! Gena's desk top (which I constructed and finished) is fine, yet Sandy's desk is coming apart at the seams, literally! After everyone left, I peeled the damn thing off and it looks like the "contact" cement didn't contact much at all. In spite of all my weight and pushing out bubbles to make sure it was flat, the stuff never actually stuck. I opened the can of new contact cement and it was partially gelled already. Threw that away, $35 out the window. Perhaps it wasn't my fault after all, the stuff was old stock or something. |
| Anyway,
I ended up using PL-400 and a v-notch trowel as if I were putting in
flooring. It seems to have worked fine! So well in fact that we may use it
in the galley.
While on the subject of contact cement, it
seems Gena had trouble with the stuff she bought for the tub enclosure. It
also seemed past expiry as it went on so thick and lumpy. She ended up using
some PL-400 as well that day. |
|
Day 308:
7 hours total - Aft hatch frame, re-surfaced desk, connected hydraulics aft,
made small cupboard face frame and small solid oak door, made 7 drawer boxes.
to DAY 307 |
NEW! The Big Sailboat Project Forum Come sign the guest book! leave comments, links, more! |
to Days 309+ |
|

