| Day 313 |
 |
Port side floor |
| Day 313 |
|
Port side floor |
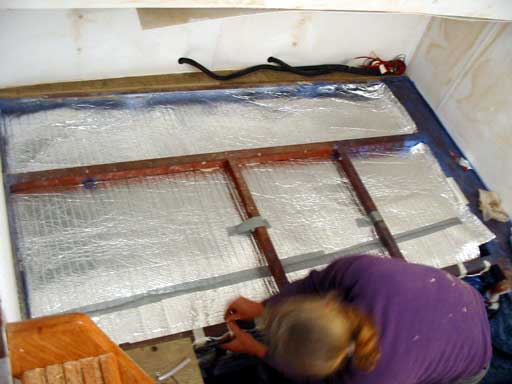
| Under the floor in the pilot
house resides, among other things, the engine. Diesel engines can be
noisy even with the best muffler in place. ( Which we plan to go all out
on ) Some insulation must be placed to dampen the sound and control the heat in the area. To be honest neither of us has much experience when it come to soundproofing. I know that placing materials of different densities one over the other is better than just one material. Something to do with acoustics, frequency damping, and sound pressure. |
||||||
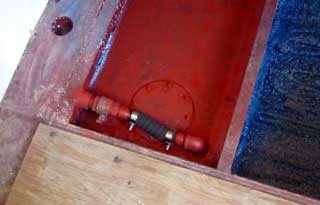
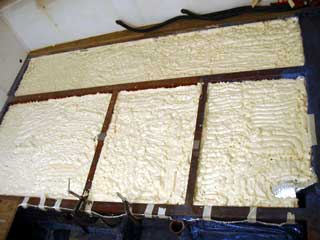 Foam rising. 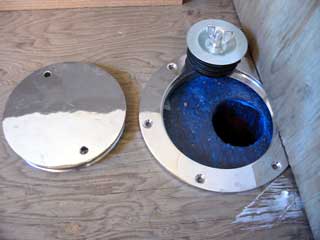 Access hatch to port side standpipe. 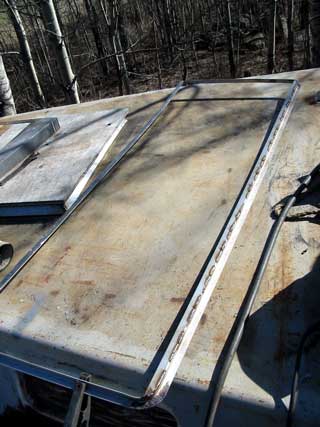 It's not warped, it's the cabin-top curve........ honest! But it warped after this shot. |
An added problem with this
soundproof barrier is that it must be highly resistant to heat. The space age looking sheet in the top photo is what we decided to use for the heat barrier. At first it was to be aluminum sheet ( as we have a lot of it laying around ) but that would have nasty acoustic reflection, like an echo chamber, and wouldn't do much in the way of absorption. This stuff is good for wrapping around furnaces and ducting so it should be ok with indirect engine heat. We glued it in with PL300. The next layer is spray in double ( not triple ) yield foam. The foam isn't allowed to rise as high as the floor so as to give a layer of air as the third layer. This should stop any low frequency stuff by allowing the foam to vibrate without affecting the flooring. The engine being really quite isn't a real concern, ( we're really accustomed to the giant engines in trucks anyway! ) but keeping it to a dull roar would be nice. A steel hull may be different in resonance than a FG hull or wood, so if you're really on the peace and quiet at full throttle quest, then I recommend study on acoustics as it's no simple subject from what I've seen. The edges of the foam and framing were coated with "blue stuff" then once cured, Gena screwed down the floor. The photo left is of an access to the standpipe. The thing on the edge is a compression plug. As the wing nut is tightened, compression pushes the rubber outward making a good seal. This plug in the pipe will stop the ocean from squirting in when the water is rough. The unit in the photo cost about $10 at the hardware store . The other one we bought earlier on line cost over $70 and is of no noticeably better quality. They saw us coming!
|
|||||
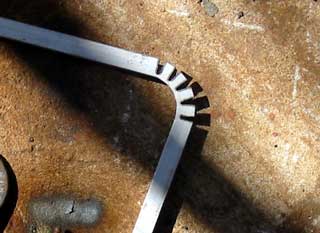
| Welding a long thin flat-bar along 6 feet of 3/4" angle is just asking for warping! I knew it would and tried all of the tricks in the book to stop it from happening. I started by pre-curving the angle the opposite way. Then I welded in slow steps 1" at a time. It seemed to work until I did the final bridges between the welds. It curled up like an orange peel left in the sun! I knew it would, but it made me sad anyway. | ||||||
| The trick will be to carefully straighten
it back out without damaging the stainless too much. I left it for a day
with more patience. The little pic to
the right is the starboard side fuel tank fill hose finally in place.
The fuel runs in from the elusive 2x2! |
 |
| After the floor was in place I went under there to see how quiet it is. It's deadened pretty good! | |
Day 313:
8 hours - Made frame for big entrance to forward cabin, insulated and sealed
floor
to DAY 312 |
Big Sailboat Project Message Board! (Come say hi!) |
to DAY 314 |
|
|||