| Day 314 |
 |
Dry Locker/ Floor
revision |
| Day 314 |
|
Dry Locker/ Floor
revision |
| Since we first designed the pilot house floor layout, an obvious function, was to have access hatches to the engine. Because Gena knows about working on engines more than I do, she has the rights on how large the hatches should be. At first I thought they were a silly size, way too big, but now I see they will allow easy access and a bit of room to move around while changing oil filters, inspecting connections, or doing a major job like replacing the water pump. | ||||
 Rudder tube.  |
The hatches will swing up,
hinged to a center bar. To allow the engine to be lifted out for
whatever reason, even the bar must be removable. For some reason, the
small section of floor under the entry ladder wasn't taken into
consideration so some "updating" was in order.
Once the situation was remedied, 2 vent holes were cut out over the sump. These are in case we ever get swamped. The water will run through these ( Gena found nice stainless steel covers for them ) down into the sump rather than slosh around the floor. It's a weak effort but better to know where the water will go than not! |
|||
| If there is a problem with any of the pilot house windows, i.e. one goes missing, sealing doors can be closed on either side of the pilot house. One of which I completed today. | ||||
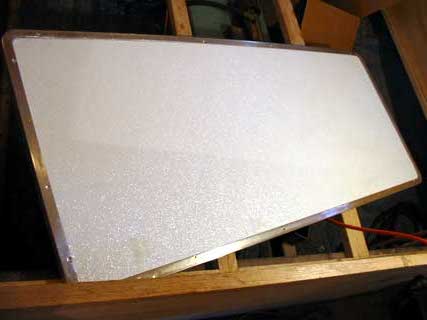
| Insetting the white panel over ply before
inserting it is a good way to do the door but the PL300 sealant that
squirted out was hard to get off of the the white! This is the exposed
side while the door is open. The side that will take all of the rubs in
a narrow gangway. It has some weight to it so it will need to be sturdily pinned open. The photo shows it sitting on the aft berth. |
 |
||
 Dry locker, cool design...or hot! |
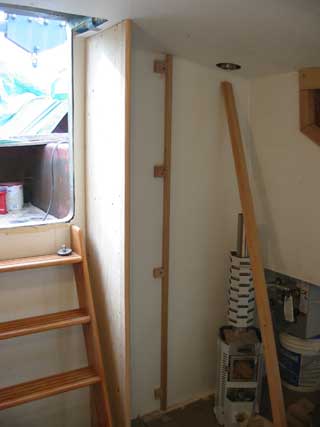
Scotty, a friend of ours who
is in the process of rebuilding a similar boat to ours, asked if we were
going to have a dry locker. We didn't even know what that was at the
time, but now it's a necessity! A dry locker is somewhere to place your wet oilies ( or clothes ) when re-entering the boat during heavy/rainy weather. Normally, there is a heat source nearby, or a chimney stack going through it from a heater. This allows the clothes to dry out rather than sitting around in the boat getting everything else wet, hence, a dry locker. Because our heater is diesel, the flue needs to be almost vertical. It can be seen in the photo in rough position. Our option is to put the dry locker right next to the heater with a vent at the bottom and top to allow for circulation. If it is found a small fan is required then so be it. |
||
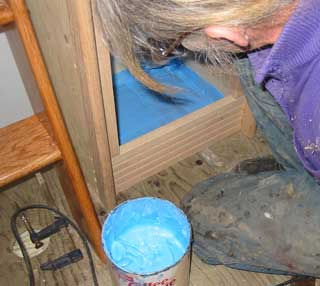
 The photo to the right shows Gena coating the bottom with blue stuff. This is a place for water to drip off of wet garments into. A drain may be added as the sump is directly below here. Ready for finishing! |
|
Day 314:
10 hours - Made new floor frame, finished aft door, built dry locker and heater
area
to DAY 313 |
 Trance, Techno, Triphop |
to DAY 315 |
|
|