| Day 339 |
 |
Waterline/ tracks |
| Day 339 |
|
Waterline/ tracks |
| I had but one desire this weekend above all else. That was to get the water line painted. The weather has been just great this summer, but the nip of fall is ever present and the leaves are beginning to change. Once they start falling and the "fluff" starts to fall, painting will be impossible. | |
| Getting the waterline height
was simply a matter of measuring from the pavement then averaging
oddities in the line while applying the masking tape.
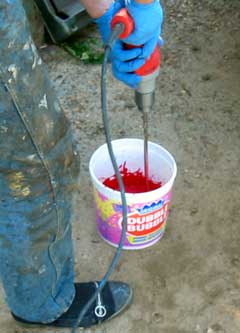
A quick "eyeball" down the line while on the ladder confirms a good straight line. The question of whether or not to include a "bootstrap" in the line was answered once viewed from a distance. This design doesn't seem to require it. Some boats do as the shape of the hull causes an optical illusion that the bow and/or stern is falling down or curving up the way I understand it. It also adds to the overall look of the boat. I did slightly curve up the top line near the bow though. It just looks right that way. As I did the masking, Gena occasionally asked me to sharpen a bit or two for her continuation of drilling the tracks. Seems I have a knack for it! She had drilled 1/4" holes for alignment between the two pieces and now must expand every second hole to 3/8" as well as countersink the other holes to 1/2" step. We both know the countersinking chews up bits one after another ( yes, and at $20 per bit! ) but we discovered today that increasing the angle of the cutting edge with a grinder makes them last much longer. Cool! |
 Drilling with water cooling  Gena tries at sharpening a bit. |
| I couldn't help but notice the aft tape looks so weird. It's because of the radius being too large to smoothly some into the hull. | |
  |
It's more our fault than the whole radius
design idea. The bottom line is of course the same hieght but the top
being measured equally shows sudden increases in angle. Ideally this
line should have a smooth transition albeit not a linear one. From any other angle it looks good believe it or not. We have seen this before but failed to recognize why. Now you know and may take steps to prevent it :) At first I wanted a 5" line but Gena wanted
larger. I compromised by making another small line above the WL by
dividing a 7 1/2" line into 2. I tried It in photoshop and looked good.
|
||||
 First coat made us a little nervous! |
|||||
 "Big Red One" 110 lbs of red hot holding power lol |
Keeping the paint between the tape
lines was a bit difficult. Especially on the curved parts near the beam. I
ended up using the large roller instead of any of the myriad of smaller
rollers we had bought. The coverage was just better. As with the hull
coating, a single coat 2 pass was applied. The first pass showed a lot of
blue through. At this point we thought we were going to be doing it again
tomorrow, but after some flash time the second coat went on solidly. Unfortunately there was quite a bit left over from the last quart Gena mixed and it seemed a shame to waste it, so we decided to paint the big Bruce anchor red! I don't know if this was good or bad, but it'll be easy to see under water he he! The Shards always dive to check their anchor has set properly. Ours will just be easier to find! |
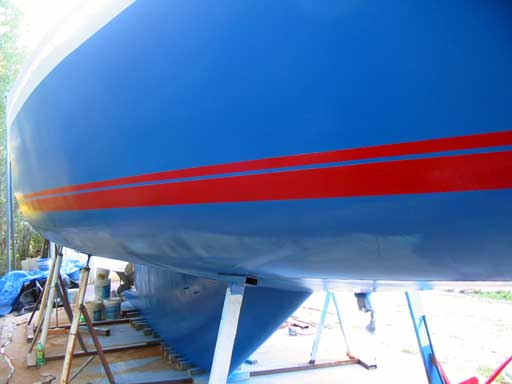 Nice and straight! Should match the water. |
|
 |
|
Day 339:
9.5 hours - Painted on waterline, polished and drilled tracks.
To DAY 338 |
Follow Paul and Sheryl Shard on a
cruising adventure |
To DAY 340+ |