| Day 353 |
 |
Seating in dining area |
| Day 353 |
|
Seating in dining area |
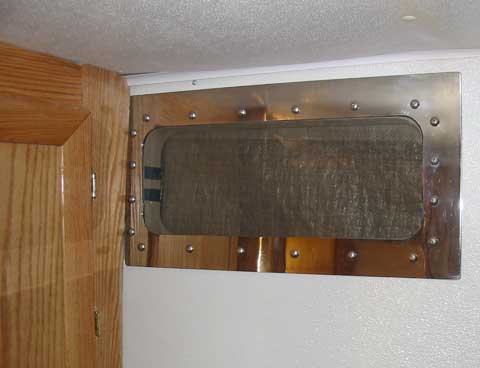
| The last of the portlight
frames are underway, and Gena has started on the galley seating. Arranging seating, especially as a first time experience, requires a lot of thought. At first we were going to use the seats off of purchased recliners as they aren't too expensive, about $250 each, and are made of leather. This plan quickly fell apart as we realized the angles involved would require a lot of filling and modification. A boat is definitely not like an RV, where everything is square! Another thing to contend with is the shape of the hull, but more on that shortly. |
|
 Portlight "glass" in place |
Now that the aft port light glass had been
drilled, and the frames templated from these, they were bolted in to
wait for the frames. The aft area sure warmed up nicely and was
noticeable right away as the cold air blowing in was stopped! Because of the angle to the lockers forward, the bolts were rather tricky to line up and had to be screwed in using our handy screwdriver bit "socket wrench".
|
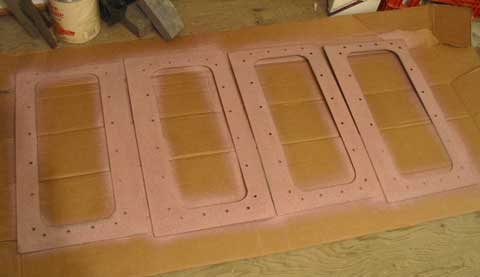
These are the
trickiest of the lot, and drilling the holes to 3/8" instead of 5/16"
will help.
|
||||||
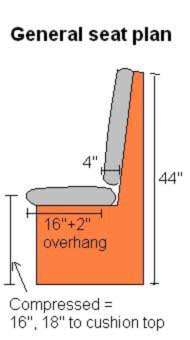
| Seat height is the first thing
that must be decided. Average seat height is 16" to 18". A standard
medium weight foam, say 1.5 lbs to 2lbs per sq. ft. at 4" thick will
compress to 2" while sat on, leaving another 14" to the floor. This
means the "box" height must be about 14". The next consideration is the seat back slope angle. A recliner has a surprising lean back to head height of 8-10" when upright. This is far to large for seating and eating, but for lounging around it's comfortable. I had originally had plans to make the hull seat reclinable through a complicated gas shock/spring/pin/bike cable setup. Gena noted that it would be too much work, and she is right. A good compromise is to lean the hull seat back a couple of inches more, and that's it. |
||||||
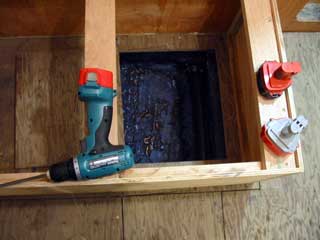 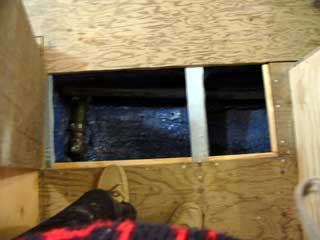 |
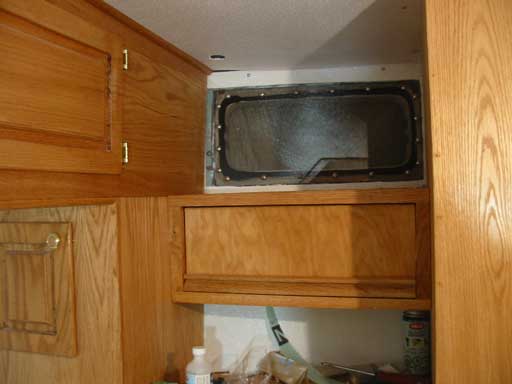
These images to the left show access that drops below the floor inside the seat, and an access hatch under the table. As can be seen in the large photo above, there is a trapezoidal shape to the whole area. The table must reflect this as well, but that'll be another day! |
|||||
| The floor hatches are an
evolving issue, and Gena seems to have things in hand. We must be
careful that the hatches don't get blocked by the table, seat edges,
ladder. Tricky to say the least! All of the hatches should be removable,
we do agree on that.
We have seen some shoddy hatch arrangements, and if it is for frequent access can be a real problem over time. One thing that is true: If a hatch is difficult and inconvenient to remove, it won't be used for anything other than deep storage! We want to keep heavy things in there, such as canned goods, drink bottles, tools. And want to be able to access them easily. |
||||||
Day 353:
7 hours - setup base frames for dining area seating, finished drilling,
painting, mounting portlight frames, mounted 2, 4 to go
to DAY 352 |
 Vertex VX4200 500 channel VHF Only $639 CAD! |
to DAY 354 |