| Day 354 |
 |
Forward berth /
dining area |
| Day 354 |
|
Forward berth /
dining area |
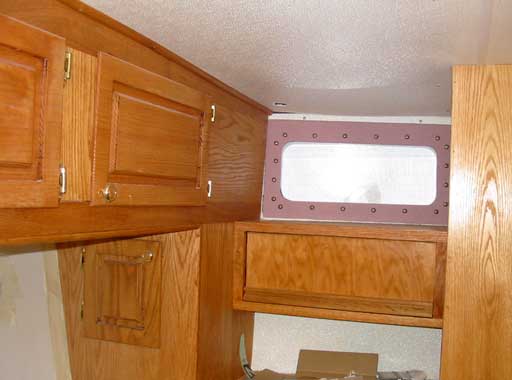
| The time has come for me to start on the forward berth. It has became my project I guess because it is across from my desk, it's my "area" on the boat. The berth will likely be used on crossings though as we change watch as it's going fore to aft, a better way to sleep while heeling. ( We would think ) First the bottom, or kick plate what have you, will be done in the same FG panel as all of the interior. It could have been wood, but we still have a fair amount of this and it's just going to go to waste. Besides it will offset the wood to be installed above it. | ||
 |
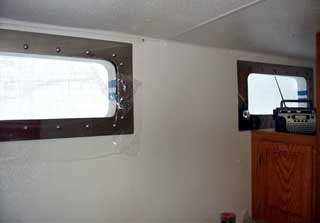
Now that all of the
portlights are in, I am free to take on whatever I want, which truly
feels like a load has been lifted. The frames in between the aft lockers
were tough to get in as predicted, and are slightly crooked because of
the angle the hull is coming in at.
|
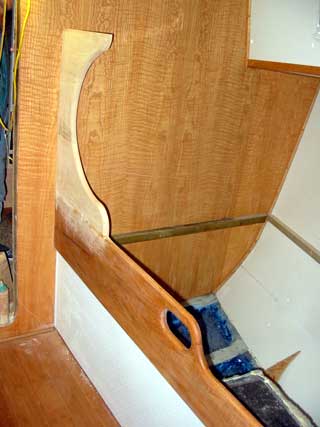
| The far one in the nook ( right photo above) wasn't as bad as I thought it would be. Just got a kink in the neck is all! | |
 |
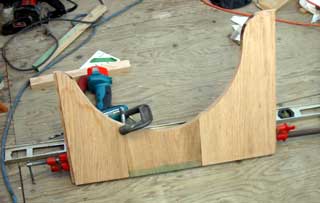
Back to the forward berth. A
number of considerations fell into place while I designed this beast of
timber to encase the berth.
I have only those criteria and really no idea of
what else. Somewhere hooks for a securing net must be mounted but that
can be added later. Smooth rounded shapes come to mind so that's the
route I will follow. After some creative jigsawing (using a breakfast
bowl and a ruler ) I came up with a suitable shape. Routing the edges
round improves the "look" drastically. |
||
 |
|||
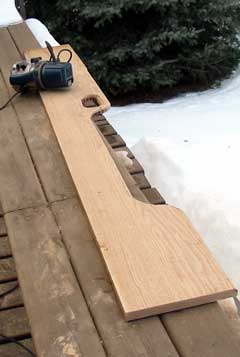
It's important to use a belt sander ( or hand sand ) to make all of the curves even and the flat areas flat before routing the soft edges, or it comes out all lumpy looking!
| Once the first coat of stain is
on, it becomes a thing of beauty. Later that night I added the top section
and sanded all that nice finish off (sniff!)
This is probably not how a pro would do it. He
(she) would wait and stain the whole thing at once, but I need to see as
soon as I finish sanding. It just keeps my going late into the night that
look! Gena laid the floor inside the seating area. This is the same bamboo we used up front what seems like ages ago now. Tongue and groove always produces fine results. After some gluing and screwing it's in place. Now comes the difficult task of deciding where
to cut the floor hatches, which way they will open, and working that
all into the galley area. |
 |
 |
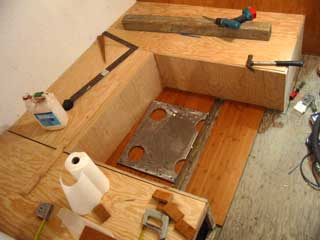 The tops of the seats must flip open so there will be more cuts here once we have decided on how they and the cushions will interact. The plate holding down the floor while the glue sets is the 80 lb mast support plate. Good for a weight right now so we won't put it in just yet ha ha! |
Day 354:
13 hours + - Framed in forward berth, dining area/flooring/seats, last 4
portlight frames
To DAY 353 |
For Sale: Radio
Repair/Sales/Installation Business in Booming Alberta
Call Sandy's CB (780) 986-7433 or go to businesssellcanada.com |
To DAY 355+ |