| Day 355 |
 |
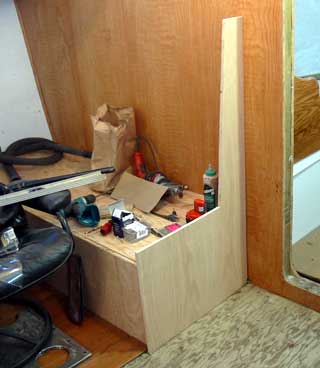
Berth Locker Seat
sides, Galley |
| Putting
wood together in a boat interior continues to big a tricky affair, although
today everything went smoothly. What is to come may be another story. Most
of the forward berth area I am working on is either curved, angled, or
twisted. |
||||||
| I think the trick is
to try not to be too accurate with irrelevant areas such as behind lockers,
or under things that won't be visible anyway. Wedging behind a frame that
runs along the ever changing hull shape, for example, is a lot easier that
trying to plane the twist into a straight length of wood that will become
curved when screwed into place. Planing for us isn't possible at the moment
as we are waiting for a new belt for our planer! Besides, the frame is only
connected at the hull frames so one doesn't gain much by flattening the
frame against the hull.
In most cases, the frame is to support plywood for a locker/cupboard bottom or desktop or shelf, so that edge ( being smaller ) can come in at any angle as long as it doesn't leave a gaping hole. As the photo above shows, a little more advance
planning would have been an asset and would have prevented the complex join
below the clamps. It's just hard when one isn't really sure how things are
going to be until reaching a certain point of the project. |
 Seat side plywood
|
|||||
|
||||||
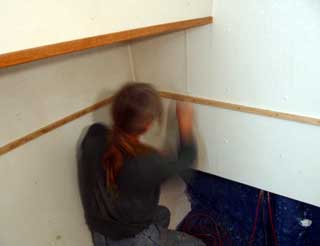
| Gena placed in the outer framing for the galley countertops, then marked out where all of the hatches are going to be. The opening direction is important as is what one can access under there. It's decisions full of compromise between convenience, looks, accessibility, and each other. Like other areas of the boat, this layout has changed 5+ times because of problems with layout in respect to cupboard space, appliances, "reachabilty", and safety. We're hoping we now have a balance between the lot! |
 |
|||||
 2 of the 4 batteries hauled home (4 too heavy for car!) Inverter/charger is on right edge of photo. Good for battery monitor and shore power. They must go in soon as they are VERY in the way! |
As a side note, our glass-mat batteries arrived (
about $600 a piece! ) and they are big and very heavy - 160 lbs each. We
found that we can fit 4 of these into our battery box. This will give us
plenty of amp-hours to charge, and they will handle a pretty intense load
for a long time. About 400 amp/hours is plenty for our use as we would like
to try to avoid starting the engine to charge them. It's good to have more
capacity for lean charging days followed by lesser charging days. Our system
will charge from solar, wind, water, shore, and engine power. We were recommended by a good source to connect the water, wind, and solar all together at the battery. Because the wind generator, a Marine Air-X, has a regulator, it will need to be adjusted for maximum performance. It'll be a learning experience! |
|||||
To DAY 354 |
|
To DAY 356+ |