| Day 366 |
 |
Water system galley
edging |
| Day 366 |
|
Water system galley
edging |
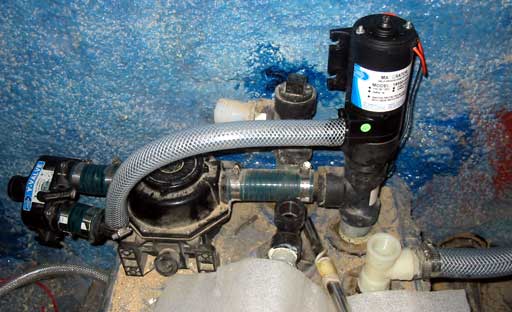
| Above the photo shows an update to the septic tank since day 318. Gena has been hard at work fitting everything together and with the amount of time she has spent on the water system as a whole, things are coming together nicely. The large black thing to the left is a 3 way valve that enables switching from the macerator pump ( thing with label ) to a manual pump, ( the big round thing ) that has a handle that can be pushed in much like a car jack. The "T" below the pump is connected to a pipe that goes to the bottom of the tank, less about 1" . The pumpout line behind it also goes to the bottom. | ||||||
 Galley pressure system fittings 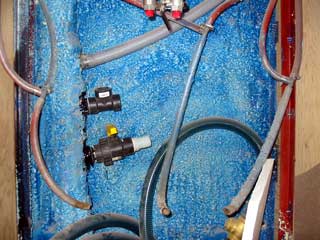 The cockpit drains/sump pumpout |
The white fitting has a hose
coming from the aft, the tub, sink, and head. A "T" fitting was used as
good practice, In the event of a clog, removing the plug may allow
better access bypassing the messy job of pulling off a stinky hose. I have memories of my father trying to clean out a pipe that went along the roof of the garage. It was a long, messy, and smelly job! The photo to the left shows the pressurized
lines, cold and hot going up to the galley sinks taps. The rather large
fitting is part of the manual hand pump. The line from it must go
directly to the tank and should be mostly gravity feed, or it would take
a lot of pumping to get the water to the tap.
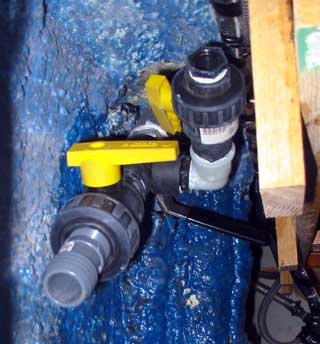
The giant standpipe from the cockpit to the hull finally has fittings on it. After applying some coal tar around the welded on fittings for extra rust protection, the plastic fitting were screwed in while things were still wet. The large bottom fitting is for the sump pump out, and the smaller fitting above it is for the starboard side drain. The little seat drain pipes will go to the top fitting barely visible. The bottom fitting has a valve that isn't really necessary, but because it leads down into the sump, Gena thought it a good idea to be able to close it off. A large volume of water flooded into the cockpit may flush water into the sump.
|
|||||
|
||||||
| The flash below has been a work in progress and my attempt to describe the whole water system in it's entirety. Each section is (will be) animated according to what function is being executed i.e. starting water maker procedure, pumpout, normal usage, "away" mode etc. It is also to help *me* understand the system because I'm still a bit fuzzy on the whole thing! Me and pipes don't mix for some reason. | ||||||
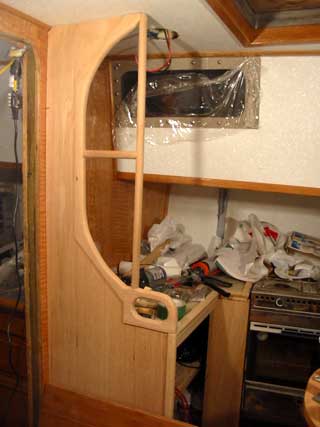
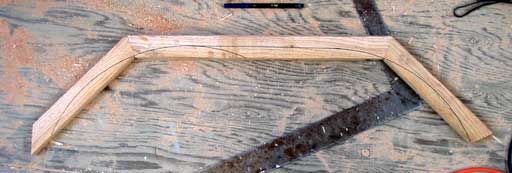 The sections glued and screwed together  Jig-sawed into a nice curve 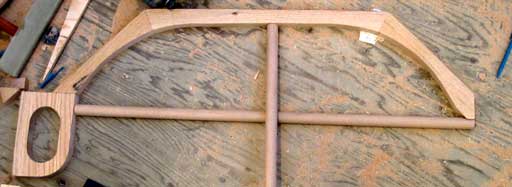
|
The hole over the handle could be smaller
because of the threaded end of the broom handle. The leftover length was
used to go across for support and perhaps a good dish towel holder.
|
|||
| Once in place, the whole thing doesn't look too bad ( much to my relief! ) and has set a "look" for the rest of the galley. Can't wait to give it a coat of stain! | ||||
Day 366:
10 hours - Added fittings to waste system, ran pipes to pressurized side under
pilot house, and mounted all valves going outside. Made aft galley counter
enclosure edge.
to DAY 365 |
 See the first water flow from the taps! |
to DAY 367 |
|