| Day 369 |
 |
Under deck galley
lockers |
| Day 369 |
|
Under deck galley
lockers |
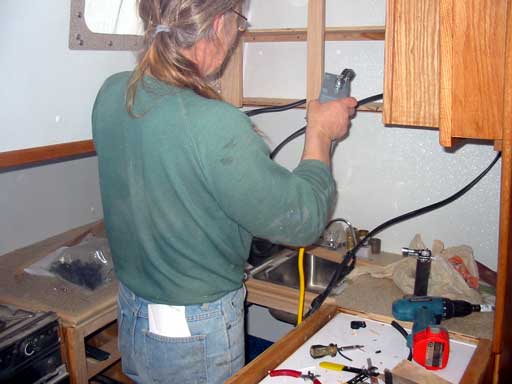
| After the big push to get the TV stand up, Gena can finally do some wiring from the shore power socket to a breaker panel, then to the charger unit under a galley seat. |
| The box is much like one found in
any home and, like a house box, is unfortunately made of thin metal and thin
paint. We tryed to find a plastic one but no luck. Maybe it's something in
the building code, we're not sure. Anyway, if it becomes a rust problem, we'll need to coat it better. For now we'll leave it as is, too many other things to do at the moment. The wiring has just begun, more on that tomorrow! Once again I have been stuck doing all this boring wood work while Gena does all the exciting wiring work...yaaa right!! If it were left to me, there would be wiring hanging from the ceiling in a tangled mass, much like my music studio and work bench at the shop. She's good at that organization , I'm good at this wood working...er...I think.... |

|
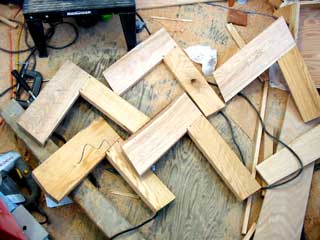
| That said, I have come to the
small cupboards underneath the deck along the galley countertop. I have been
looking forward to these as they will be "roll-up" using some of the tambour
we acquired on eBay a while back. First the frames need to be cut and
joined. The whole side could be one solid chunk of oak but there are always
weight considerations, particularly this high above the water line. The frames need to be fairly wide though as to accommodate the slider track in a curvy fashion, and to have some structural strength. |
 |
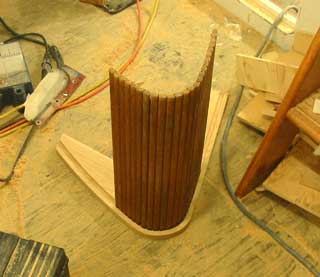
| Once the glue set, the outside
shape was cut to use as a guide for routing the tracks. The round top edge
cut away will be re-attached after the cut to butt the top facing into.
Seemed like the easiest way to do it. This was done early so the glue
dried to allow working of the sections. ( photo right ) Notice the top board overlaps the rounded board, being routed in, glued and nailed makes for a good strong join. ( I wish I could "dove tail"; haven't quite got to that level of expertise yet! ) |
 |
| Because the deck increases in
height as one moves forward, I decided to pre-construct the frames and
insert afterwards as a whole unit. The uneven height along the top will be
solved with a face board cut to fit. Some style of handles must be purchased
that won't stick out too much and will blend well into the scheme. |
 |
| ...testing testing 1, 2, 3.... |
| For the fist time I will be using
wood oil on these so the tracks aren't bunged up with varathane. After a
couple of coats of oil, some varathane will be added for gloss. On the oil
can instructions they say that coating with varathane after dry is ok. I
hope it is! The 2 open ends have been routed in to accept a 1/2" piece of plywood. The shape of these pieces will be strange no doubt. I templated the 2 known edges to ease fitting as they must be pretty tight. All ready to be smoothed off and framed together |
 |
 |
|
| Guides rounded and routed | End re-attached | ||
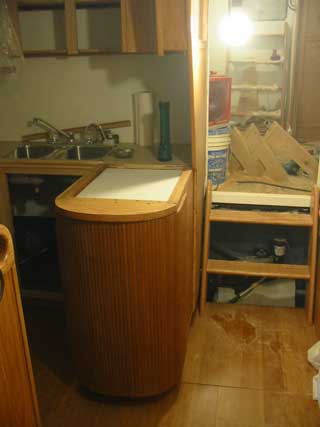 |
The small "choppings"
of tambour came from the 2 lengths required to face the island ( left ) and
worked out to be just enough. I seem to be lucky that way! The round end
when opened exposes yet another large drawer under the deep freeze. At the
moment it is in research stage and just flops out when opened. We would like to attach a solid frame but don't want to mess it up with what will undoubtedly be a jutting outward piano hinge. I have been considering a bar hinge on the top and bottom but not really sure that the end tambour strip wouldn't warp... |
||
Day 369:
6 hours - Wired in box for shore power and "hot" distribution, started
under deck galley tambour cupboards
to DAY 368 |
|
to DAY 370 |
|
|
