| Day 370 |
 |
More galley
lockers& wiring |
| Day 370 |
|
More galley
lockers& wiring |
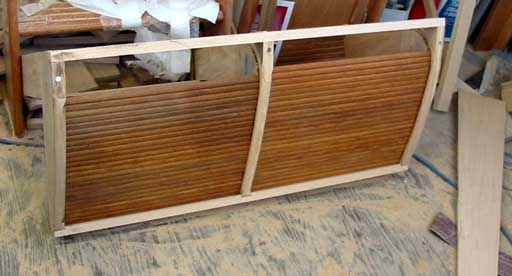
| A oui! Quel beau tambour! Once the frame was together I was surprised to see how well they slide up and down. This stuff is great! As it was purchased "used" I can only guess at how old this stuff is or where it came from. |
| For the tambour, a 1/4" x 1/2"
slot was cut and the frames spaced apart to allow 1/8" movement. This way
moisture expansion shouldn't be a problem. If there is a problem, the ends
of the tracks have been routed downward to facilitate removal of the
tambour. So far so good! The real trick will be fitting them in place. There will be another one of these only single to fit on the forward side of the stove (pieces 4 & 5) but I can't get any real measurements as Gena is working in that area. ( God forbid I upset her concentration with the wiring. She's been under there a while, better go check and see if she's ok he he. |
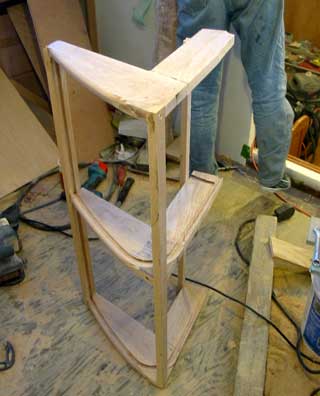 |
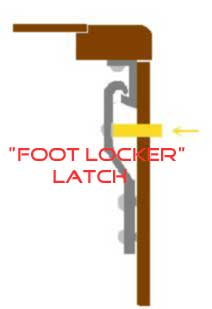
| The perfect time to work on the
foot locker in the forward berth. The framed top will flip up and house our
monster sewing machine. The small frame on the end will be attached for the
larger frame to hinge from. The reason this was done this way was because
the sewing machine just barely fits, even the lid swinging up would be in
the way! The little end section won't be attached until a cubby hhole is cut out in there to stuff sewing accessories.
|
 |
||
|
 |
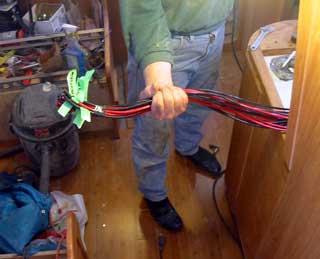
| As mentioned Gena was underneath
the floor somewhere pushing 8 gauge wire for power to the pumps etc from the
controls at the dashboard area, and other wire to the dash fuse panel from
the entertainment center( I've dubbed it that now! ) lighting, fans, freezer
etc. Every once in a while she'd call me to pull yet more wire through the
pipe hole in the floor poking up and moving back and forth like little
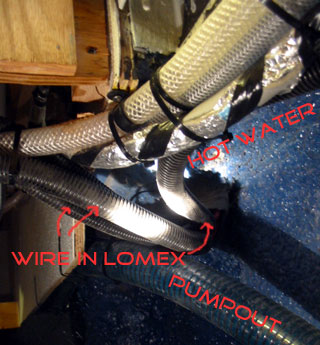
snakes coming out of their nest, each with a name tied around it's neck. All of the wire is being encased in 6's or 8's in lomex for protection from rubbing. The below image shows some of this below the pilothouse floor. This is just the tip of the wiring iceberg, the best is yet to come. |
 |
 |
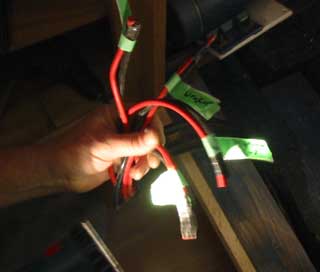 Wires are temporarily labeled with masking tape |
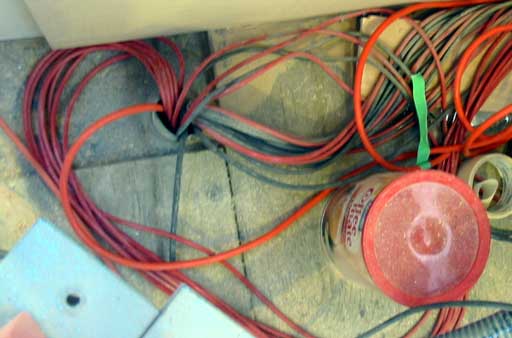 An ever-thickening clump of wire grows in the pilothouse dashboard area! |
|
Day 370:
8 hours - Completed first under deck locker for galley, framed footlocker top,
wired for pumps and freezer, over
to DAY 369 |
|
to DAY 371 |
|
|