| Day 388 |
 |
Main Sail / island
cupboard/ floor latches |
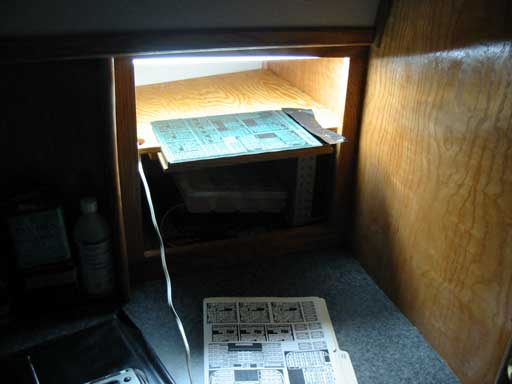
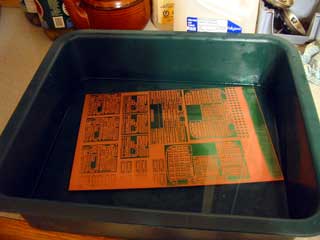
| Above the photo shows the first "onboard" PC board being exposed of what is certain to be many in the future. Made on day 386 the exposure worked out well, although I may need to cut back the exposure time next round, it developed so fast I could barely get it out and washed off in time! | |||||
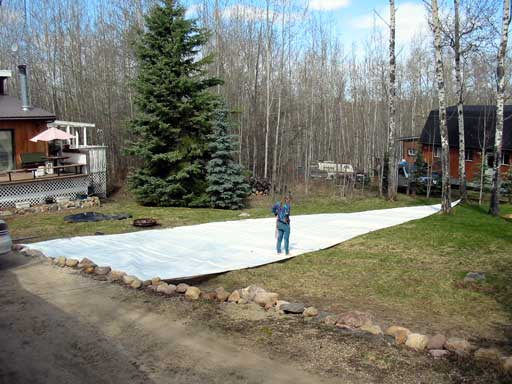
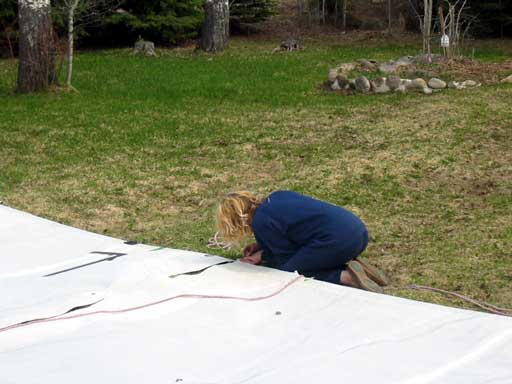
 Some of the boards are for something I am designing for someone at work. I hope to continue custom design while abroad. Keeps one sharp :) First thing this morning the grass was dry and no wind was blowing so we decided to unroll the giant ( 75' luff ) mainsail we purchased some time ago on Ebay. The thing weighs over 120 lbs and is very awkward, even with two people. We have found that carrying such a heavy sail, or one our size wet, is so much easier with a short pole running down the center. We may keep a short pole onboard just for this! The time has come to cut the sail. I haven't had much time to read the "Sail makers' Apprentice" book but figure a rough cut would be best in line with the nearest reef point eyes. We have no idea if this sail will work well less 20 feet of the foot side, but if it does we'll have a great sail! The gauge is the thickest either of us has ever seen, and will hold up well I'm sure. The remaining material will be kept aboard for making wind scoops or a small jib. The sail is now much more manageable which is another reason why we built a 45 footer instead of a 75 footer. The sail came with "bat-slide" mounts but they don't match the ones we purchased from Harken so they'll probably need to come off. Too bad. They'll be on Ebay soon enough.
|
   |
||||
| Below, Gena is trying
to sort out a good method of sheets for the mains' boom to the traveler. We
have all of these blocks and sheaves and must figure out a way to utilize
them. Because the traveler for the main is on the end of the boom, a 2:1
purchase is all that will be necessary. We bought a 600' spool of Samson
5/8" polyester rope for all of the sheets which cost $600CAD.
Rope is expensive! The big RG8 Coaxial Cable on a roll that big is only $400 by comparison, but would be a bugger to pull through a winch lol.
|
|||||
| As mentioned before,
we have no idea how well all of this is going to work as we can't afford the
fancy systems in the "high end" part of the catalogue. If it doesn't work
out, we'll just change it. Part of sailings' great unknown factor.
|
|||||
| Gena kept busy in the boat with the floor hatches. All of the hatches in the galley and dining areas need to have their latches installed. Because each one needs to be flush, they were routed in 1/8". | |||||
|
I helped because of my experience with the
router, and just because errors are very costly in this case. After Gena
remembered the nuances of routing, she took over. The top photo to the right shows a different type of latch. These are probably for sliding door locks. They require quite an inset and are a bit stiff, but with some grease in the slide and perseverance with the router, they look very nice in place. The latches aren't something that can be planned easily without knowing the location of the hatches/everything else in advance. Gena has done a very good job of making it all make sense, using the forward bulkhead, under frames, even installed cross pieces for latching points. There's no point in explaining this any further as every boat is different, as is every sailors idea of "great access below". As long as it looks pleasing to the eye and isn't unsafe in a knockdown or broach scenario, I'm ok with however it is.
|
|
||||
| My "job du jour" was to get that pesky island door built! For ages I have wanted to make the tambour follow a rigid semi circle and swing out with little shelves inside like a fridge door. The only problem with this has been what kind of hinges to use. Every time we're in a hardware or building supply store it's "gotta go look at hinges" for the last month. | |
| I really really really
don't want them to show or stick out at all, giving the door a smooth hidden
transition into the side of the island. I must have seen this before
somewhere because the idea seems very appealing.
Shown to the right, as being opened, it pushes outward (left) first. This is exactly what is required to get the adjoining side tambour slat away from the door slat. Because of the angle of the door at the hinge length, the whole thing needed to be routed in 20º off of flat -hard to see in the photo. |

|
 |
|
| The frame, even though it looks complex, was the easy part. I just matched the bottom plate on the island by tracing, figured out the insertion point for the vertical support by lining it up on the hinges and measuring the distance to the "jamb", then inset that into all 3 pieces that will support the tambour. The photo to the right shows the final result. It's gluing so can't be mounted, but tomorrow I'll post some photos of in in place, at which time it will all make perfect sense! | |
Day 388:
8 hours~+++: Cut out floor hatches for latches. Made end cabinet for galley
island. Etc etc etc.
To DAY 387 |
We have rescued 2 lost baby squirrels, and made a video! See it here ( hi-speed connection recommended ) |
To DAY 389 |
|
|