| Day 395 |
 |
Pilothouse panel |
| Day 395 |
|
Pilothouse panel |
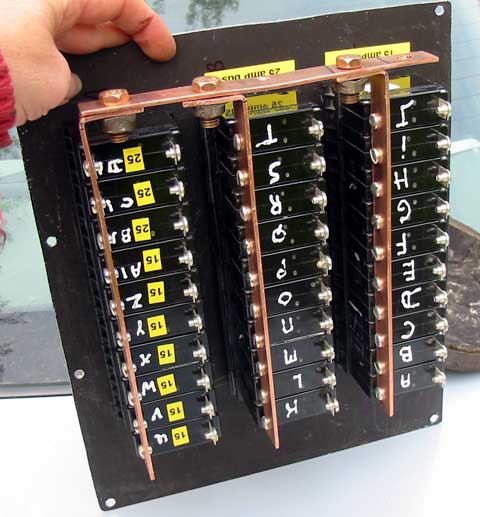
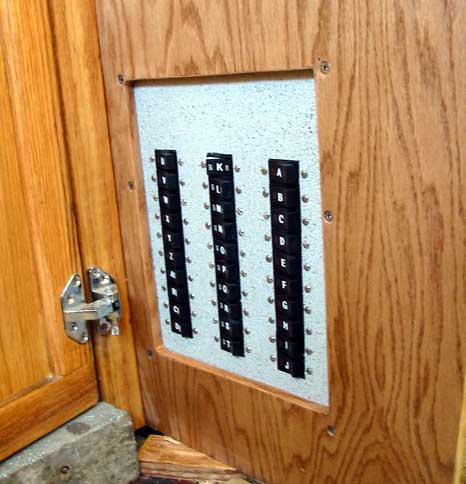
| The main breaker panel, well, the panel with the most breakers, is going to be situated in the side of the dash for easy access. Once again we are using the switch style breakers so circuits can be individually shut down in case of maintenance or a problem or just to save power. All of the instruments except the radar will be connected through one breaker. It is important that each instrument has its own fuse coming off of the breaker in the event of a short circuit. The wires to each component can thus be smaller gauge, saving space in an already cluttered wiring area. | ||
| There are probably too many
breakers, but you know how it is. A toy here, a new circuit there, it
all adds up and we don't want to be overloading breakers. I thought the amount of breakers Gena had allotted was a little much, but then I thought the amount of wall sockets she decided on in the house was ridiculous too. Turns out there are still not enough! It's just not something one gives a lot of thought to unless having gone through the sequence before. I trust this is the same thing. She is older and wiser ;) The photos show the panel front and back.
The breakers each have their own letter, then once the letters run out,
a number after it. This I don't agree with. I'd rather have a label of
what it is next to the breaker. It does look pretty though hey? A little list will be made up on the computer then taken in to get laminated along with the other to breaker panels. The card will be posted on the panel top for easy viewing. Gena made up a heavy gauge copper bus from, yes again, the scrap yard. We must invite the owner of the yard out to show him what we've been doing with all that scrap. He may never look at his scrap the same way again! |
 Back of breaker panel |
|||
 What a wiring nightmare! Gena says it will get much worse. |
||||
 |
|
|||
|
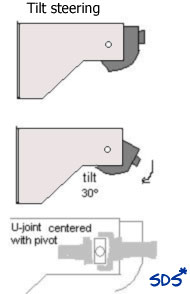
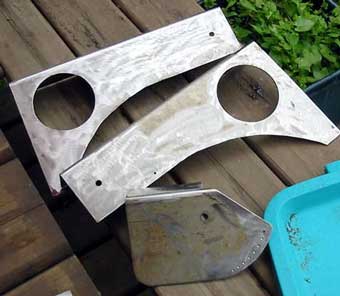
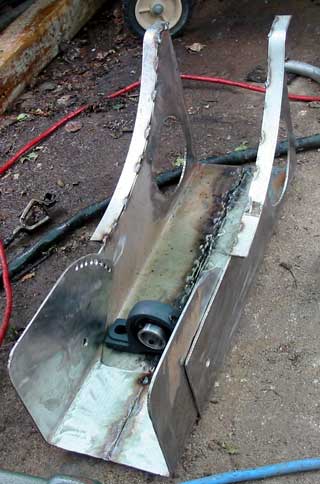
I just love building things! Especially when
it works. Hopefully this does as it is needed.
The problem is we want a very comfortable seat
to pilot on. Gena also wants to be able to stand while steering inside.
This means when seated, there is no way we'll be able to reach the
wheel. The early design was to mount the helm pump at an angle to
accommodate sitting. |
||||
  |
||||
Day 395:
10 hours - Installed breaker panel, started of the tilt steering unit.
To DAY 394 |
"Big Boatcam"
Click to go there! |
To DAY 396+ |
|||||||||||