| Day 409 |
 |
Nav Area, fuel
filter |
| Day 409 |
|
Nav Area, fuel
filter |
| Today I worked very hard, like a little elf in Santa's workshop, or a slave laborer, or both. The routed in 3/4" trim and side board was put together in the blink of an eye, all so I could get started on the fancy little navigation table support. | |
| Because it runs along the entry going aft,
it should have soft corners and be generally out of the way. It will
support a slide out table where charts can be plotted, and viewed. To
make it functional, a drawer will be added to store navigation rulers,
compasses etc. After using cardboard to test the size and shape/look, a frame was screwed together. Some thin 1/8" ( I say thin because it's imported, smaller rulers I guess...) is heated in the oven and quickly stressed over the frame and nailed on. I hate nails because they pull through, bend, can't be pulled out once in, and are just a pain. Screws are better, but leave ugly big holes, so nails I used. I discovered (again!) that bending with the polarization of the mahogany backings grain is important. Also it's splintery stuff. A good torture tool to say the least. |
 |
Before bolting it into place, I oiled the
whole thing. Inside the wiggly part would be pretty hard to completely
access. I drilled a hole in the bottom for a low level floor light.
These are used on ships so in total darkness, people aren't tripping
over things to find a light switch. For the tiny 2 or 3 mA it'll
draw, I think it's worth it. |
 |
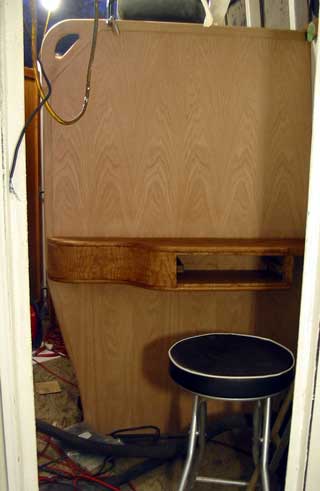 |
At the corner of the backboard for the
seat, I added a handle. It's good and strong so a handle is good there.
One can never have enough hand holds on a boat. The table support looks funny all be itself. Soon it will be surrounded by woody friends! A large cubby hole will be placed under it, and the engine vent along side connected by another top to support the slide-out table. |
| Gena installed the fancy
fuel filters by
Racor. These can accept 10 micron or less filters and have 2 stages. The
onboard valve allows switching between one, the other or both. The pressure
gauge shows negative draw as the pump is sucking the fuel through. The
copper lines going all over the place look confusing but are pretty basic.
The fuel can be switched in from one of 3 tanks ( as described on day 407 ) through the filter, then to a T that goes to the engine injector pump, and the electric solenoid valve to fill a gravity fed heater tank. |
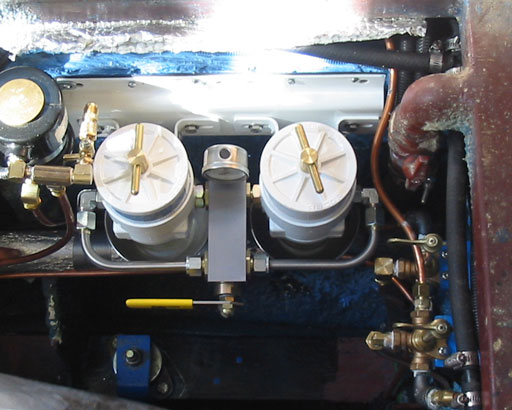 |
| In the photo, the black
round thing is the fuel pump. I haven't counted how many pumps we have so
far on board, but I bet it's more than 10. This one makes lots of humming
noises until the fuel starts going through it. Once the system is
pressurized, the pump, being a bellows style pump, will just stop. I don't
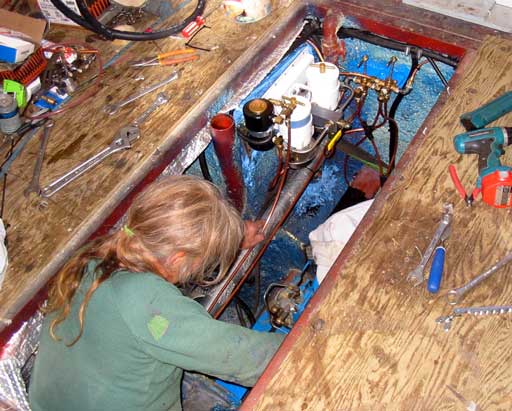
know if this is a good condition for it's little motor, but nothing smoked. Gena continued running lines towards the gravity feed tank and swore and cursed as the day went on. Guess it's time to drive into town for more fittings. Speaking of fittings, Gena figures there are 400-500 fittings on board now. I thought maybe 100, but then I'm not the one putting them all in ha ha! |
 |
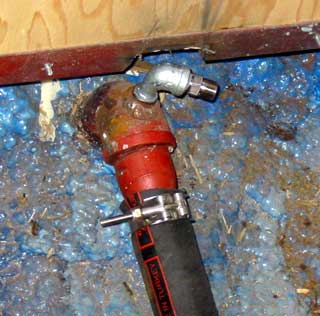 |
This includes elbows, T's, adapters, snap-ins, valves, spouts, connectors and whatever else that isn't hose, tube, or pipe. The one in the photo she added today is for an air bleed off for the engine's cooling system. It took a while compared to the other one at the bow end because we added steel frame there to raise the floor in the head. Ooops! My fault. |
Day 409:
11 hours+3 - installed fuel filter and associated lines, air bleeds for cooling
sys, added trim, base, and nav table support