| Day 417 |
 |
Nav table & cubby hole |
| Day 417 |
|
Nav table & cubby hole |
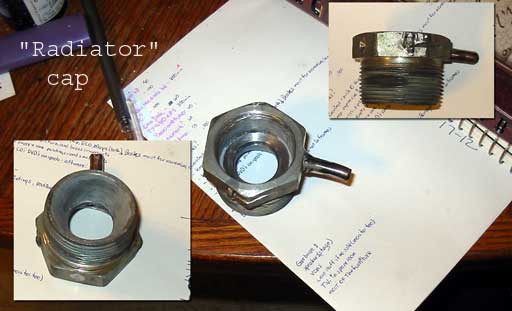
| The water ( antifreeze 50% )
take up tank for the engine needs one last fitting. Some thing to adapt
the big threaded hole, left by the fitting Gena welded on to the
tank, to a standard radiator cap. Unfortunately, I didn't get any photos
of how it all went together so I'll try to explain...with a thousand
words lacking the "picture." The seal on the standard cap needs a nice smooth surface to mate with, so a custom washer was inserted and welded on from the bottom only. This was then coated with epoxy to make sure there weren't any leaks. Next, slots needed to be cut on the sides for the caps tabs to slide into. These were cut slightly concentric in relation to the depth so it will tighten as turned. The ends of the slots were then sealed with a "blob" of weld. A drain for over flow also needed to be added. This is so anti-freeze doesn't end up pouring down the tank and all over everything when/if the cap pops open from pressure. It took her all morning to make this, but it'll work! |
||
 |
Meanwhile back in
the open-air carpentry shop ( the front deck! ) I was busy making a
cubby hole for under the navigation table support. At first this was going to be a cupboard style affair, but I decided it would be too small to be usable for anything and drawers were out of the question because of required leg space. The corner needs to be round to match the rounded curves on the support. I used a 45º router bit to start the edge of this 2x2" solid oak board left over from the forward stateroom door. |
|
| The roundness was created with some careful belt-sanding. I wish I had a router bit big enough to make corners of this size, but must make do. Only the "big" routers have bits that large. If you are ever planning on doing woodwork of this magnitude, I'd suggest getting a "big" router. There is an awesome selection of bits that 1/4" shafts just can't support. | ||
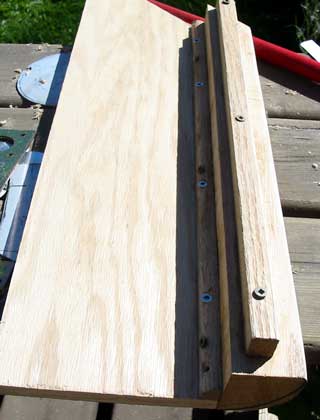 |
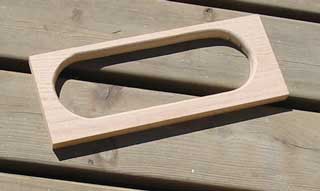 Next must be added the supports for the front and side. Two scrap pieces suffice. The "hole" of the cubby should have round edges to go with the theme of things, so a short length of 3/4" oak board was cut out and routed round to part depth, (thus hiding any defects in the cut that are difficult to sand out I've discovered.) |
|
 "Cubby hole" for nav stuff. |
||
|
|
A little bit of tambour on the
face and it's in! The bottom kick plate edge was the hardest part as I don't
have a band saw so just had to sand and fit it. I still had some time left after completing the cubby, so I turned my attention to the nav. table. |
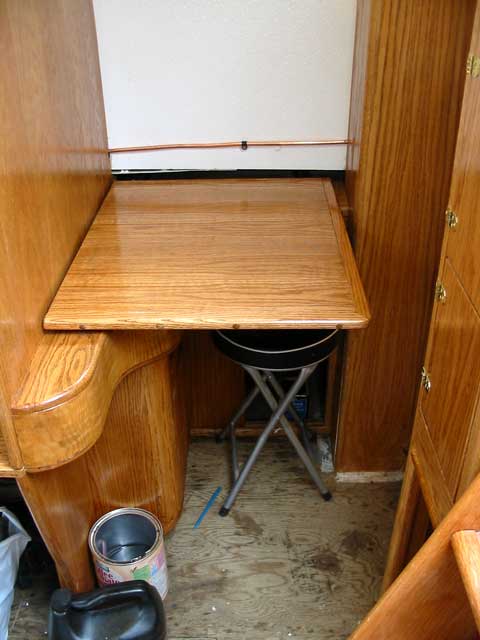
 Nav. Table ready to go in |
|
| It's just a piece of ply capped
with oak. I probably should have used nails on the end cap as the plugs kind
of ruined the look. Oh well, next nav table! The sliders work perfect and it is a nice size to lay a chart out on. The table is strong enough to lean on thanks to a furniture leg pad attached under the corner of the table for support. |
Day 417:
9 hours:
Made cubby under nav table, made and fitted radiator cap
To DAY 416 |
 You're welcome aboard! |
To DAY 418 |