| Day 419 |
 |
More wood work/
roll top desk |
| Day 419 |
|
More wood work/
roll top desk |
| Putting something over the table that slides out has been a priority because without it things look horrible and we have been expecting a visitor, the surveyor, to be coming any time now, not to mention other people coming to have a look. | Shown above: Small end locker over nav area makes use of dead space and hides table tracks |
| The top is a shelf with 4" edge for "stuff" and there are 2 levels inside for more "stuff". I have learned that having lots of little areas to put "stuff" is a good idea as it keeps small things organized better than being in a big drawer, and allows easier "extraction". If something is inside of a big locker, inside of a large container, inside of a smaller container inside that, then it'll be forgotten or just not used due to the sheer trouble of getting it out and putting it away. | |
 Doors ready but no hinges! |
So while it looks silly
having so many storage areas, in my opinion it's not really silly at
all! This little locker covers the rough panel edge, hides the tracks for the table, and hides the hydraulic fill line behind it. Cool! I couldn't resist making tambour covered doors as it will all match together with the sliding door below it and the front of the cubby hole. |
| After all the excitement of getting this done, I realized I didn't have any hinges to put the doors on. Agg!! |
| Not to be discouraged,
I turned my attention to starting the "roll top" part of Gena's desk as
instructed. I found the tambour would need to be hidden by a "false wall"
because the larger objects she plans on putting in there could potentially
hook onto the tambour, thus preventing it from being opened. (which would
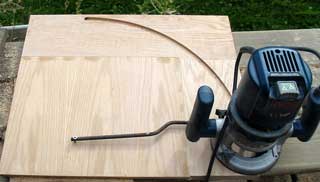
make it pretty useless ha ha!) The real trick was to get a nice curve without using the router guide along a curved edge, as I did with the lockers in the galley. The sides need to support cupboards and bookshelves so need to remain square-ish. |
 |
||
 |
The solution was to make a
radius bar that can be inserted into one of the router's guide locks. A few minutes later I was cutting perfect curves. This thing should be included with routers! I don't know why I didn't think of it before. As can be seen, the tambour now has a place to run inside of. I cut it in to about 1/2" which should be plenty to allow for expansion etc. |
 |
|
| Gena decided it was
more important to work on the house as winter is fast approaching and this
can't wait until spring. She was kind enough to let me continue on the desk
as she took on the grueling task of scraping paint off the side of the
house. She used a grinder with a brush which made things move quicker.
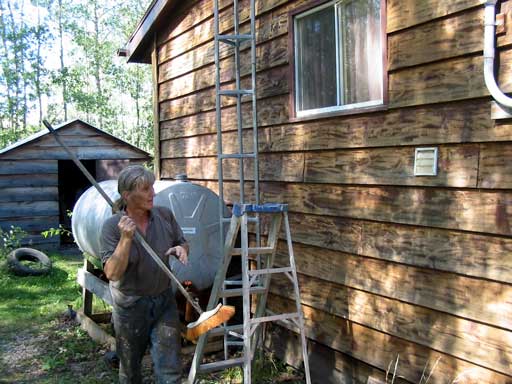
The surveyor did show up during the week, and every thing went well. Soon we'll be registered and official. Being in your countries ship registry has certain advantages when abroad we have heard. It will at least prove that this in fact is our boat if ever questioned...which could be a good ...or bad thing. Anyway, one thing I did learn is that with the sprit (pull-pit) we're over 47' which is what the marinas will charge us for, not the hull length (of course!) THAT SPRIT IS GOING TO COST US MONEY! IT BETTER BE WORTH IT. |
|||
 |
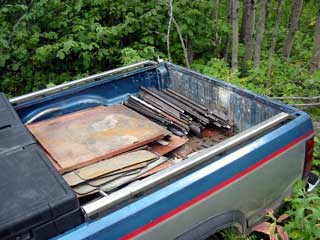 SS junk ready to haul away |
 Surveyor measures the boat's "lengths" |
|
Day 419:
7 hours+: Started tambour top, little doors, cleaned up
 Under New management with PDQ Telecom |