| Day 439 |
 |
Throttle, Water
Generator |
| Day 439 |
|
Throttle, Water
Generator |
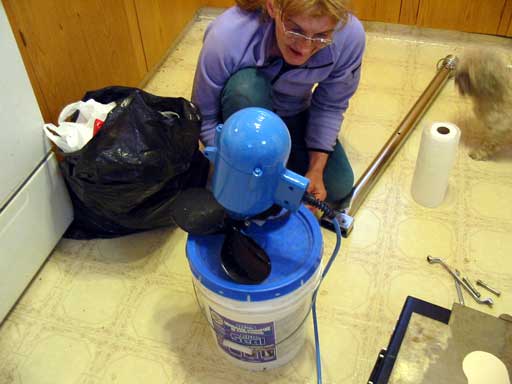
| While I was working away at the davit construction, Gena was doing her own thing. Sometimes, as mentioned before, we find it best just to stay out of each others way. Sometimes we cross paths, asking for advice, and when that happens, look out! If we're both doing complex tasks, and either of us interrupts the other with a question that requires more thought than, "yep" or "nope" things can get pretty ugly! Happily this doesn't happen too often. | |||
| It did today though. The ongoing
problem with how to control the throttle from 2 stations became more a
battle of wills I think. After a while, ( a long while, I'm afraid ) It was
agreed that the two should be paired together. The cables are Teflon, so
friction won't be much of a problem in any case. After Gena put it together,
it pretty much came out the way I'd imagined so now I'm not really sure why
we were arguing in the first place. The photo above shows the two coming in together. The controls feel a little sloppy, but not bad! We started the engine and it is nice and responsive. We'll call that a success. The goofy looking thing to the right is for the hydraulic power drive pump. The autopilot doesn't have the guts to power the motor directly so we must put a controller in-line. I think the auto-pilot was designed with a continuous running hydraulic pump and electric valves in mind, like any front end loader, or crane would have. The outputs are (+) port and (+) starboard. No good for reversing a motor. |
 |
||
| Before I go into this
too far, I can use the gift of hind-sight as I am typing this page weeks
later. I had researched the design and decided to order parts to make an
H-Bridge. An H-Bridge is a fancy way of saying forward-reverse motor
controller. A simple switch can be made to do this, as can a relay.
Unfortunately relays and switches wear out quickly with this kind of
amperage, so not my first choice. The best way to do this was to use 4
MOSFETs ( don't even ask!!) and a high end driver.
After a solid day of messing around with it, I had managed to blow 6 MOSFETs, one driver chip, and my stack. Through a misunderstanding and poor description data on the chip, the first 2 were blown. The minute I reversed it, 2 more cooked. Anyway, to make an incredibly long story short,
I did finally get it working. A powerful solid state beast it is! 200 amps
controlling power! But little did I know at the time, Gena was
plotting against me by ordering a 12 volt winch controller solenoid off of
eBay. Duh! I sure wasted that day! Neither of us had thought of one of
those, until then. |
|||
|
|||
| Also going aft
is the Aquair water generator. The 8 amp savior of our extra power needs.
She had welded the support pole for it months ago, but needed me to polish
it today, as I was already busy polishing all of the davit parts. :-| The unit is solid enough, very heavy in fact, and has an oil filled sealed aluminum housing. Problem is the paint started chipping off like a cheap toy car, and we hadn't even took it outside yet. I'm sure paint was just an oversight and the real quality is inside. Gena stripped the old paint, which suffice to say, came off really easily, and coated it with a lighter prettier color, in several coats of Tremclad. |
|||
 |
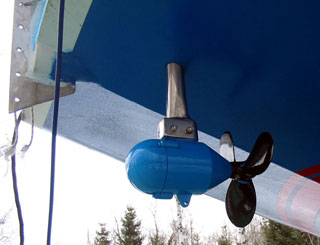 8 amp water Gen in place |
||
 |
The stainless housing made earlier is fit with a rubber sleeve to stop( or dull) the humming coming up through the hull directly under the aft berth. ( photo left). The wire was fitted with a special water tight plug we found at DigiKey, which mates to a 4 pin socket going through the transom. It was the only solution, but shouldn't get in the way. There is a pin in the pole which when released, lets it down low into the water. Raising it should allow easier cleaning if it gets fouled by weeds. |
||
Here's a couple of photos of my davit progress...
The box with catch handle in place,
all shiny, just like in the Maya 3d animation!
|
|||
Day 439:
14 hours for Gena - 60+ hours for me over the week( davits). Finished
water gen and mounted, made bracket for throttle and installed, finished hawse
pipes, mounted some big cleats
|
Need a house moved? Located near Millet Alberta |


