| Day 438 |
 |
Tilt Steering
&Davits |
| Day 438 |
|
Tilt Steering
&Davits |
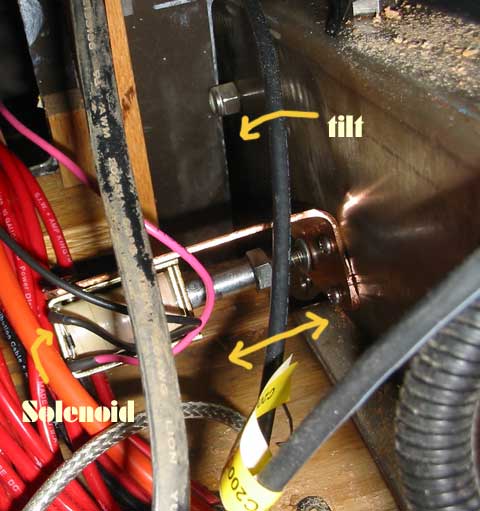
Little jobs keep creepin' in on us,
especially me, as this one did. Gena was pulling out the wiring in prep
for doing up the switch panel and it dawned on me that the solenoid for
the tilt wasn't actually on yet! The wiring is pretty simple, but,
because the only really powerful solenoid we could dig up at the shop
was 24 volts, a little trickery was involved.
|

|
She was making good use of her
time in any case. It was decided that cordoning off the port side access next to the engine would be good for storage away from the heat, and would also improve airflow along that side of the engine. It's an aluminum door that slides up and down in a track. Pretty cool! It *does* add to the complexity of the rats maze under there, but that might be good too. If we can't find our way around the boat anymore, we're probably too senile to be sailing around the world too ha ha!
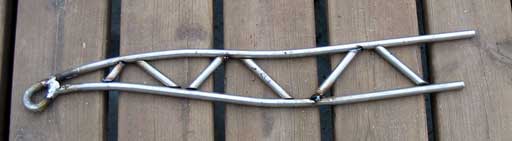
Now for the davits! |
|
Every boat this size needs some sort of
dinghy or tender to travel into shore while at anchor, unless being a
"marina rat" is planned. Dealing with the tender depends on the size and
type. We have opted towards an inflatable with a hard "V" bottom. This gives
it more stability inside but allows compact stowage. I could never imagine
the inconvenience of having a wood tender flipped onto the cabin top
blocking the view, adding windage, and constantly needing to be tightened
down during heavy weather. |
|
|
|
|
| I've always had an idea of how
these things should look so I drafted them up in my 3d animation program and
did the modifications there. For a more in depth look at the design and
progress of the davits, which took several days to put together,
open new window.(pro55.htm)
|
 |
| A few hours in and things started
coming together....
The video was created from the 3d plans I did in Maya, and shows how everything will go together. Click here to play outside of browser. |
The welding must be done carefully so as to prevent distortion of the "box" of stainless. Everything must be polished afterwards so the welds need to be kept clean.
|
 
|
|
Day 438:
12 hours - Started davits, installed tilt solenoid, put in gate off engine
area, started switch panel
|
Need a house moved? Located near Millet Alberta |