| Day44 | 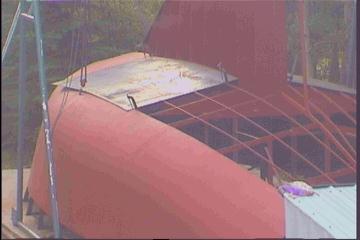 |
Putting on next bottom plate |
| Day44 | |
Putting on next bottom plate |
| Putting on the top plate is easy as long as the previous work done on the radius sections resulted in an even and smooth curve vertically. Today's plate was a perfect example of how accurately a piece can be cut and fit. | ||
 Slots cut out from frames of keel |
Firstly, the
plate is placed into position for maximum coverage. This
wasn't a worry for this piece as it had about 4 inches to
spare. Then the maximum amount of movement toward the
center is measured, in this case 2.5", for how far
it will need to come in towards the keel. Slots are then cut out so plate can be moved inward into position. The existing radius plate and recently placed bottom plate will now act as a stencil to mark for cutting. |
|
| The plate is now removed and cut using pieces of long flatbar clamped on as a guide, always keeping the traced line on. ( As it was when being drawn ) | ||
 Perfect fit!! Inside tacked. |
The plate is then ground
off to smooth the edges, and the inside side cleaned of
mill scale etc for proper priming, then hoisted back up
into position. This piece of plate laid in so perfect,
we hardly had to do any lifting or pushing to tack it
into place! The forward-back evenness is important, but the way the radius rolls off from the flat plate is just as important. |
|
| We were watching it as we put on the radius plate, but only as a desire to make an even cut along the top radius stringer +1.5 inches. It's a good thing we didn't leave them straight! It would have made a huge difference to the way the bottom plate faired in to it. | ||
Day 44:
6 hours: Put on starboard-2nd from aft bottom plate
to DAY 43 |
 |
to DAY 45 |