| Finishing Up.... | ||
 |
|
|
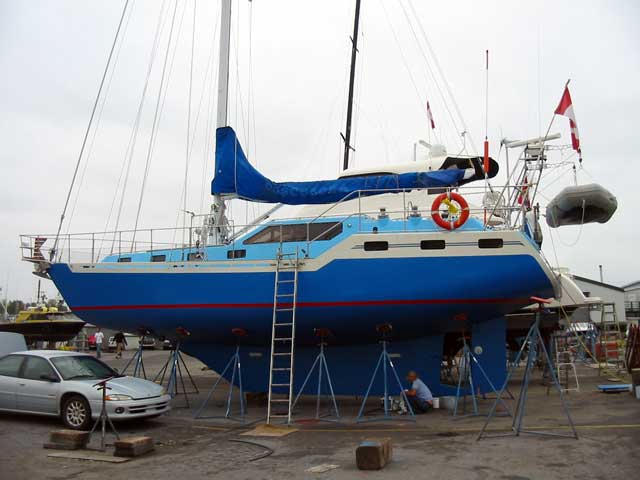
| After the boat was hauled out to the
coast, a number of projects were left unfinished, some parts left at the
house, others had to be taken back, and yet others popped up without us
ever having thought about it. One had to be done by someone else as we
had just gotten rid of all of the metal working equipment the week
before! Some projects were done on the hard here in BC, some was done in
Alberta, and some projects were even done while at anchor. Click these little pictures to view section, or browse using the side buttons at each section |
 |
 |
 |
 |
 |
 |
 |
 |
 |
| Exhaust Sys | MastCam Box | Pedestal Box | MOB Pole | New WL/ Paint | Sail Cover | Stay Sail Mods | Boat Wiring Prog | Winch Covers |
| Exhaust system # 2 | ||
 |
PRESS PLAY, OR CLICK HERE VIEW IN WINDOWS MEDIA PLAYER |
   |
| The only real issue,
which presented some inconvenience while out sailing, was the exhaust system.
The waterline being some 6" higher on the hull than the designer proposed,
created a potential danger for the dry exhaust system and the engine. I
estimated that beyond a 30 degree heal, water would enter over the "loop"
and flood the engine. We had installed a remotely operated butterfly valve
at the hull fitting, but this was only to act as a splash guard. If we were
healed to 45 degrees and wave buried the exhaust "hole" the butterfly valve
would limit the surge of water that would ensue. Now, because of the new
waterline, the whole thing would constantly be underwater and eventually the
loop would be flooded.
|
|
|
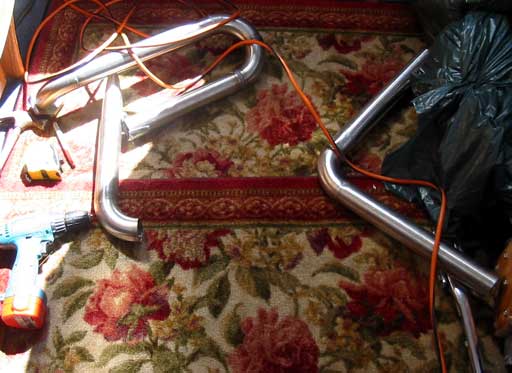
The only solution, albeit ugly, would be to
redo the whole exhaust system from the hull to the muffler. After some
delegation and consideration, we decided it should once again be done in
stainless. Because we no longer have welders, cutters, and material, the
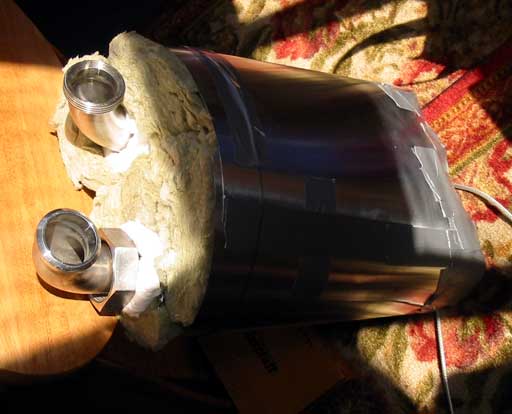
local welding shop's services , right here in the marina, were requested. They estimated, with materials, the job would cost about $1200. That's not bad, but Gena wouldn't have it! She marched of to a local scrap dealer and found all of the pipe, unions, couplers, and elbows we would need. She then cut and fit everything and took sections in for them to weld. Over a couple of days the job was done in time for our next outing. She toiled late into the evening to get the insulation on, and make the aluminum casings for that out of duct aluminum. Perseverance! Lucky that space under the steps to the poop deck is there, and empty. A good space to add almost 2 feet to the height of the system. The exhaust works great! No more smell from the leaky flex pipe, and we can rest comforted that only a knock down would allow water into the muffler's catch...if the compression allowed it that far. |
  |
(above) Muffler has some new friends! (right) the "U" section insulated and ready to be shoved up under the steps to the poop deck. |
 |
| Mast Cam case | ||
|
|
|
|
Because I like recording things, especially in
video, plus other reasons, I am making a "mastcam" to go aloft. The extra
trouble, weight, and windage might just be worth it. We can monitor it when
steering in slightly less than ideal conditions. I might be good for: (a) low fog banks, the mast is pretty high at 68 feet above the water. (b) Spotting coral in shallow areas (c) Documenting a pass, or other event while under way...as I have already done from the webcam (d) Spotting whales /other marine life beneath the boat (e) Spotting land (f) Spying around in a marina! :D |
|
| This won't be a tiny webcam
with no zoom, poor light sensitivity, and light correction. We have
purchased a fancy Sony mini-8 cam off of eBay for cheap (because it had
problems we can fix) and, even though the "wire" is all plastic, I am
confident that I'll get things going. The camera must pivot and rotate as well. I made all of the stainless framework before we let the welder and cutters go, and Gena gave me some gears from her ancient Meccano set (circ. 1950's) which may be valuable now. They are very heavy duty, not a toy really. |
|
| Pedestal Case | ||
|
|
|
|
coming soon
| MOB pole mount | ||
|
|
 |
|
| While we were browsing through Steveston looking for bits and pieces, Gena commented that we still need a man-overboard pole. I remembered when we were on our cruise and learn that during one of the exercises we used such a beast. I thought, "oh no! Another large item to clutter up the decks." |
 |
|
 |
We looked around the marina
( a great advantage to be here it is!) at other boats of the sailing
variety, and noticed that many didn't have MOB poles, or that they were
hidden perhaps. Some had the pole tied to the aft stay.
This wouldn't do for us though because of the HF antennas on both aft stays. I don't know how much the would affect the tuning, or SWR, but because my tuner is the automatic/memory/frequency style, I didn't want to chance it. I also think it might put some unnecessary strain on the aft stay it was attached to. Vibration from wind?? The cable rusting under the attachments? Ok, I just think it looks stupid really. Being an X-CB'er from way back, I like things that stick straight up like antennas. OMG! What am I saying!
|
|

|
I
took the photo to the left back to Alberta when we went back, and devised a
set of brackets. We couldn't do them here because we have no welder, and,
believe it or not, we couldn't find stainless U-bolts anywhere here! I find
that surprising being right next to the sea with salt air everywhere. Hmmm. These brackets are simple enough, but I had to stare at the photo for a while. The top bracket has the U-bolt plates welded at 90 degrees. One for 1" the other for 2". The bottom is basically the same but angled from the center. I was pretty happy they fit! Looking at the tall skinny photo to the right, you can see the orange holder the pole sits inside of. I clamped this with some hose so the clamps could be tightened enough for grip, but not to crush. The section inside is very heavy, probably has steel rod inside of it. This makes the pole float upright. The cap at the very top has a fine string tied to it, then to the nearest backstay. When thrown overboard, the cap pops off, and a bright little flag unfurls. Pretty cool huh? |
|
| New Waterline and paint job(s) | ||
|
|
 |
|
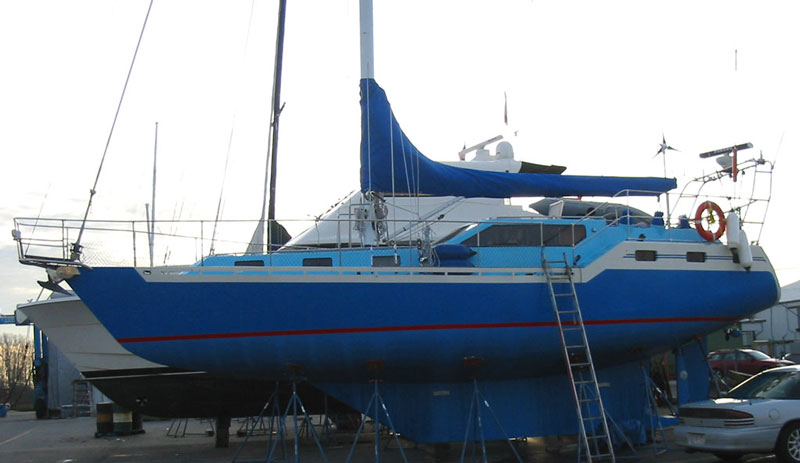
| OK,
ok! Nobody's perfect! Yes, I had to do the waterline over again. As
mentioned during the launch, the boat sat quite a bit lower than the
designed waterline. After we came out to the coast, everyone that we
discussed it with said the same thing. "You never trust the design water
line." There were variances like "That's with no interior" or "that's just
the hull shape waterline on a computer" or "just to make the boat more
attractive to potential buyers of the blueprints". Whatever the real reason
is, the waterline still needed to be moved up the hull some. The rest of the boat needs some work, due to damage from the move, rub damage from trying to figure out the rig and lines, and just specks that somehow were missed during the painting and haven't showed up until salt water hit them. We can feel OK with this as many a metal boat building guru has exclaimed " coat and re-coat steel until you think you're being ridiculously overcautious, then give is a couple of more!" This rule seems to stand for many things when seriously cruising. We were told that of the manual pump-flush style toilets. Pump until your arm is sore, then pump until you think other crew think you are losing your sanity, then pump a few more just to be sure! We installed an electric with a maciator just to be sure. :) Well, back to the waterline. (I do carry on in person as well, I can't help it) |
|
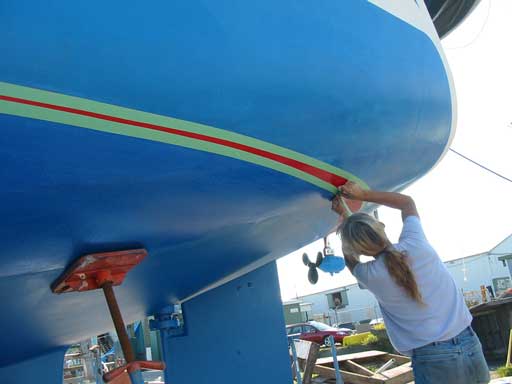
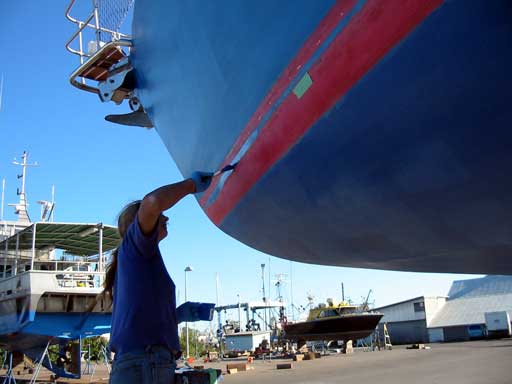
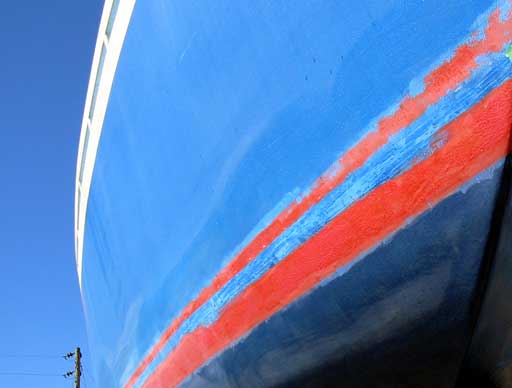
| I knew it would be some work, but
because Ceram-Kote is so tough, it ended up taking the two of us a couple of
days to fairly smooth the old waterline out. Gena was pretty picky about it,
whereas I didn't care much explaining that the old W.L. would be, er, below
the waterline.
She smoothed it more anyway. In the photo (right) you can see the blue Ceram-Kote on the side and how it has dusted off nicely in the UV. This is why we have decided to put something more customary, hence predictable, on over it. We considered using the Ceram-Kote "thane" proposed by the company, but it would be difficult to find/get posted/ get sent by UPS so we're going with Interlux Brightside single part paint. The nasty thing about Brightside is it's "bright", meaning high gloss. This makes us a bit nervous because, lets face it, we didn't spend 500k$ and a year fairing her.
|
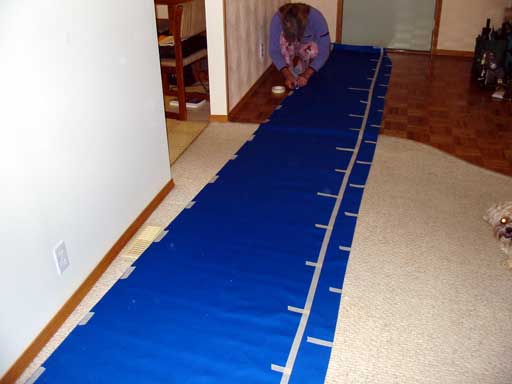
 |
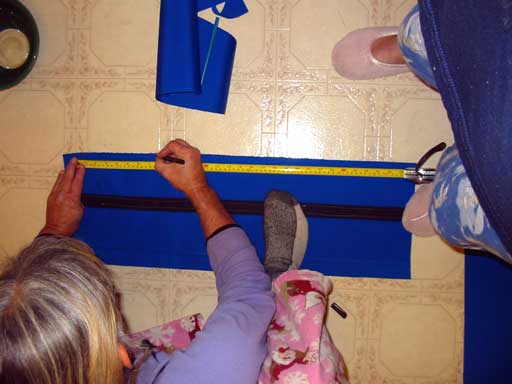
 This long skinny photo shows the first coat on. My main concern was the paint bleeding under the tape. It's not so much a problem here but could be when I do the sides. I won't make the same mistake twice! If you look at the photos below, you will notice the water line becomes quite large as it curls under aft. This is so from a side perspective, it appears to be totally even. As I was laying out the tape, I kept trying to imagine what the heck I was thinking when I did the other waterline? I can only attribute it to "rush, rush, rush" and I knew what I had done afterwards, but had to accept it. The method I used was this. First the proposed line height closest to vertical must be measured. Then find an object ( I used a pack of cigarettes) that can be slid easily along the top of a small level. Then use this object on top of the level ( top corner of level to the bottom of the line) to mark the top. As the boat curves under ( a bit near the bow, but a lot aft ) the object will move out further and further. The line is only 3" amidships, but almost 1 foot aft. If you look hard at the photos at the bottom of this section, you can see it is in fact even. Some people curve the line up into a bootstrap shape to avoid this potentially touchy area, but I know it wouldn't "go" with any of the lines on our boat.
|
|
| We
talked the guys at Action Welding (who welded Genas new exhaust system
together) into doing a short little weld under one of the bowsprit arms. It
was damaged during the move when the crane arm flipped up and hit it.
Because the sprit wasn't designed to hold the whole weight of the front of
the boat, the weld cracked. I guess it could have been much worse. Anyway, the young apprentice came over and buttoned it up. He was using a TIG welder. What a nice piece of equipment!! If we had know (a) that TIGs aren't just for aluminum and (b) that they are under $1000 new and (c) could weld stainless without spatter, we would have bought one years ago! I am also very surprised that nobody in the forum has mentioned TIGs. I helped my X study for his welding courses, but never saw anything that would portray that SS could be welded this way. Of course back then they were prohibitively expensive. There you go. |
 |
| Gena gave it a quick coat of Ceram, while she gave the keel a final barrier coat (and just to use the stuff up!) and I sanded it once hard to prep it for the first coat of Interlux after the water line was done. | |||||||
|
|
Brightside is very
different from what we are accustomed to with 2 part epoxy. It is a Urethane
type of paint and doesn't cover other colors well. Especially on the first
coat. Even though this happens, I know now that one must resist putting lots
of it on. The following coats will take care of the transparency issue. When I put lots on, I caused lots of problems. The paint wanted to run, it bubbled excessively, especially under the foam roller which I traded for a short pile type of roller, and it took days to dry. I kept having to go back 10 feet to flatten the bubbles and fix runs. The first time with this stuff was really touch and go. Over the hull side/waterline painting week, I
learned this: |
||||||
 |
-Roll vertically at
first, then roll horizontal into the previous area. Don't start at the edge
of the previous area, or the paint will pile up too thick. -Mask well. This stuff is way thinner than epoxy 2 part so likes to run under tape into dimples. Thankfully I noticed this during the waterline job, so took extra care with the blue onto the white. Gena made sure to mask the bottom of the waterline to get the anti-fouling paint on. We looked at several different types of anti-fouling, and decided to go with Micron CSC for it's seeming compromise between ablative and hard coats. For us it's the right stuff. But the type of paint so much depends on whether a boat will be sitting at a marina most of the time (or at anchor) or underway more than not, or in a river, or may need to be hauled out in the near future. |
||||||
| I,
for one, didn't want to put any anti-fouling on, being environmentally
conscious, as well as cheap, and figuring I could keep the hull clean. I
don't mind doing it, (I did with our little boat) and probably can use the
excersize. This all changed when (a) I realised how bloody cold the
water here is and will need a dry suit, (b) heard from a fairly reliable
source that tropical waters a brutal for growth, I'd be cleaning it twice a
week, and (c) realized that we would be wintering over here in BC. CSC is less environmentally disastrous, so I can sort of sleep at night, sort of. At least tin has been banished. That has probably saved a lot of fish and coral worldwide. |
|||||||
 |
The
amount of coatings differs with whoever you ask. Some say 2, some say 3,
some say 1. Most agree that the area just below the waterline should have
extra coats. Gena coated the keel 2 times, except the forward edge has a 3rd
coat, the undersides twice, then the 2 feet up to the water line 3 times. This stuff is $300 bucks a gallon, and it took 4 gallons to do this. It'd better last! We were lucky to have found some on sale at Nikka in Steveston for $200, but then add the GST, then the PST and 12+ rollers and 5 cans of Xylene for thinner. It all came to over $1000 again. I always say ( and have said many times in the past few years ) no matter what you want done to a boat, it ends up costing a thousand dollars. I hate being right! The waterline and sides cost about $300, but we had to buy a random orbital sander and $30 worth of Canadian Tire disks which turned out to be garbage, then another 10 good disks from Rods Building Supply in Steveston, etc. So about $500 was spent there. It's only money. If doing the sides, the bottom, and the waterline wasn't enough, why not do the bulwark rails top side? We just have way too much time right? |
||||||
| Well we
have a lot more, but there is a sorta deadline, not sure when though
as we don't know the seasons here at all. It's the second half of September
here and there have been tank top hot days this past week. In Edmonton
they're laying out the boards for skating rinks. I noticed these little dots of rust forming in various places, mostly on the starboard side along and on the bulwark rails. At first I blamed Gena for not cleaning up after drilling holes for deck hardware, there are a few areas nastily stained by steel dust/condensation rust, but these looked deeper into the crevices. Then I noticed a few tiny cracks in some areas. Probably from shrinkage in the cold Alberta winter. There's not many, but the dots kept me busy with tape and pen for about an hour. They are tiny, but should be dealt with. As we have heard, the small rust spots should be fixed quickly before they become big rust problems. We have some spare Ceram-Kote white, so Gena whipped me up a tiny batch after I sanded around all of the rust "zits". They are so small, they don't even show up in the photo above. There were also nasty scrapes from where the solent stay ( still under research) was tied on to the rail. Many things are coming to light when dealing with the sea. Anything that rubs turns into a mess in a very short time...
|
|||||||
| Main Sail Cover | ||
|
|
|
|
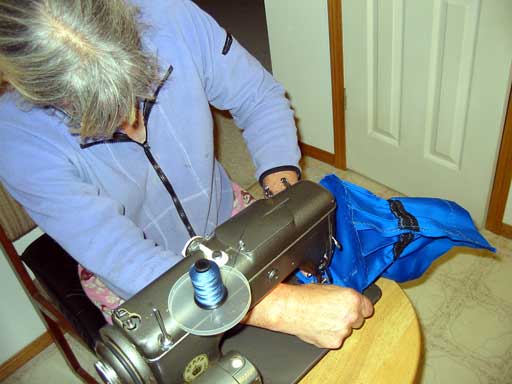
| As winter "moves in" we have decided to take some projects back to the house to make our stay there less boring, and use the time productively. I have been developing the remaining electronics/ display systems on the boat, while Gena has found a new hobby, sewing! It's a good thing she enjoys it, as I don't like sewing machines, and they don't like me. I've always hand sewn as a result. | |
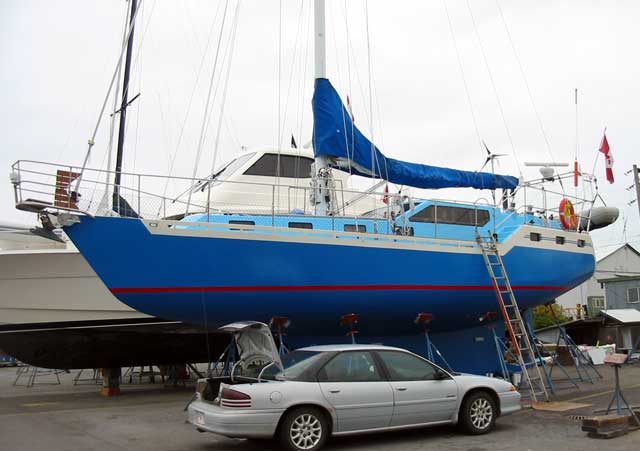
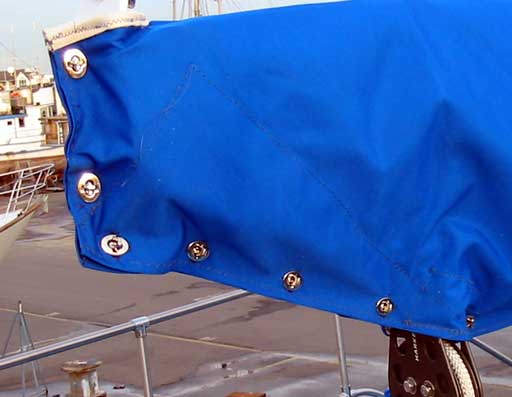
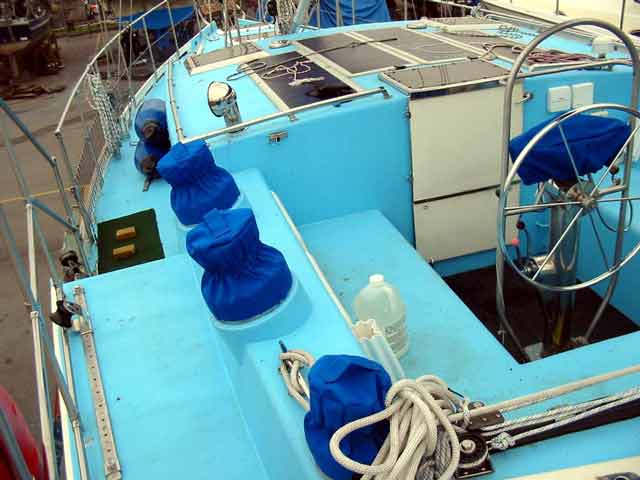
| As can be seen in
photos above, we already had a sail cover. This is one Nigel gave us that he
obtained from someone else a while ago. It was in pretty rough shape but we
were grateful as it's better than *no* sail cover, and all of it's parts
were still good.
Gena stol;e the zipper, and removed the Zeus snaps (even though they weren't used) but best of all, it gave us a good idea of what we needed to do to get the proper fit. The old cover was short by 3 feet. This is
likely because our boom is extra long by 2 feet. The forward size was also
too small and couldn't wrap around the boom. This is because of 3 reasons:
|
 |
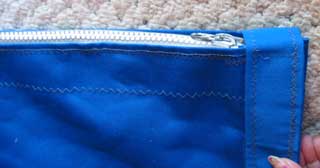 Zipper from old cover |
 |
| Gena took all of this into
consideration, and asked my opinions, even though I didn't really have a
clue really. The snaps were purchased online ( as they are
ridiculously expensive here) as was the SunBrella material used. She
purchased the SunBrella from Sailors Exchange for $6/yd which compared to
here ($36/sqr yd!!) was a total bargain. Back to the cover, any "rub" areas, like the bit that covers the head board up top, and the aft corners of the boom, was doubled up with leather or extra layers of SunBrella . the open flap above the zipper was closed with to velcro tabs, and the top has a rope woven through. This may become a hook in the future because it's really hard to stand off the side of the mast and tie a knot up there with nothing to prop against. Gena held my butt, but had to stand on the bumrail herself to reach me! |
 |
 |
|
| Well there it is!
Much nicer. Now we just need to get "Dulcie Darlene" lettering on there,
then we'll be real "yachties" !
|
|
 |
|
| More sewing! Stay Sail / Try Sail | ||
|
|
|
|
|
I want
to try my hand at sewing as well, perhaps make a yankee sail out of
leftovers, but haven't had the chance with everything else I have to do at
the moment. So Gena went into re-building the foot of the stay sail.
The original configuration for that sail was for a furling, and also was too long for our inner forstay by a few feet. We were thinking about using a furling on the inner, as many people do these days, but decided the extra windage, and needing to protect the leech and the foot with sunbrella, wasn't worth the effort. (Not to mention the extra cost!) This means grommets, hanks, and re-enforcing will need to be added, as well as moving the tack and clew re-enforcing plates to the new position. A big job, but hey, there's lots of time now! |
|||||||
| The photo above
is of a bunch (more) materials, thread, tools, and needles Gena has
purchased to add to our "sail repair arsenal" in the sewing box. Included,
some not shown, is rope fids, sail tape, double sided sail tape, extra heavy
thread, an awl, webbing, and more bobbins to fit her Pfaff machine. Moving up the foot required the plates from the original foot be duplicated (as we have no idea how much is required, best to copy!) the sewn on in the new position. After getting to 10 layers or so, the machine was grunting a bit. A few #18 needles were broken, and a #20 bent. Sail fabric is *so* dense. You have to sew it to believe it! This machine can easily sew 16 layers of Sunbrella, but 10 layers of sail canvass is about it. I tried pushing a regular needle through 1 layer and it was bloody hard without a palm. It gives you a real appreciation of how powerful sail sewing machines are. |
 |
||||||
|
 A hank in place on stainless grommet  |
||||||
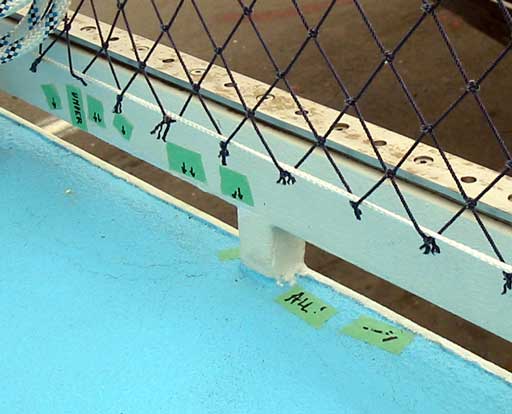
| The cool arrow
pattern, as seen in the photo up above, will need to be "fixed" because it
is partially covered by the plates at the clew. Some web strapping that was removed from the original tack is hand sewn on to the new tack. The "awl" shown has a spool of waxed twine inside and has a large handle with which to push the triangle shaped needle through. A very useful tool for jobs too big for the sailors palm. This web was sewn on with 3 sets of stitches each side, offset from one side to the other. |
 |
||||||
 |
The way we understand
it, a sail can never have enough re-enforcing with only weight being a
limitation.
The thread used was nylon for the heavy areas, and polyester in the less crucial or long runs (as nylon shrinks supposedly)
|
||||||
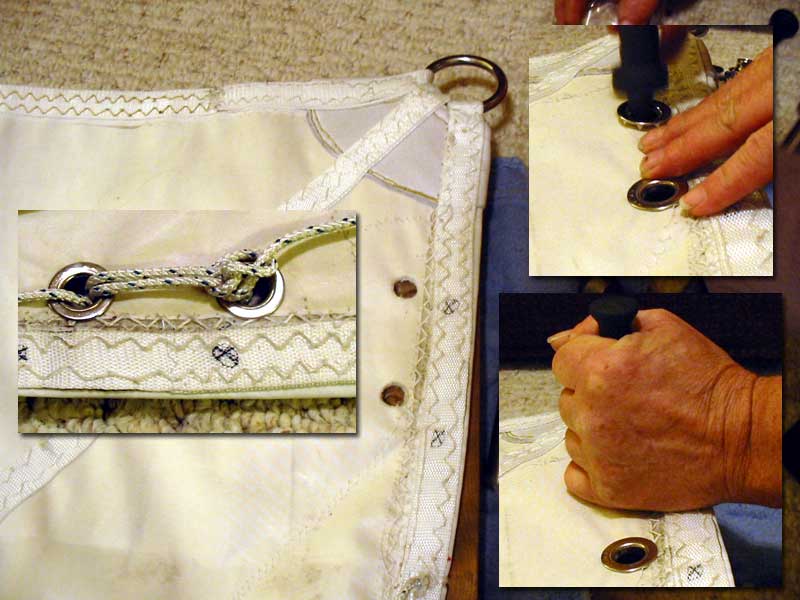
 Plates taped in placed, ready to sew on |
The
original clew had one of those large grommets into it, but we don't have the
machine to stamp one of those in ( plus we're some 800 miles from the
nearest sail maker right now!) so Gena decided to use a stainless ring
instead.
The smallest corner of the clew has been doubled up with some leather to add yet even more rigidity, and 3 straps to spread out the load. Notice the marks for the two grommets ( photo below) in the strap weren't continued. That would weaken the strap too much for only an adjustment cord, so it was moved inward instead. For a good book on sail making, we would recommend "Sail Makers Apprentice" to get a really good idea on how much one needs to do to build a good sail. Some of the techniques are a little strange from what I've read, but they are time tested and true based on ancient and modern sailors experience. Best we listen! |
 |
|
 |
This
trip back to the house also allowed time to change the track slides on the
storm try sail. On the mast is a special track for this sail, but it was (of
course) the wrong size for the ones on the sail. DOubled strapping was used
to wrap around the track slides. (The big brass ones that go around the
track). Ian with ocean rigging found us a track stop gate for the bottom of the track. This is so the storm sail can be loaded on without being hoisted up. This way, it'd be ready for the "big blow" if it happened, and easy to engage. Unfortunately, the gate wasn't big enough for the slides. The slides that may have fit are expensive and rare, so changing the gate seemed to be a good solution. Notice that everything for coastal sailing (recreational, day sailing etc.) is readily available. But when it comes to the extra heavy duty stuff, track, clevises, bolts whatever, everything is hard to find and expensive. Supply and demand I suppose. This means that either most boats doing blue water are owned by rich people, or most boats doing blue water are under rigged for blue water cruising! Hmmm. |
| Anyway, Gena used the original gate Ian had gave us to model a new bigger one. The photo is only of the pieces before she drilled and riveted a hinge in as I was unwell (back out) and forgot to take photos of it in place and the sail! What's amazing is she made this with little more than a grinder and a pair of pliers as we've sold/ given away virtually all of out metal working tools. What determination! Hats off to you girl! | |
| Boat WIring Program | ||
|
|
 |
|
|
Contrary to popular belief, I have been doing a little
more than sitting on my butt watching TV and surfing the 'net! I don't have
a lot to show for all of my hard work, (and it has been 8 hours a day,
7 days a week) but I will have. All under construction includes the big
pedestal display, Weather logger, chain counter and remote control steering,
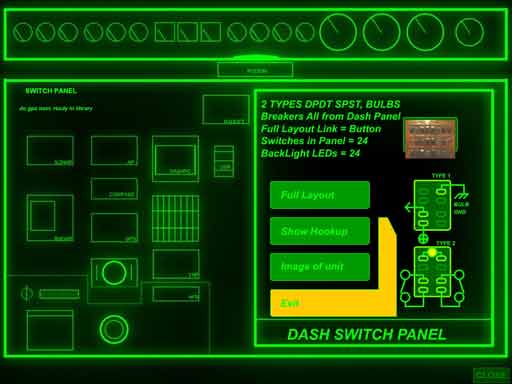
the DVD documentary, plus plus plus. One of the things I can show off is the boat wiring program I wrote. It, like everything else, isn't finished, and may never be finished as every time something electrical changes on the boat, it must change to be up-to-date. It is, in my opinion, a very good idea though. The complexities
of wiring and electronics in our boat is quite vast, and amounts to a lot of
paper in the form of service manuals, drawings, handwritten sketches and
attempts to record the breaker configurations and distribution of power,
NMEA, Ethernet, video, coaxial and signal connections. Every time we need to
know a circuit to hook in something new, or troubleshoot etc. It's an hour
job to decipher all the documentation in order to find the thing! |
|
| The layout of
the program was inspired partially by Star Trek, as it is cool and seems to
work well on the TV program lol! Sound effects, smooth graphics, and cool look aside, the program is, and has already been, very useful. I can start it up and find any circuit in our boat in seconds based on position in the boat, or if there's a button, using that. Most of the inner circuits are nested ( some pretty deep) but, because it's modular, can provide endless data to the most minute detail on any system in our "ship" just like on Enterprise.
|
"Boat-Wiring" flash exe program |
|
I have included a sample of it for the web here,
which will open a new window, or you can download the whole thing in a .zip
file by clicking on the little picture above, but warning: it's big!
30 Megs. About the size of a long youtube video. I didn't
really design it to be on the site. :) The sample has blank spots, is missing a lot of the cool effects, and some of the more detailed schematics etc, so if you want more, then the full version is worth the download time. Each time I update, there will be more and more. In the .zip file is a shortcut, or you can click on the test2.exe directly after unzipping it. To unzip, just right click on boatwiring-web.zip in explorer wherever you downloaded it to, then select extract files. |
|
| Winch Covers | ||
|
|
 |
|
|
As mentioned above we got a really good deal on some Sunbrella. After
the sail cover, there was lots left over so Gena decided to start making
some other covers. A bimini is also in the works once we get the dimensions
required. Some covers for the "oh-so-expensive" winches seemed a bit silly
at first, but after listening to Nigel talking about the coal dust grit at
Point Roberts getting into everything on his boat, we thought it may be a
good idea to cover the winches, at least i fthe boat is going to be sitting
in a marina near dusty roads etc.. Perhaps a little protection for the
winches.
|
|
| They
are full of marine grade grease, which protects the bearings, bushings, and
gears from salt water and air (supposedly) well. But we know from our
experiences with tractor trailers in northern Alberta that road grit sticks
to grease like it's magnetic, then gets ground into everything, sometimes
ruining an otherwise perfect metallic connection. One could only imagine
what would happen if this same grit got into the winches!
|
 |
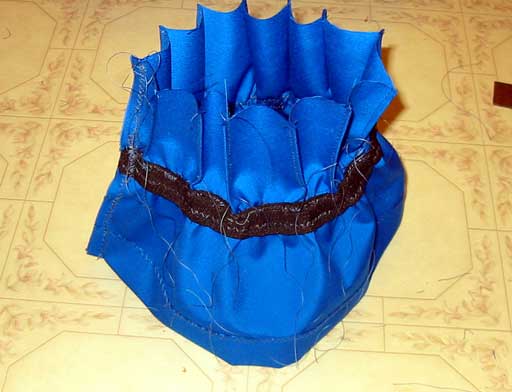
| The
basic design is similar to a pleated skirt really. The top edge is a little
smaller the the bottom hub, so the material was sewn in folds to reduce the
size. An elastic strap cinches in the "waist" and a nice round top in sewn
to the pleats. A handle was sewn to the top so they can be easily pulled off in a pinch, but also so a rope can be strung through them if we're in a particularly windy place, although I couldn't imagine wind catching these being so tight and all.
We were unsure of how they would fit / look because the boat isn't here, so we had to wait for our next trip out. |
|
 |
As you can see, they look great! Notice that Gena also made a cover for the compass. |
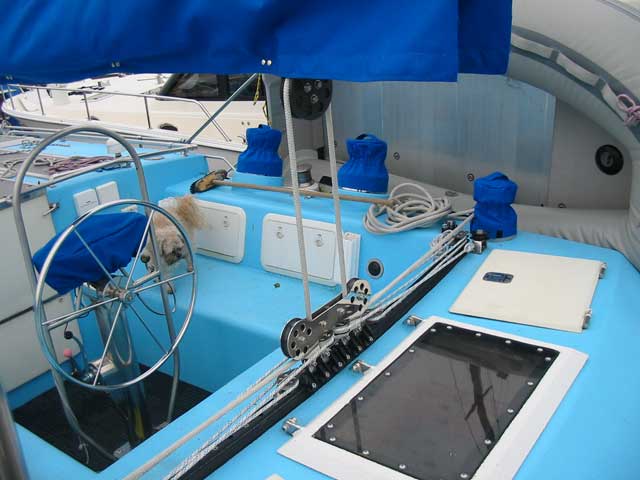 |
What's really neat is they
go well with the blue decks and cockpit, plus all match the sail cover! What
more could anyone want? I wonder if we should embroider "DD" into them? The smaller covers for the mainsail sheets had to be done slightly different. |
 |
Because
we like to leave the sheet loosely on the winches, just to keep the boom
from moving around, there had to be a slot to let the line out without
interfering. The solution was to just Velcro the bottom together. (Photo left) Cool!
|
 |
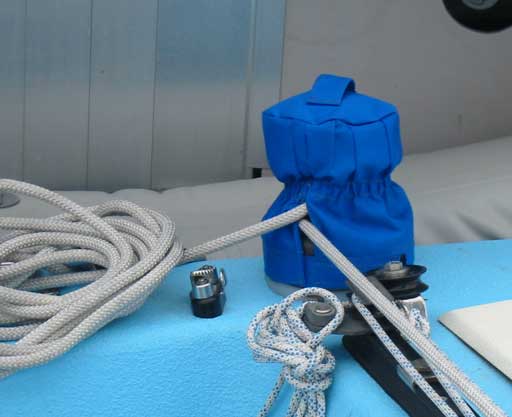
By
far the weirdest shape Gena has made in the way of covers ( I say "covers"
because she made a doggy coat for the dog with full legs and paw pads!) is
for the little electric winch I installed in the summer for the roller
furling line.
It consists of a round cylinder shape on top, then a box shape for the mount, then a curved cylinder shape for the bottom. A short cord sewn on is used to secure it. (photo left) Ya gotta love it! Now the only thing remaining is the windlass cover, which may take some planning and snaps, and the bimini of course. Guess you can say she'll have it covered soon enough! ( sorry couldn't resist that one! ar ar!) |
|
|
..to Projects Aboard |
|
| Replace
this button with a link to your site, mailme ..to Main page |