| Projects Aboard ! | ||
 |
|
|
| After
the "finishing up" page became unmanageably large, I decided to add yet
another. I once commented to someone in the boatyard at Steveston Harbour
how many boats are "in progress" yet how little seems to ever get done. He
just said, "yes, that's boat!" Ever since then, the meaning of that has
become clearer and clearer. Will we ever be finished? I hope not! I'm sure
sunbathing on deck, only worrying about what to eat, or where we haven't
visited yet, or when we'll leave for a next anchorage, gets old after a
while. Maybe not. But Gena and I have one thing in common: we like to stay
busy. Boredom is our true enemy, as it is of many people our age. Some go
back to work to thwart it. ( ya right!!) while others just succumb to
it.
As it looks right now, we don't have a lot to worry about there....yet! Here's yet more projects that needed to be done, and some that didn't need to be, really. If you are building, let this be a guide to things that you should have/make that you probably, like us, never thought about. Click these little pictures to view section, or browse using the side buttons at each section |
 |
 |
 |
 |
 |
 |
 |
 |
 |
| Cushions! | Galley Updates | Solent Stay + | Nav PC 2? | Mast Follies | PropStop/Camera | Riding Sail/more | Radar Fix/Ped PC | More Power!! |
| Cushions Cushions Cushions! | ||
 |
|
   |
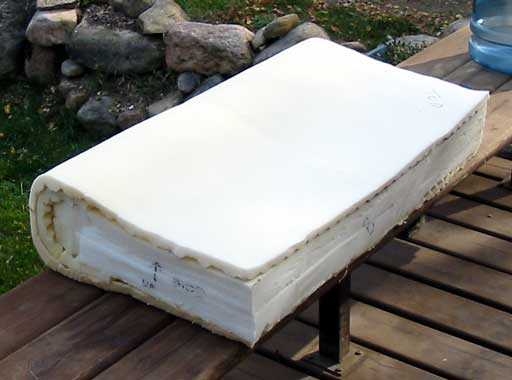
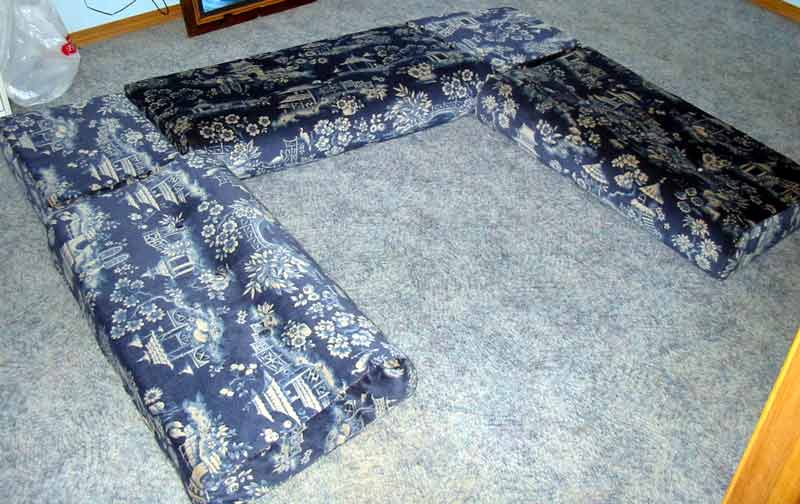
| Those
pesky cushions! A job I had begun, only to be dissatisfied with the
material, then unhappy with the quality of foam, then to be badgered by the
difficulty of accessing under the seats, and just generally procrastinating
on the whole thing, has been lifted from my over-burdened shoulders by my
lifelong bosom buddy Gena.
|
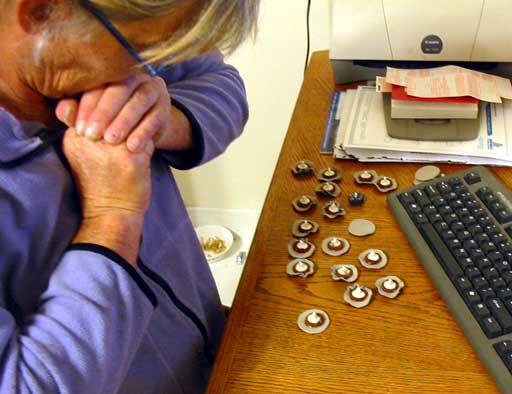 Glue-gun glue is HOT, ouch!! |
We
wandered around in the, now out of business, FabricLand in Leduc, checked
some places in Vancouver, and even somewhere (forget the name) in west
Edmonton, searching for that certain material. This time we were
extra careful as the "other" stuff we bought turned out to be a real
headache, and became obviously infeasible after only 1 cushion was finished.
(top photo) It fell apart as I tried sewing it, got jammed in Genas 20 year old sewing machine, and basically wrecked her machines mechanics. (I'll blame that on the material!) It turned me right off the whole cushion project. I'll admit I'm no expert, but the choice was wrong, the material stretched, and became ugly quickly. Anyway, we found some nice soft surfaced plush type of upholstery cloth, that is 4 times the weight and almost the same color and look. |
|||||||
 ...the trouble with Tribbles... |
|
|||||||
|
||||||||
 |
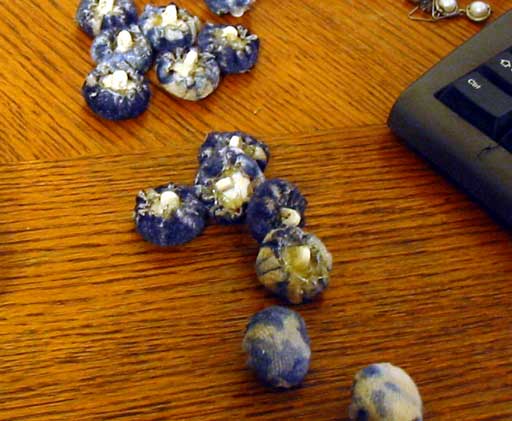
||||||||
| Buttons ready to go in! | ||||||||
 |
||||||||
 I hand sewed the backs, zippers are on the seats. Looks great! |
|
| Galley refinements | ||
|
|
|
|
|
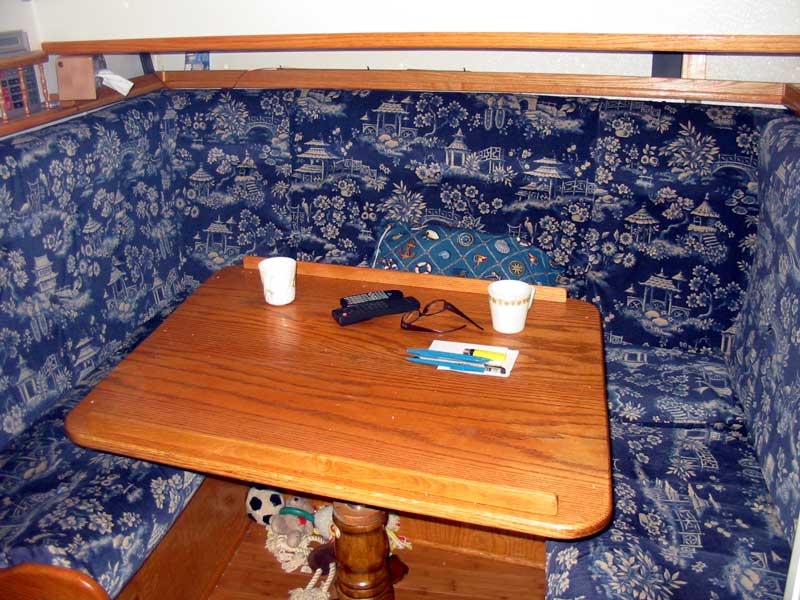
Since
the boat was dropped into the water, we have added a few things to the
galley. The microwave has been performing flawlessly, but the timer is a bit
"rough". To do 1 minute, it could go for 30 seconds or 3 minutes. So I
bought a little timer that beeps as a reminder, it's the white thing with
red buttons.
The alcohol stove has been working well, except for the methyl alcohol issue which has been rectified with 90% ethyl/10% methyl which is the proper mix for enclosed areas with poor ventilation. Actually I was getting headaches a lot, especially when it was cold as the hatches were all closed with only the exhaust fan going. Anyway, the issue of making toast came up. I was holding it over the burner with a fork but that doesn't do a very good job. It just basically singes the surface so it tastes like charcoal and bread. We found this stainless grill thing the guy at the store swore by as he's used his for years. Obviously he has a propane stove because on an alcohol stove it toasted the top edge of the crust and that was it. After mucking around with that for a few loafs, we decided to buy one of those toaster ovens. It's surprising how cheap they are. Ours cost $18 I think. It can broil, roast, toast, and has accurate timers on it. What more could you want for $18?? Problem was we had planned to store it in the oven when not in use. It was 1/2" too big to fit. Seems there's a standard width for those things, so we had to decide where else to put it. As can be seen in the photo, it found a place over the sinks. As if the galley isn't small enough already ha ha! We've yet to wire it in permanently, as we wanted to be sure it'd be ok there, but after over a month I think it'll do. Gena stood it off with the bolts from the wood so it wouldn't singe off the finish. I have cooked toast, roast, salmon, pork chops, steak, lasagna, and even hamburger in there. |
|
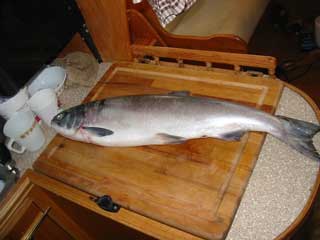
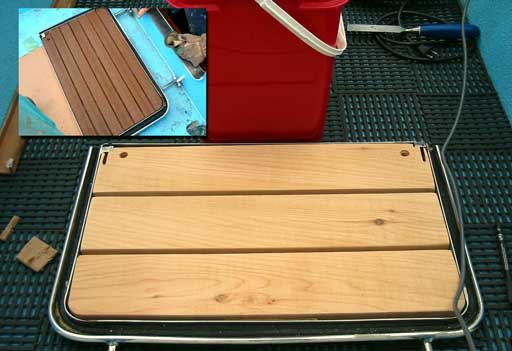
| (Click
here for a full page pan.)
A coffee perker was also early on the list. Gena and I like our coffee, and couldn't do without a small one on the boat. In amp-hours 4 cups doesn't amount to much. 10 AH is worth acouple of cups in the morning! The perker has found a home bungeed onto the forward bulkhead counter (not shown) but as there's no plug there (yet) it must sit on the bread board during the morning. Speaking of the breadboard (right) I rebuilt to fit the freezer lid, it's not big enough for a full size salmon. Darn! I had to cut it's head off anyway... The breadboard/freezer door flip-up now has a simple catch made from a screw and piece of wood. Works great! |
|
| One more
mention, as trivial as it may seem to you, it's not for me. I am the one who
does most of the cooking and the dishes. To not have a garbage nearby is a
proverbial pain in the butt, so I ended up tying a bag to the handrail which
kept getting hit, dumped , and torn off by passers-by. We purchased a door mounted garbage bin while getting our annual flu in Saskatchewan. It didn't fit under there because: (a) the drain pipes are too far forward. (Remember the little cartoon on Day 362?) and (b) they don't flop down like the old ones but have a huge plastic frame and a lid. Too big! We kept the bags and chucked the holder. For temporary use, I stuck a large plastic dog biscuit container under there, and Gena stuck one of the bags in it. Problem solved! It's been there ever since. We're thinking of putting in a bracket to make it steadier. The exhaust fan is obviously doing it's job getting rid of sticky cooking grease etc. I've cleaned it twice, the second time was really gummed up. It may need an overhaul next time lol. Everything else works perfectly, the gimbled stove gimbles well, and the new latches to stop it are far more solid. When the hot water tank is on, it only takes a couple of seconds to get from the tank down the 8 feet of pipe to there. Even the hand pump works, good for blasting stuff off strainers. Best of all, I have gotten back into the habit of doing dishes immediately after eating. One must. They are a hazard in a boat. |
|
|
|
|
| Solent Stay/ Running Backstays | ||
|
|
|
|
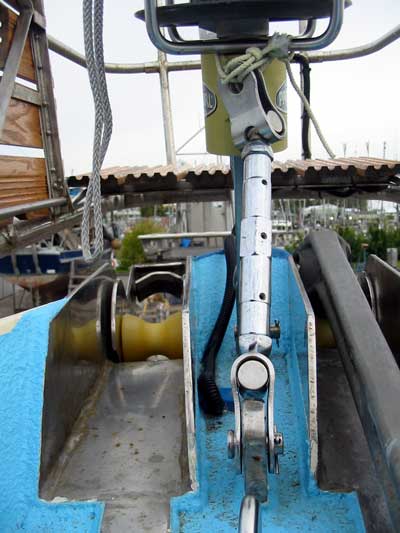
| One really
annoying issue while "at sea" was the solent stay. This is an auxiliary stay
that can be used to hoist a genoa if the furling becomes incapacitated for
what ever reason, or to hoist a storm sail forward, or just to hoist
something up into the air along. Looking at other boats with solent stays,
we have read (and looked at diagrams) that attaching it in closer to the
mast than the forward chainplate, then pulling it in with a large
pulley-like shaped plate to stop it from kinking, is the proven method.
I drilled a hole in one of the stanchion mounts and attached a clevis for this purpose, as it had been suggested we attach it this way. When out on our first sea trial with Ian, he tied it to the bulwark rail. Bad idea. It was constantly coming loose and had to be watched continually. Not to mention the fork rubbed the paint off of the rail to bare steel!!
|
||||
 |
When we went anchoring, the
stay was hooked onto my clevis, and pulled in with a rope, for lack or any
hardware, and held fairly well. The only problem was the tension needed to
be extreme but we didn't want to kink the thing, so it flopped around all
over the place hitting the genoa, the spreaders, and the handrail. Granted
we didn't really give it a chance, but even with it tensioned hard, it still
wanted to slap against the shrouds. While at anchor, we just tied rope around the cable as a running hitch and held it in place that way for the trip back. The solution, so far, was to cut it short enough to be attached to the inner forestay (staysail) chain plate via (yet another) large clevis. (photo left) A large used turnbuckle we found at Mariners Exchange attaches to the forward chainplate, tied onto the furling frame for now, makes up for the lost length when attached. |
|||
 |
|
|||
| Seems this
isn't the case out here. According to the guys at Ocean Rigging, it's always
good to use them one way or another. Now this may be because of the "racing
mentality" out here, or just because the Strait can be quite unpredictable
at times, but we're all ears having no experience in these matters. The stays consist of a 5:1 block arrangement, with a convenient cam-cleat built in, attached to 3/8" cable going aloft to the second spreaders area on the mast. The length of the cable, including minimum block height, has been cut to allow tying up to the aft shroud chain plates while not in use. We have found that some support can be added to stop any pumping of the mast in short rolling waves by attaching them to the aft end of the bulwark track. Care must be taken to remove it if turning off to a run downwind as the boom will hit it! For "real" support though the runners can be moved aft to the dual backstay chain plates where we have recently attached a wider clevis as on the inner foresail chain plate for the solent. Luckily (and I think it's luck!) the boom, even over length as it is, doesn't hit the stays. As just a note, I need to mention that all of these pin-to-clevis modifications have me a bit concerned. Because they are made in Chine, the 3/4" clevis pins weren't exactly 3/4", they were larger. All but one needed to be ground down slightly to fit in the very holes the fork pins were actually loose in. I hope the steel is good quality, as we now have one on each backstay, 2 on the shrouds, and one on the staysail stay. If they start failing ( as "made in china" does often ) we will be in a real pickle! |
||||
| Backup Nav PC, Misc. Stuff | ||
|
|
|
|
| I am beginning to realize the "building/projects" part of the site is beginning to wind down when I actually need to think about what's left to do, and what hasn't been posted to the site yet. Most of the final stuff doesn't show much results, but is important anyway. Case in point is the "pedestal project" that has been underway for so long, anyone following it has probably passed on by now, and other electronics projects ( the super-duper test bench, remote ham radio head, and the chain counter) which are all slowly underway but won't be listed here until they are done. The good thing here is I'll never be bored while waiting for the spring of '09 to arrive. Gena on the other hand, is running out of things to do with only the Jordan drogue to assemble ( next on this page ) and curtains for the remaining portlights that won't have blinds. | |
 |
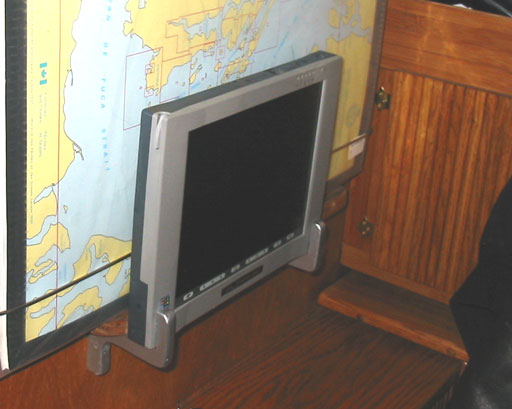
A little project I have been
meaning to do is mount the backup Navigation PC over the nav table. I had
wanted to make them out of wood, but because wood has grain direction, I
figured it'd be too weak. A couple of cutouts from leftover 1/2" Lexan
painted a tacky silver would have to suffice. They don't look as bad as I thought they would, mainly for one reson: they look like they were carved out of thick aluminum plate, and therefore look really cool! |
 Plastic PC Mounts |
|
| A
second ZenStar "USB-mouse" DGPS will
show this PC the way. OMG! Another computer! We must put the lid on 6 PC's.
Any more, and we'll need to re-name the boat
Deep Blue
(lol) Gena insisted on this one as having only 1 PC on the GPS that can handle charts at the flick of a switch might be dangerous in a night/foggy navigation of a tricky pass. I agree, 2 is better. Also one can play video games while navigating, and we are just posting the rest of these Fujitsu 3400 tablet PC's with windows '98 on to eBay anyway. |
|
|
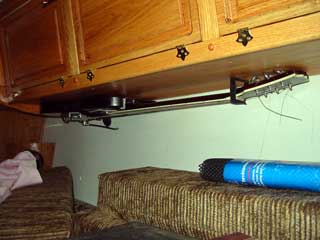
While I was doing the above, Gena reciprocated by mounting my
"ocean-going-for-the-moment" musical instruments up front. No matter how
full the lockers are, and how big things that need to be stowed are, she
seems to find a place for them. She brought her cello (like a violin but
giant) aboard without me even knowing! I don't even know how long it's been
aboard, 1 month, 3? She's good at stowing hey? Below is my violin hidden behind a door, mounted firmly on with screws so whenever I have the desire, it's right there ready for me. Under the lockers, strapped firmly in place, is my electric guitar. I had to let the 2 acoustics go because of their size, and my trumpet, big Moog synth, my other Kawai, and of course the drumset, but it's nice to have these 2 happily having found a home with Georgena's help. |
|||
 |
|
||
| Life Raft, The Bosun, More Paint, More... | ||
|
|
 |
|
|
The end is near! I don't mean the end of the world,
but the end of the boatbuilding, finishing, preparing, and fixing ( for now!
) where we can finally enjoy the benefits of owning a cruising sailboat. I
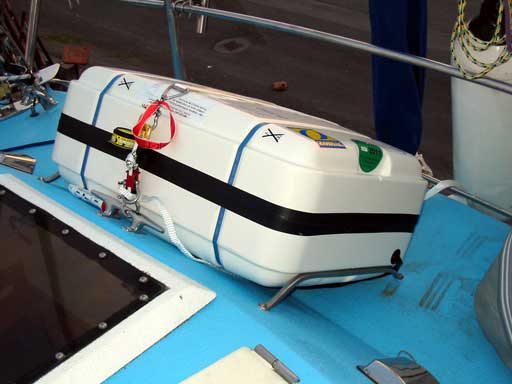
am able to post We have at last purchased a lifeboat. We had wanted a valise style, but due to time constraints ended up getting a hard cased deck mount style. After sales tax it cost us $5000 which is a lot of buckage, but hey, what's a life worth? |
|
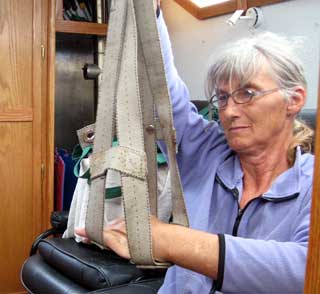
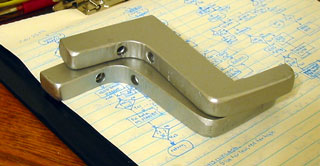
| Where
we decided to mount it, out of the way, and somewhat protected from the
elements, dictated that the consumer brackets wouldn't work. With a flash of
ingenuity, Gena figured out how to get it to mount properly, and save a
couple hundred dollars to boot. |
 |
| We already had some large
cleats that we didn't use that would make a perfect strap mount. ( Photo
above) The strap is connected to a hydrostatic release. This somehow cuts
the cord when at a certain depth, then the liferaft will be released. There
is also a manual release, but adrenaline would need to be pumping to heave
this bugger over the side as it weighs 150 lbs! This further re-enforces my
ideal "I won't step into a liferaft unless I'm stepping up!" The braces for side to side was a little more challenging. We don't have any metal working tools remember, so something had to be fabbed up with only a grinder and a drill. Gena found some left-over stainless hydraulic tubing in under the floor and bent then flattened it into this shape using a hammer and one of the boat stands. Wow! and it actually looks good! I may even polish those up one day. The liferaft issue is solved, well for the next 30 months anyway. After that we'll need to get it re-packed, especially if we're in Aussie was. |
 |
|
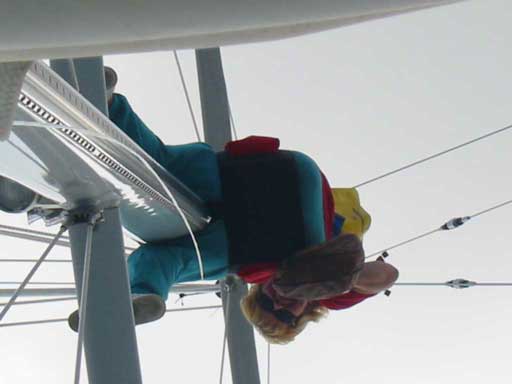
Today was a gain for myself as a block needed to be added 2/3 of the
way up the 68' mast, atop the storm sail track, for an extra halyard there
as we don't want to use the topping lift. I designated myself as the "bosun"
hence took a seat in the bosuns chair. |
|
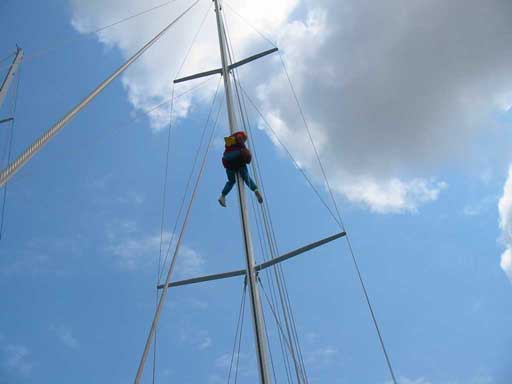 |
At the house, I tried to climb the ham tower and at about 20 feet my legs became wobbly and I had to come down. In the bosun's chair, my legs can be wobbly all they want, and nothing will happen. I won't fall. Sure enough that's the way it was. I didn't feel nervous one bit, (could have been the swig of rum helped!) got the job done, and even had a bit of fun trapezing around. It was a very liberating feeling to know that I can do this. The real challenge will be going to the top of the mast to mount the big 360 degree mast-cam. That may be done in the water so there'll be motion too. Stay tuned on that! | |||
|
|
So if I can loose about 20
lbs before the end of next week, the boat won't tip over he he! I could see what the guys over at Ocean Rigging were talking about going up a mast while the boat is on stands. Something doesn't feel right. The mast wobbles strangely in the wind. They won't go up unless it's in the water. The safety harness I also wore as backup may have been designed by a man for a man as my body (except maybe my boobs!) would likely slip through it no problem even though it's so tight around my waist I can't breath. I'll chalk it up to the winter hibernation feasting for now. |
|||
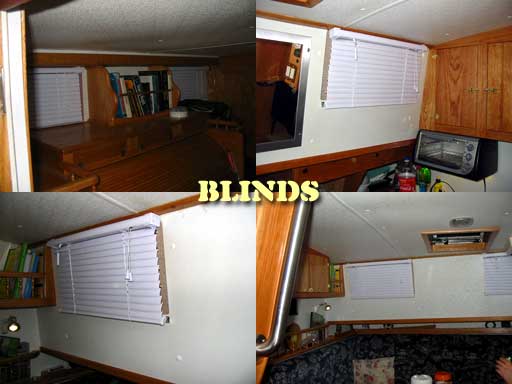 |
Gena
put in some blinds around the boat, well lots of blinds. I thought the would
look cold and clinical but I was wrong! I did manage to reserve the aft port
lights over the berth for curtains, nice little motor home style curtains,
to give a real homey look. They do look good though hey? Now the neighbors don't have a clue what the hell we're doing in here. Among the myriads of other "small" projects, we decided to convert a wind direction meter we bought off EBay a while back into a Rudder meter. I even put a couple of low level red LEDs behind the Danforth button in the center to light things up a bit at night. I made a tiny board to adjust it like a +V, -V sort of Wheatstone bridge with adjustments for gain, center, and zero, that fit nicely into a flash card container.
|
|||
 |
|
|||
| A final paint job was also in order over the past week. The white Ceram-Kote, be it tough and strong, decided to start dusting off in the huge UV counts here, so we decided to give it an overcoat of the Hippo-coat polyurethane mentioned above. The decks and cabintop/sides haven't faded one bit. Only silly people (mainly us) with gritty boots and shoes have caused any damage to it. Grit and dirt have no place on any boat. Shoes off at the dock / dingy. | ||||
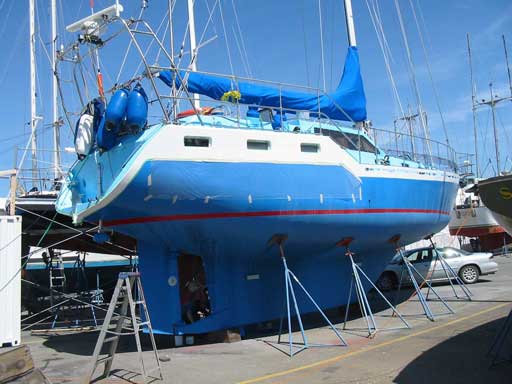 |
There she is, bottom coat
on, (Micron CFC) high gloss brightside and waterline, Hippo on top, and
Hippo topsides. A quick (7 hours) polish of all the hatches and she's
looking pretty dapper. Silly me didn't take a photo, but I'm sure you can
imagine. Now a new job has begun. We decided to clean out and pump out the septic tank today. Keep in mind this is only the 4th or 5th time we've ever used the pump. It's a Jabsco macerator pump, and Jabsco is supposed to be a really good brand. No water. No anything. The housing began heating up and making a funny hissing sound. So Gena pulled it off the tank and lo and behold, only 1 of the six impeller blades is left! I am astounded at how poor quality this is! It is a self prime style pump, yet even though we know it was wet, it chewed all of its blades off. So now we must see if we can get another impeller or pay more $$ for a new pump. |
|||
| Update: The manual
for the pump states that after it has sat for a "while", the shaft must be
hand rotated to break the impeller's bond to the casing. Ever heard of
Teflon?? Ok enough negativity because we found a new impeller for only $22
at Steveston
Marine. Must be a must-carry item. Maybe we should have bought 2 or 3.
Anyway, poor Gena did the stinky job of replacing / re-mounting all that. I
took a photo but I think we'll just leave that one out hehe.
For more on this past week or so, yes we have been really really busy, check out news.htm |
||||
| PropStop, VidCams, I.D. Plate, Ped PC, More... | ||
|
|
|
|
|
Well, here we are back at it again! Not that we're complaining as
there's always something to do on board, but it's amazing how many things a
person doesn't think about until the need arises. A long debated topic arose while we sat at anchor, and turned into a project. The question of whether or not to allow the prop to spin free while under sail for long distances has two strong sides ( just google it!) and I'm on the side that it's ok, as long as the transmission is built to run this way. It's hard for me to be neutral on this but here goes. My argument also includes that wear on the prop tube bushings won't be an issue because a) The amount of turns at 2 cycles per second is nothing compared to the engine driven speed b) The movement will allow grit, sediment and growth to continuously flow out of the tube from the intakes c) The prop not free wheeling (i.e. releasing the energy built up in the shaft) will cause more drag Genas
arguments are equally as persuasive. The prop should be stopped because: The funny thing about (c) is that I have pulled a hand held prop (similar in shape to ours) through the water and have noticed the drag is much less when the prop is turning. A 3 blade may have different drag than a 2 blade. As can be seen in the above photo, Gena got her way, or, I just gave in. The yellow strap is to be hooked on to stop the prop. Using a shaft anode for a catch was my idea though. There's quite a bit of torque there, so hope it holds. A fellow anchored near us at Nanaimo has a slow turn alternator (rare-earth magnets) and he claims it can generate 20 amps! We may be making another change. |
|||||
| While visiting Genas brother Harold in Crowsnest pass, we helped him set up a little video camera that works wirelessly. I was so amazed by the picture clarity that he gave it to us! Thanks Harold! We're putting it to good use already. I mounted the camera on the radar arch, with a small 9 volt regulator (it used a 9 volt battery), then screwed one of our spare monitors to the dash. |  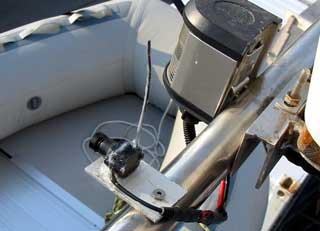 |
||||
|
The camera is aimed aft. What is this for? Well after having sailed
the boat from inside the pilot house, we realized that there are no windows
going aft that one can see from the pilot seat. I thought of setting up a
mirror, but that wouldn't cover enough of the aft to be useful, plus the
coaming blocks of most of the horizon anyway. A concave mirror, like the
security ones, might work off the bum rail next to the mast, but it would be
big, in the way, and the boat coming up aft would nearly need to be on the
transom before we even noticed it. The camera works great, and the monitor can be flipped so port is left and starboard is right, just like those in motorhomes. Best of all the whole thing only uses .5 amps. The receiver unit can be seen to the right of the monitor. |
|||||
|
|||||
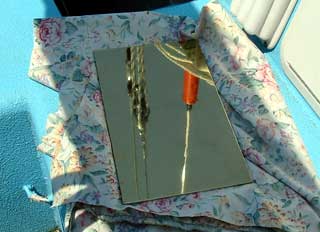
| We went down to the local scrap
dealer in Richmond, and found a nice washroom plate, solid brass, and bought
it. I peeled off the plastic sticky letters, cut it down to size, and tested
some etchant (ammonium persulphate) on a scrap piece. Nothing. It turned out the brass was plastic coated too! It took 3 hours to get it off, and polish back the shine but look at it now! It seemed a shame to etch it again. |
  |
||||
| As you can see it came out fine,
and Gena riveted it on to the steel bulkhead in the pilot house. Job done. There are other projects that we never thought of doing until the need arose: A Riding Sail, a bridal for the dinghy motor, home made radar reflector, and more. Stay tuned! |
 |
||||
| Riding Sail, Motor Sling | ||
|
|
 |
|
|
|||||
|
|||||
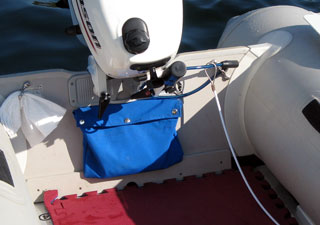
 |
As can be seen in the photo left, a small
pulley splits the weight to 1/2 making it easily controllable by 1 person,
and no risk of the engine slipping off and falling into the water. (4
stroke, big $$, so not an option.)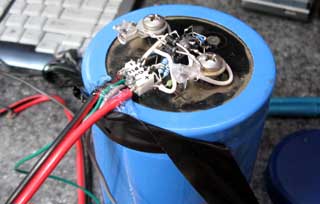
My project for the day was to augment the voltage to the bath tub drain/ door lock motor valve. It couldn't open the valve much with 12 volts, so the water would take forever to drain. Sometimes it just jammed open which is bad when the next person in the head flushes. 'Nuff said. |
||||
|
|||||
| Radar Fix, Ped PC, Entry Hatch fix, Pipes | ||
|
|
 |
|
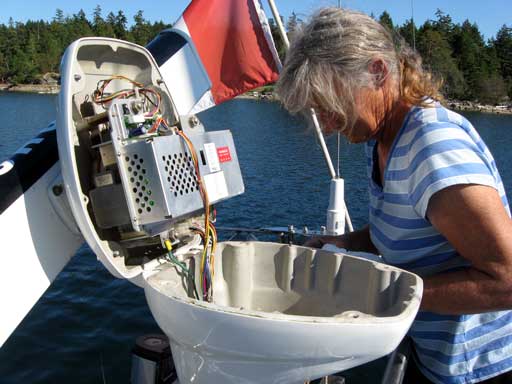
| Well
it had to happen sooner or later. A major peice of electronica screwed up.
The radar antenna is full of delicate electronic boards, plugs, and moving
parts, was used for who knows how long before we bought it, and finally was
damaged by UPS dropping it from a plane or whatever. The enclosure isn't
entirely sealed and it's made of metal. Aluminum conducts heat/cold well,
and likes water as a companion in the way of condensation. A real recipe for
disaster, and disaster struck on our way back south to VanAnda, Texeda. I had noticed strange drops of rust sprinkled around on the decks aft from time to time. It didn't seem to have a source, so I thought it might be exotic bird droppings or something else unfamiliar. After the radar stopped working it became all to clear what the rust was. It had been coming from the metal parts in the bottom of the radar antenna as they waded in 2 inches of water! In the above photo, you can see where the water line was. The interconnect
board is covered with non-gold connector plugs that are crimped on to copper
wires. |
|
|
Gena at the porcelain throne..lol. ok... aluminum. |
The connector board wasn't the only
casualty though. The big motor and heading sensor unit were rusty, and upon
later dismantling, had rusted bearings. We noticed there might be a problem
there because the unit was drawing 8 amps while running. So much power that
the display monitor image was wiggling.
Being tech's we weren't overly distressed by all this, and Gena made sure we have backups for this and that. The motor was replaced with a fresh one, while the old one was cleaned, oiled, greased, and dried out. I bypassed all of those nasty plugs by wiring all of the connections directly. It's hard to stand on a bar and do delicate soldering when the boat is bobbing up and down. Takes practice. So far so good, fingers crossed and all that, it's working again! Gena drilled and tapped a drain plug into the
bottom for future checks. Later on a fellow on the boat behind us asked,
"Does it have a drain plug?" having observed us throughout the procedure.
|
|
I had a funny thought about how much it
looked like a toilet when we first opened it up haha! I felt like using it
for a toilet believe me. This goes to show us: don't trust the way something
is put together even if it is made for that purpose. The sea seems to
supercede any plans to keep water out, keep things working. Respect.
Speaking of
"waterproof-ed-ness ", the case I made for the pedestal PC has been giving
us constant greif. It was sealed well enough, but I kept needing to pull it
apart for different reasons. Wires breaking (don't ever use solid wire for
anything!) and me messing up, water accumulating because I had to pump the
thing up over and over, wrecking the connector board etc. |
|
 |
After cutting open the plug insulator, it
didn't appear to be too bad, but Gena always hated that plg and
started taunting me about it, so I agreed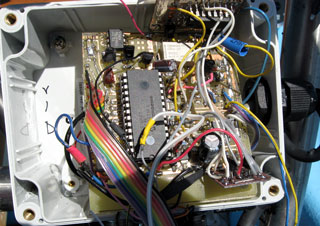 to drill a hole and feed a wire straight in. The original wire was already way too short, so I had to use some giant 14 conductor we have on board. |
| After a whole day of wiring, making an interconnect board and rewiring the little box (above) for the mega cable, things started working fine and eberyone was happy...for a while. After we arrived in False Bay, Lasqueti, Gena notice a relay clicking inside the little control box. I promptly pulled off the lid, and water came pouring out!! In my haste to re-assemble it the night before we left, the night it poured just like the tropics, I had forgotten to tighten the top right screw that compresses that part of the gasket. Yesterday I cleaned it out and allowed it to dry all day. 2 power wires had oxidized right off, but everything is back to working fine again, no serious damage. Yay! | |
| I'm still a bit leery on re-sealing the
PC box. As soon as I do, I'm sure something else will go wrong to make
me break the seal yet again so I'll wait until we're at the marina in
Nanaimo. That way I can storm off and have a drink! Gena got me to hoist her up the mast to get her home-made radar reflector mounted. It's been rolling around in the boat for, uh, 3 months now. It was pretty easy to make out of 1/16" aluminum, after we saw one in a package (and measured it). We just can't pay that much money( $80) for a card with 3 pieces of aluminum in it. Notice how Gena is mounting it? (below, right) Clamped on with rubber wire clamps, then a cord attached to a pad eye on the mast to keep it up. It won't be flopping in the wind in any case. I think that a flopping reflector wouldn't give very good results on a radar, intermittent at best, but then who knows? We're not sure how well it works , but no ships have hit us yet hey. |
 |
| I know you want this page to end, but
there's more yet. Read it all, you never know when it'll come in handy. I
wish we'd have read some of this.
|
 |
|
Remember way back when I was looking for a
durable wood to put into the flip-down hatch at the entry? Of course you
don't, I didn't either and it took me a 1/2 hour just to find a picture of
it to inset here! Anyway, I had used this plastic wood, hollow but waterproof. Bad idea. It breaks like it's made of particle board. After a while it started to break up pretty bad, so while at Pender I decided enough was enough. We found some rough cut cedar at a local lumber place, and I cut/finished it and glued it in. A few coats of oil every now and then and it'll last forever! |
 |
| Solar Panels & checking Antenna | ||
|
|
|
|
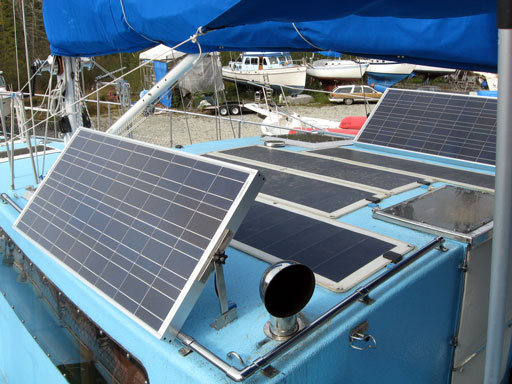
| After a fairly long rest on the marvelous Texada Island, we are back on the boat finishing some work we had began in the fall. Our friend and fellow sailor, Rob, just happened to purchase the same solar panels we did. (photo below) He said they supply him with all the power he'd ever use, even on a cloudy day. Now keep in mind that his requirements, (as with many a solo sailor,) limited to a single cabin light, nav lights, and charging tool batteries, pale in comparison to our electronic menagerie! | ||||
 |
||||
| The TV and related components alone would effectively zero charging from the other 4 panels already on the pilothouse roof in full sunlight. These of course are relatively gutless flex panels at just under 30 watts each compared to the 80 watts each these rigid panels produce! | ||||
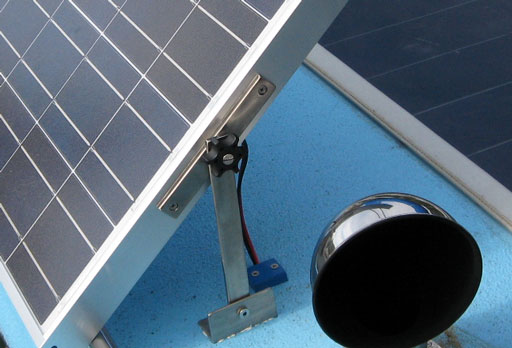
| As can be seen in the top photo,
brackets needed to be made. We had originally considered mounting them on
the stanchions up on the poop deck, like Rob's, but the clutter,
interference with visibility, and their exposure to possible breaking waves
(which could end up ripping off a stanchion) would mean they'd need to be
stowed when in rough conditions. Have you ever tried stowing 2 4 foot long delicate class things inside of a sailboat? Not easy! The bracket material was a bit hard to find, as was steel/metal supplier while in Nanaimo, but we managed to get some, and at a good price too! I drilled, formed, and polished them on a dock at Sturt bay during a wind storm. Ever try drilling a straight hole through 1/4" stainless on a bouncy clunking dock? It was a *challenge* for sure! |
 |
|||
| Long ago, Gena had modified a few
Sirius satellite display mounting bracket knobs to accompany a 1/4" bolt,
with the idea we may use them one day. Well here they are! I have just
purchased some SS snap pins so the brackets can be locked at various
positions. This way, I can grind off the stops and allow the panels to swing out further. One thing I never thought of is at this height, they partially shadow the other panels. (duh!) Anyway, now they can swivel toward the sun. Even mostly overcast skies gave us 5-6 amps all day, so in full sunlight we may get 20+ amps. Another job was to add more Interlux Micron CSC to the bottom (Much to my chagrin. That stuff is $230/gallon, and Gena used 2 today!) then paint some up over a bit of the waterline. Gena's over-enthusiastic pressure wash revealed some poor adhesion of the cheapish Bright-side paint to the Ceram-kote, so I still need to paint those. We moved one of the compass sensors further
forward to get it away from the batteries and cable. We hadn't considered
that when the engine is running, as much as 225 amps of current can be going
through that cluster, veering the compass by 90 degrees! No good. |
 |
|||
|
||||
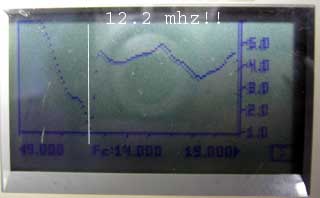
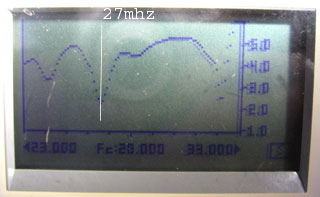
| The bottom end at
80 meters, shows not bad at 3.1 Mhz, but "missed the swr boat" on 20 meters
- my favorite, by 2 megs. (sniff-sniff) Then to add insult to injury, the 10 meter mark was missed by 2 megs, ending up in the useless CB band! Oh well, that's what antenna tuners are for. I have made numerous US contacts as well as eastern Canada for sail-mail, so it's all working fine. Now if we can get Robs antenna working we'll all be happy boaters! |
||||
 |
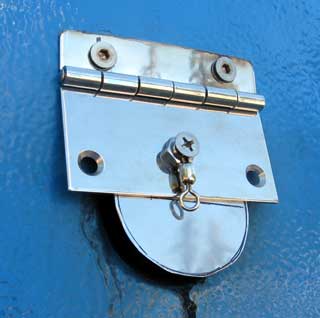 |
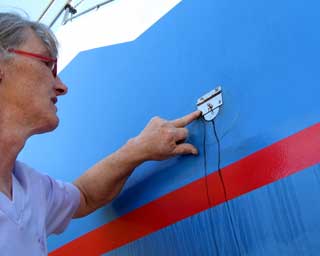
Some
of the more important things to do before the boat goes back in were
somewhat overlooked, or forgotten! The exhaust plug was one very imortant "to-do". Last year, we installed a rubber flap, but it didn't have enough give which resulted in the side of the boat getting sprayed with black soot. YUK!! Gena was going to just make a stainless flap from a hinge and a thin piece of plate when it dawned on her: "Why not just make it fit inside the hole?" There is a little shelf where the SS 3/8" plate meets the SS pipe so it'd be perfect for that. The photos show how it all worked out. A string will be attached to the fishing swivel to pull it up when required. When a wave slaps against it with the intention of going up into the exhaust system, it'll slam shut! |
|
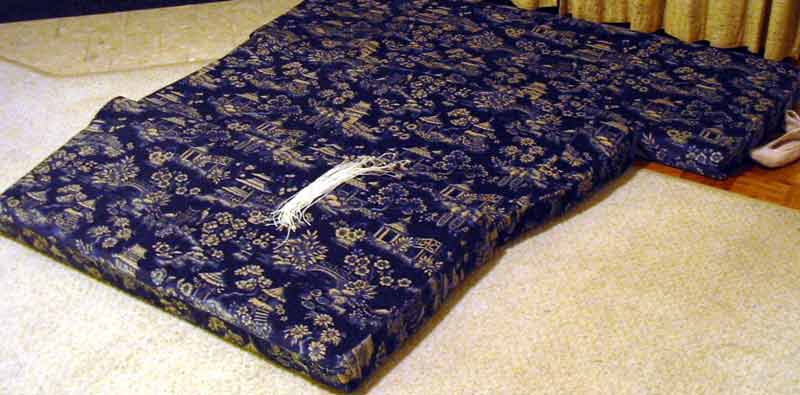
| Another thing that somehow slipped by forgotten was a lee cloth for the forward berth. The aft berth doesn't really need a lee cloth as it goes all the way across port to starboard, but the forward berth is facing the bow along the gangway. It will stop one from falling out of bed on a steep heel, and more so, stop serious injury in the event of a knock down. | |||
 |
A few stainless snaps screwed on to the inside of the frame, then
their mates sewed into some left over sunbrella solidly attaches the cloth
at the base. The top corners of the cloth are secured via rope through grommets leading to cupboard door handles screwed to the bulkhead and berth enclosure. I stretched a rope across and hung from it to be sure it is strong! The lee cloth also offers something to snuggle against when on a port tack, as the berth is quite wide for one. Notice the long block cushions we made? There's 3 of them 3 feet long x 6" thick x 10" deep that are handy for leaning against while reading, or putting along the side as a type of "bumper". |
||
 |
A really neat addition I just did was changing the compass light. As
we haven't sailed much at night, the green light over the compass was never
used, thus never hooked up. The way the light was rigged blocked the view so bad you'd have to sit down to see the heading. If you have been to dollarama lately, you may have noticed (or bought) some of those solar charging lawn lights. These ones are quite nice, made of stainless on the body and shaft, and have a white LED, removable battery, and a switch. I took the top off one, exchanged the white LED for a red one, and drilled holes in the existing mount to screw it on top with the LED shining through the original mounting hole. The result is a perfectly illuminated circle that only lights the compass card. I can't figure out why there'd be green LEDs in the original! Green is blinding to night vision. Anyway, we just leave it on as the light from the day charges it up enough to go all night with energy to spare...all for $2! |
||
| Well, that's it for
the projects aboard page, although there will likely be another page in the
future as boatwork is never really done, we have been told. I also
have lots of electronics projects on the go, that I think I'll add in the
electronics/PIC programming area of the site.
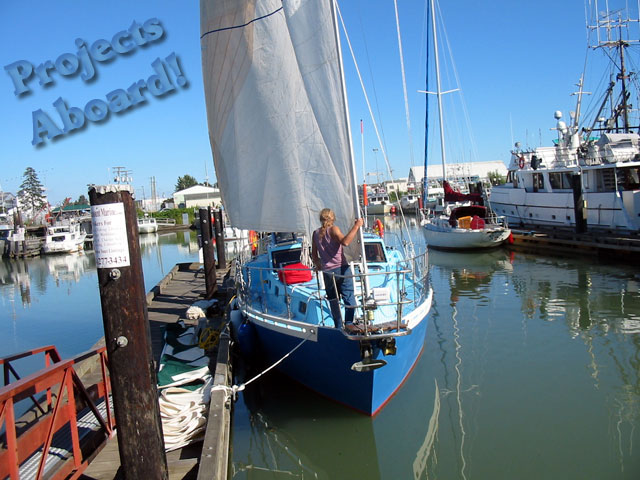
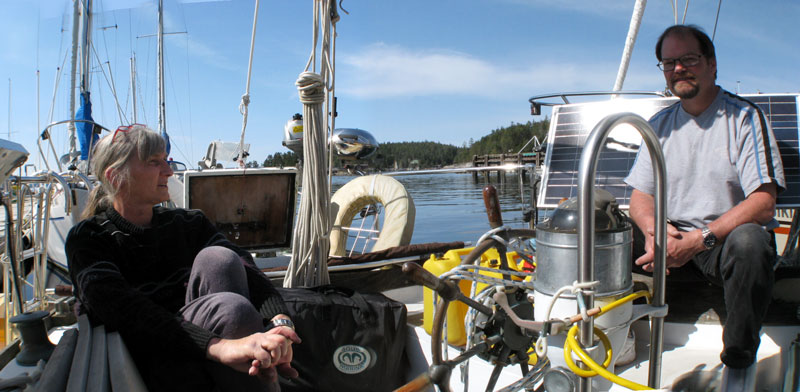
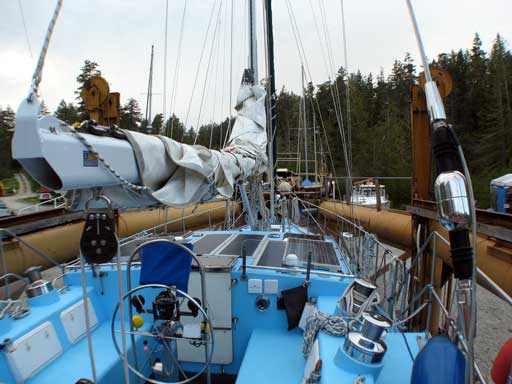
As can be seen below, we're all ready to go on a
real passage, and we're going come-what-may! I hope this page can be
of help to someone out there in the future, and many of these projects will
be covered in the second video DVD at
filmbaby.com. |
|||
 |
|||
---last update May 19, 2010---
 |
..to Main page |
 |