| LED LIGHTING | ||
|
||
| As mentioned on day 386, LED lighting on a sailboat is the way to go! With new manufacturers in China and a little experience with photo etching PC boards, ( Or hand drawing if one has time ) LEDs can rival and surpass incandescent lights both illumination and wattage-wise. | |||||||||
| Led bars can be
purchased as boards at a very reasonable price only requiring a wire and
plastic case. We have used soft hose (3/4") to house ours. The ends are
filled with silicone and clamped together with a screw to dry and mount. If
the curved out part of the tube is on the bottom side of the board, the
screws pull it flat when mounted. Sort of like a spring loaded mount. The wire is split to allow room for screw. These only have 16 LEDs but are about as bright as a 12 volt fluorescent trouble light, with half the wattage draw. Great for under the deck to illuminate counters, desks etc! |
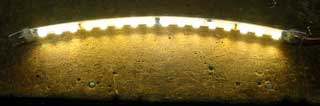 LEDs powered up, gaps are where resistors are.  |
||||||||
 |
|||||||||
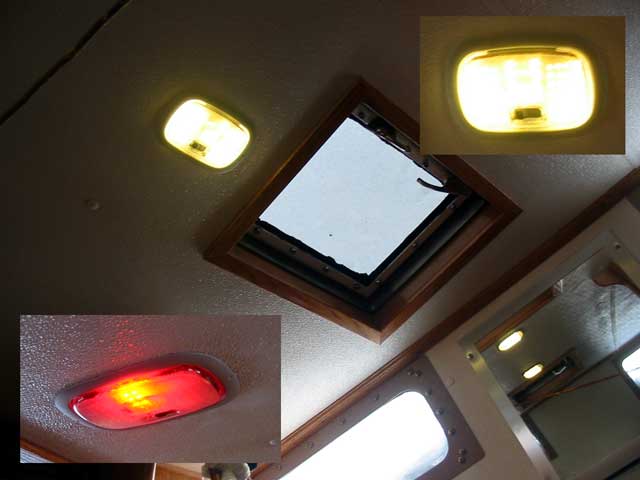
| The overhead lights ( bought
surplus) present a different challenge. An "LED bulb" would work, but the
brightness is nowhere near that of an incandescent bulb in the same mount.
Because there is so much room inside these automotive ceiling lights, a
board with LEDs on it can be mounted. If all of the little legs are cut down
to half length, flat top 4-pin high-flux LEDs easily fit into even the most
flush of enclosures. From what I have seen so far, these buggers are bright when full on! Luckily these cases have a second switch that can be used for a dimmer by turning some off. The center LEDs on both boards are reserved for a few Red LEDs. This is for conditions at night that won't ruin the night vision. |
 Gray light fixture, click to enlarge |
 Purple Light (painted white) in forward |
|||||||
| Configurations: Because LEDs for the most part aren't 12 volts, there must be some voltage compensation with the LEDs voltage the target. These warm white LEDs each require 3.2 to 4 volts ( abs. max!!) to operate. One way this can be done is to connect identical LEDs in parallel, then regulate to 3 volts. The more common method is to connect 4 in series to make 12 volts, then use a low ohm resistor such as 10 ohms to reduce the chances of over voltage surges from variations during charging etc. While that method seems to work well, the resistors must get larger as the amount of LEDs goes up. The resistors create heat, which means the circuit is loosing efficiency to the air, power that should be going to the LEDs. High watt ( >1 watt) resistors start to get bulky and expensive. Also, the LED brightness can vary greatly from charging to low voltages on the batteries. Not at all like a bulb. My solution is to plan out the mA draws in advance and use a regulator. I have measured these hi-flux LEDs and noticed they are fairly happy at 3.1 volts. No heat, and fairly bright, about 70% max. At 3.5 volts they are really drawing current, and at 4 volts they are getting hot! Using a 7809 regulator with a diode on the "ground" side going to ground gives 9.6 volts. 3.2 each. The diode located under one of the LEDs will pick up any heat as the LED warms. The warming diode will conduct better thus lowering the voltage. A balance can be obtained that emits minimum heat for max brightness. I will be experimenting with 2 diodes in series to start. That will make 10.2 volts, 3.4 volts for each LED cold. The boards are done, the LEDs are going on this week! Yesterday, we tested the first light in the boat. It provided a nice amount of light that is plenty easy to get around under at night. Unless one sits right under it, reading is more difficult, though not impossible, hence the reading light are strategically mounted. The regulator idea works, but it seems the diode needs more to be near the regulator than on the LEDS. Without heat sinking, they get quite hot.
ng wAbove the photo illustrates the low profile lights over the galley and dining areas. The both of the on at night provides ample light to work/cook/read under. What more could on ask for! The center switch position makes the light go red. Amazingly easy to see under as well. While messing with the
dash dimmer board I thought about an automatic
LED controller based on PWM (pulse width modulation) that would either
(a) sense the current draw and lower or raise voltage to compensate (b)
sense the temperature via a thermister and compensate, or (c) use thermal
and a CDS cell to balance the max brightness without overheating the
LEDs. Using a PIC chip to control a light seems silly and wasteful, but
these days PICs are so cheap it's not a problem. Nov30 2007 |
|||||||||
| Sandy Sims | |||||||||
 hebeiltd.com.cn |