| Project 11 | 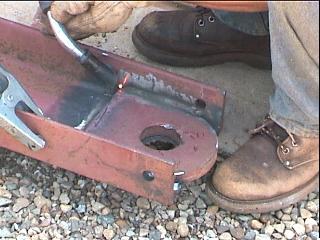 |
Turn Over |
Putting in beams for crane
| The order was for two pieces of "I" beam to span the beam width, and allow a solid connection for the crane to lift the boat from. As we searched the scrapyards, a "C" shaped set of 4 beams was found. Each had a tab pointing off 90 degrees on the back of the C. I plasma cut those off, there were 4, and placed them inside the C for greater strength, cut out the hole and voila! Welded together they made 2 14' very heavy beams. |
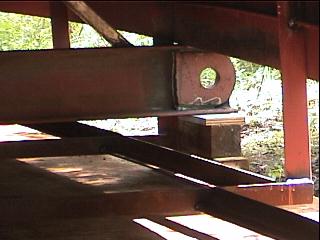 First support beam in place, ready for crane! |
After these were in place, the diagonal
cross supports were put in, attaching to the webs and frames on each
side. All frame welds were rienforced for maximum rigidity. We don't
want to take any chances! We then jacked up the whole hull, fist one side , then the other and mounted it on (only) four blocks. One can be seen to left. |
|
The hull was very rigid and
solid. Not even bouncy at all! We were amazed, and relieved about this. We
then pulled out the strongback that had supported everything since we
started the project. We
then pulled out the strongback that had supported everything since we
started the project.All ready for turnover! |
||
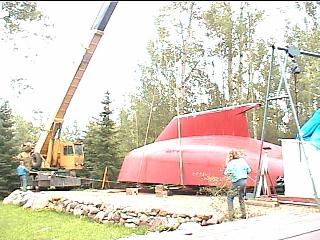
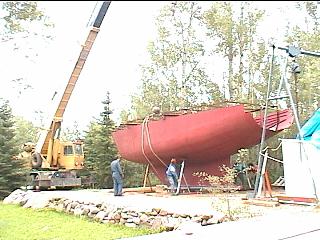
| After the keel paint had sufficiently hardened, we could only wait for the crane to arrive. The following Saturday the crane arrived. As soon as he pulled in, a small crowd gathered at a "safe" distance from edge of our driveway! | ||
| To our amazement, everything
went so smoothly, it took only about an hour! Firstly, the crane operator inspected the re-enforcements we had made, then hooked on a steel cable to each of the eyelets in our c-beams. 2 loose on port side, and 2 tighter that ran underneath the boat. On the other side he connected two slings to the same eyelets on starbord side. These ran up to the higher hook on the crane. Our job was to steady the boat with ropes tied on fore and aft so it wouldn't hit trees and whatever else! |
|
|
| As the crane pulled the hull
upwards, the weight was really apparent from my standpoint, it was going
to turn and I had very little effect. Oh well, it looked good anyway! (
pic above ) Of course the photos show no justice whatsoever as to the size of the hull hanging there. A pause was in order so more photos could be taken. ( operators idea haha! ) |
||
| As the boat came past half way around, the slings rolled into the hull on one side, while the cables would support the other. Once completely around the slings were loosened off and the single crane pulley with 4 cables held the hull ready for positioning and sliding in supports. |
|
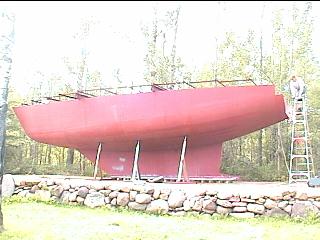
| The stands lined up perfectly and needed
very little adjustment. Also the hull was completely level both fore and
aft, and port to starbord. ( See I'm using the correct terms! ) The height of the aft where we will be climbing in over the next few months was way higher than we thought! Good thing the transom isn't on yet. We noticed the only the blocks underneath first 2 1/2 feet of the keel were load bearing, so the crane operator advised we build a small stand for under the bow area. This would prevent it from walking. Good idea!! |
|
| Well there it is! We are newly
enthused about the upcoming deck work and a real change in scenery around
here! If you are building a boat in the Edmonton area and need it turned
over, call Champagne Crane because he really knows how! We spent the rest of the day sitting inside the boat and making plans :o)) |
|
See the Video in Realmedia!
![]()
to Individual projects main page