| Project 2 |  |
Installing the hull Stringers |
| Today proceeded like clockwork. Unfortunately the clock seemed to be going faster and faster! Plasma cutting out the slots with our aluminum templates went smoothly. We cut enough for both the deck and the sheer stringers, which doesn't sound like much but that makes 40 slots! We wanted to make the stringers 1/8" proud all around so the templates were moved out by 1/8". This actually created more work as all of them had to be ground deeper, so next time we'll just go with the original depth of 1-1/4". Also, at the same time the frames had to be leveled | ||
| to vertical at the
point of the frames. They should way up. As shown in the sheer stringers both had a bit of difficulty come into the stem at we shifted them down up. We then tacked It's amazing how they |
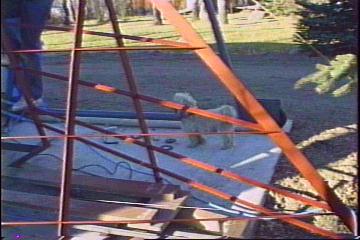
 Stringers coming in to stem |
where the stringers
meet also be vertical all the photo here, the deck and come in to the stem. We getting the stringers to the prescribed place, so another 1/4" to fair them them on working astern. all just fell in place! |
| After they were in place we checked for fairness of the stringers and found only one flat area between the frame most forward, and the 2nd most forward. Not bad! I must admit though, this took much longer that I had anticipated. Once again the plasma cutter was invaluable, causing minimal warping easily corrected with a hammer. And thank you oh great meteorological gods for giving us fair weather once again! Now please, one more long weekend... ;o) | ||
| After cutting 40 slots last weekend, we must be getting better at it. I did the cutting, while Gena set up the templates for the next cuts. Today we cut 60. That means 3 more stringers on both sides. While the shape of the boat continues to evolve, all those stringers are now getting in the way as one can only enter from the front or back. We decided to run some 2x6's down the middle next to the center line so moving the welder and the plasma cutter back and forth would be easier. ( Believe me, it's no fun trying to pull a 250 pound welder through roots and soft ground on those little castors! ) | ||
| I have been able to cut the slots fast enough to minimize heat in the bar. From these cuts there was virtually no distortion in the frames. In the photo, the slots shown haven't had any grinding, but needed to be as most were still a bit narrow for the 1/4" stringers. |
  |
|
| Pulling the stringers around the frame wasn't as hard as we thought it would be, but cutting the angle to meet the stem at the bow was tricky. We developed a method to accomplish this. The stringer needed to run up to the stem inset by 1/4". As the stringer was too long to begin with, it of course couldn't sit in the position it would be welded at. Also, after being cut, the position would change as it was pulled in tight to the stem. By making a mark on the stringer perpendicular to the position it should end up at, then marking a line from that, parallel to the stem but inward by a few more degrees, a tight fit in the right position up the stem is almost guaranteed. This saved a lot of grief as slight movement up or down the stem | ||
 |
could make a huge difference in it's final position forward and back. I must admit we made a mistake that was rather silly. We didn't recognize the position of the radius to straight section and cut a slot in the wrong place. Almost 2 inches out. Of course we didn't notice it until we had tacked on the whole stringer. That prompted a lunch break and was fixed shortly after! | |
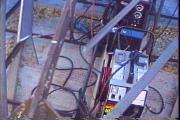
| The small picture shows how all the stringers bunch together near the stern. Some of these should probably be cut out here as they are too close together and would be almost touching once they reach the transom. | ||

| Putting in 5 frames that just have to sit on top of angle irons between existing frames seemed like a simple enough task before we started. It was when we noticed a considerable sag in the supporting angle pieces that we new it would take longer. | Shown above: Hoisting a half frame into position |
| The welds from the frame to the supports, while cooling, had pulled upwards on each side thus lowering the overall height of the frame. See?!! Even us seasoned welders, well one season anyway, get fooled from time to time! Luckily, Gena had built a great little bending tool last week, which promptly straightened them back out again. (Shown below) With a bit of patience and practice we had it doing | |
 Gena's Frame Bender |
the job well. I'm sure we'll
use this tool again! After a couple of hours we had them all straightened out and ready for marking for the slots. Myself cutting the slots while Gena set up the next slot templates proved to be difficult as these were much higher up and we had only one ladder. So Gena became "monkey-girl" swinging from one "limb" to the next, clamps and templates in hand, dodging flying bits of molten steel from the cutter, me! Amazingly we completed 80 or so slots before the day ended. |
| I think we scared away another prospective buyer of the property adjacent to ours, as they drove by wide eyed never to return! |


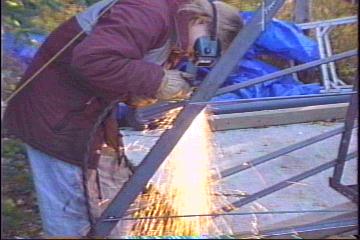
| The top stringers were somewhat difficult to put in, we could have used a third person. 1" flat bar is solid enough in short lengths but turns into spaghetti over 40 feet! Grinding out the slots was a bit dangerous as most of the time the grinder was being held upwards and would hook in then buck hard in repercussion. | ||
| We just plumbed and tacked frames 3 to 8 as the others will have to be faired out. After deciding to run the stringers along the keel in an equally spaced curve, we made a mistake cutting 1 slot in frame 2, as it didn't fair up. So we didn't cut the rest . You can see the 3 stringers on each side tied together and covered with a glove in the photo. After 4 pm the weather went really cold and windy so we finished up for the day. |  |
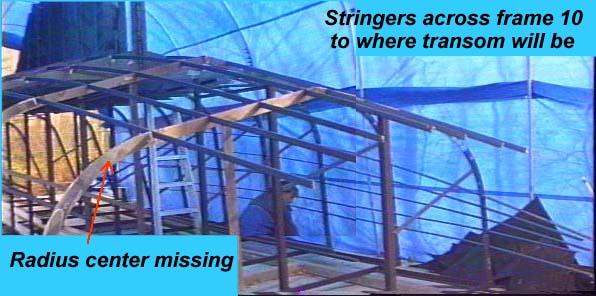
| Today we faired in the stringers fore and aft. Originally I wanted to continue the curves inward as it would have looked nicer, particularly at the bow. But it turned out to be impractical as they would have fell short near the bow, and curved in too much near aft. So we continued to divide them evenly, cutting them off near the bow when they came too close together. I still would have liked to continue those curves though. I love flowing curves! Oh well. Below is a panned view showing how we | ||
 |
||
| corrected the stringers aft. The last frame (10) will have to be pinned down with sandbags because after pulling down the last 2 stringers, believe it or not, it lifted right off the strongback! We had previously made a scale model of the frame and it did the same thing. I figured the sheer size and weight of the steel would hold it down....guess not! :O) | ||
 |
We finally filed the slot templates out to the exact perfect size for " no grinding needed " fit of stringers. And no distortion occurred today, still a good idea to check. To the eye, all the stringers look as though the plate will lay smoothly over it, the straight bar lines up with all the stringers on the straight sections. |
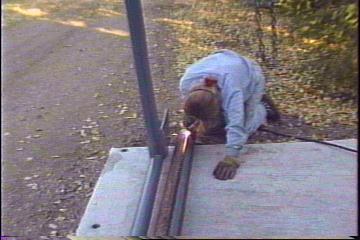
| Although today was short, (had to work until 2) a lot was accomplished. We cut and ground the slots for the final stringer, the center radius. Then joined the flatbar to make 40' both sides, and put them in place. Faired them up 1/8" and tacked them on. That took only 2 hours. Then we decided to use the 4" pipe for the keel edge instead of a smaller size as it would save a lot of work during plating and seems to be "a good idea at the time". After using a short test piece, and placing it across the webs, took the 8' piece and split it with the plasma cutter. (pic above) | ||
 |
<<
Radius stringer at stem cut off to butt to stem Same stringers after being |
 |
| I seem to be getting the knack of dealing with angle cuts, ( brag, brag, brag! ) as you can see above. The pic to the left shows my cuts this side of the white line freehand drawn by eye. The pic to the right shows how nicely they butted into the stem bar after being pulled in and tacked. Wow!! I hope that keeps up for next summer ;o) | ||
 Here we are test fitting the split pipe over the forward part of the keel |
||
| With the split pipe
we'll have to be careful as that is part of the finished hull exterior.
It seemed to fall into place quite well and the angle we split at will
flow into the keel plate nicely. ( Part of the reason we decided to use
that size.) I'll have more close up pics of that on day 22. |
||

![]()
to Individual projects main page