| Project 21 |  |
Put In Lead Ballast (8000 lbs) |
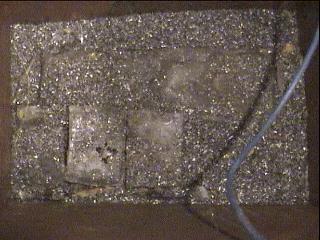
The time has come to put in the lead. Partially because we need to get that done before the plate can be put over top (of course! ) but also because we are tired of it being in the way! Most of what we have is scrap, two large pieces 800 and 1000 lbs from a crane counterweight, flat pieces from around chimneys, pipe and cable covering, wheel weights, and other odd chunks. The rest, about 2400 lbs is ingots about 100 lbs each. Totaling to about 5600 lbs, the required pre-placed amount before balance distribution once in the water. Gena discovered that indeed a chainsaw is the best way to cut through large chunks of lead, after trying a circular saw, the grinder, even the plasma cutter! ( Messy splatter don't try it!! )
|
|||
The steel ribbing was cut out with the grinder and finally the big pieces were becoming smaller. One piece we carried up was 270 lbs, our limit on the end of a rope. We then suspended it between us on a pole over the keel, and pulled the pole quickly though to allow it to fall in. Pretty dangerous, I don't think we'll do that again!
|
 |
||||
________A Better Way...______
 |
Now we're cookin' ! The kind folks at Ryan's Scrapmetals in Nisku Ab. were good enough to lend us their propane tank, tiger torch and even a melting pot for a few weeks, which saved us having to rent or buy one. Thanks guys! For the first time we have seen what molten lead looks like, a bit like a pot of solder, or mercury, once all the impurities are out. That brings up another cool point. Pieces of steel float on top of lead. Floating steel! Something you never really think about until you see it for yourself! It's a good thing too, because it
makes things real easy for getting out the junk with a straining ladle.
Lead just filters right through it.
Other impurities, as long as they didn't contain water, or large air pockets, were ok ( except some smelled pretty bad ) |
|||
|
|
|
|||
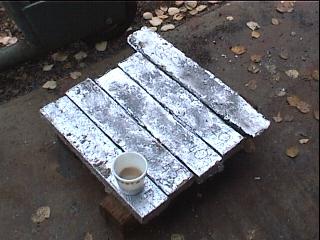
| 6 months later, in the spring, the kind
folks at the local scrap yard finally asked for their propane tank and
tiger torch back so back to making last minute ingots! These are for
the trim ballast, about another 2000 lbs.
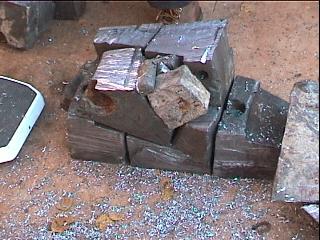
About 1200 lbs of this ended up getting hauled to the scrap yard at the coast as we had way too much. Funny how when you buy lead it's up over $1.00 a pound, but when you sell it, its only worth 40 cents, 45 if you talk nicely. Must be the metric conversion, or maybe "the changing markets" as one scrap dealer explained. ( Maybe we were both wearing our "I'm with stupid" T-shirts that day...? ) As a final word on lead, if at all possible,
melt and pour directly into the keel. Our bottom keel paint job was ruined
long before the boat was finished anyway, so it wasn't worth the grief.
The trim, of course, should be left in manageable sized, 50-75 lb, ingots. |
|
|||
![]()
to Individual projects main page