| Project 23 |
 |
Bulkheads Installation |
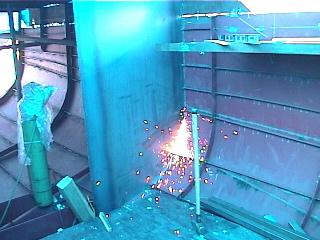
Put up a bulkhead aft of pilothouse
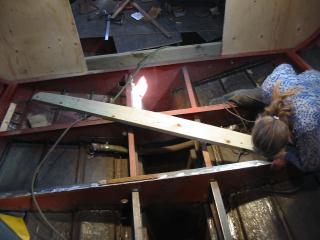
| The bug got us! It's in the
middle of Febuary, normally a brutally cold month in Alberta, and we're
out working on the boat! We heard on the weather that we'd be gettin to
+10 today, so we got some last minute 1/8" plate, ( that's a story on it's
own ) and new clamps etc the night before. Ready to go at a moments
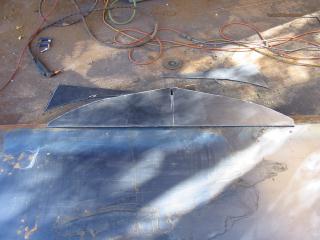
notice! The pic above shows what we learned from a 5 second segment of a professional boatbuilder on That's boating TV! We used gluegun glue to stick each peice on which works great when it's not too warm out. |
 Bulkhead is cut from batten pattern, very accurate! |
It does take a bit of thought
though as to where exactly to put the sticks. For the other side we will
use a few more on the radius as that was where the ( slight ) error
occured. Normally the bulkhead could be set on top of the stringers, but
as we would like this bulkhead to be watertight, seating it to the hull
seemed a better idea than piecing it together with flat bar after. Pic to left shows plate marked by the batten. ( We may use it for plants in the spring hehe! ) |
|||
 |
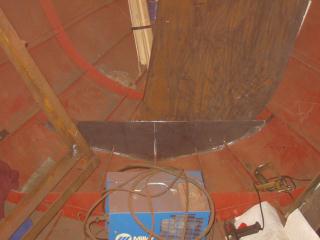
Wiggling it into place, into
the stringer slots, proved to be the most difficult task of the day,
partially because of our taped down tarp pulling at the top of the plate,
and partially because both of us are maybe a teeny weeny bit out of shape! Anyway the bulkhead ( left ) is 4' wide and 10' high ( to the pilothouse roof) We're going again tomorrow if it stays warm.
|
|||
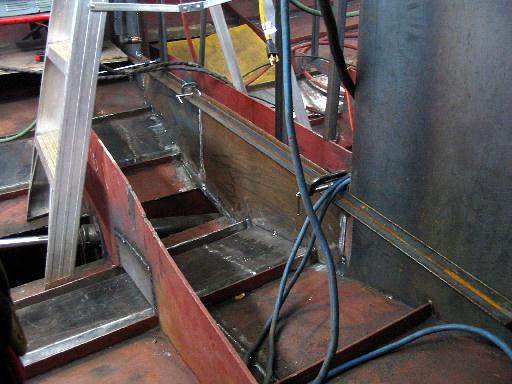
| I battened a base for the pilot house aft
bulkhead, cut it out and tacked it in. This way a 4' piece of plate will fit
nicely in place as this left a rectangle hole to fill. in the photo to right
it's to the left. Next I cut a small plate to fit in, thus sealing the fore and aft sides of the bulkhead. This piece is actually a shelf above the keel opening aft where some trim ballast will be placed. This means that plate had to be removable. |
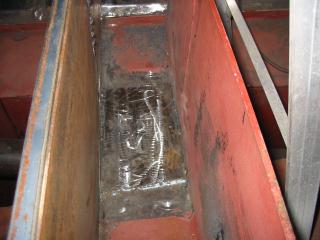 Sealed plate "shelf" between frame and bulhead |
Pilothouse Bulkhead
| As before, we are using the stick method to aquire the shape of the hull for the pilothouse bulkhead. | |
| This bulkhead is somewhat different from the
origional plans. Instead of dropping straight down from the pilot house
"dash" to the bottom of the hull, we decided to have it jutt forward to
meet a web frame.
Besides making the job somewhat easier, it also allows for space forward under which the fuel fill line can be split into three, access to those valves, and access to water fill, watermaker, pump out and black water tank access. In other words it has solved a lot of problems! The plate had to be bent 90º forward then 90º back upward by a metal shop. Origionally the idea was to put in the whole piece port the starboard, but as luck would have it, the 1/8" was the heavier "gauge" plate and it was way too heavy and difficult to handle. The solution was to split it just above the 90 going up. |
 |
| The plate can't be too strong,
but this is incredibly strong!
Both sides were tacked in place with ease and the top portion of the bulkhead will be done tomorrow. The height of the seating is that of the pilot house floor less about 1 inch, which will rest on top of it. |
|
| The port side of the bulkhead has already been cut as measured in one batten, but the starboard top side wasn't , so a bit of heat glue and more sticks remedied that. | |
 This simple shape ( to the right ) would be very difficult to make without those sticks! The accuracy is important as this is a water proof bulkhead...although....if the water was already this high, we likely wouldn't still be around to see whether it held or not!!
Lower right photo shows the bulkhead in place. Trimmed along the curve of the "dash" under forward window. As can be seen, a doorway cutout there is about to become a priority haha!
|
 Forward Pilothouse Bulkhead
|
| Today we put in the other haf of
the pilot house forward bulkhead, trimmed it down to match the dash and
tacked it in. My origional plan of putting drop boards in may be changed as
Gena doesn't like the idea. She has read that people get lazy and complacent
during rough weather and don't bother. If anything happened ie. a window
blew out, it would take too long to dig out the boards and put them in. I had to agree on all points as I can be pretty lazy at times hehe. Possibly a sliding door may be more appropriate. One that we'd never use, but is there just in case. A roll shutter pull up door might be another option, or alas, a regular "in the way" door that swings into the galley (port) side. Yuk! |
|
 Base for forward bulkhead rendered from another set of sticks! |
My next job was to make the base
for the forward most bulkhead base. I used sticks glued together for a
batten again. I'm getting better as it fit right into place!
I also cut out the aft pilot house bulkhead's center section which we'll put in tomorrow. Today was a beautiful day for October this far north. 23ºC ! It was like summer and gave us lots of energy to do a lot in a short time. |
| Gena welded up the forward pilot house bulkhead to make it waterproof. It's not bad around the radius curve as nothing will shrink and pull in, but on the flat sections great care must be taken to keep the weld size down and only on one side. Coal tar epoxy will be painted on these seams to ensure there is a good seal. | |
Sail Locker Bulkhead
 |
My day was taken up installing the forward
most bulkheads base plate. It fit in fairly easily. The plate for the
bulkhead itself ( I attempted to fit today!) Is 1/16" and is very floppy!
This will be supported by vertical stiffeners all on one side of the plate. The door will be offset to allow for more room on one side. Those sails are huge!! |
 |
As the bulkhead is only 1/16" plate, I managed it up the ladder and into the boat quite well. Getting it into place was a bit of a trick, I almost had to get help from Gena! The bulkhead will have to be supported with some vertical 1/8" angle because it's pretty floppy stuff! It does guarantee a decent seal though, which is why we chose steel here. This isn't the crash bulkhead per-sae, but it would serve as one in a catastrophic bow event! |

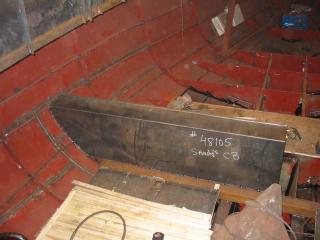
Wood Compression Bulkhead
| And now for something
completely different....... |
||
 |
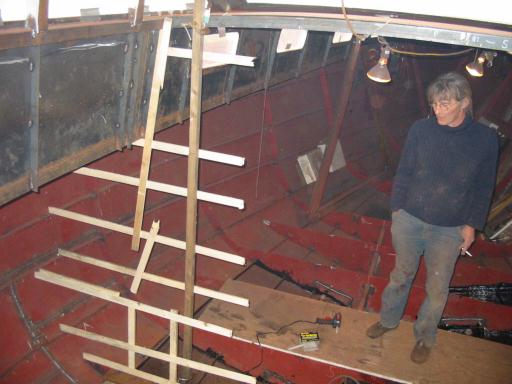
Wood is a fresh
change from the old steel humdrum, and pretty different to work with in a
boat compaired to a house or shed.
The one thing with wood is you can't really bend it much to fit it in! We are using 1/2" ply and it doesn't have much give. Exterior grade is a must in a boat ( at least ) and could have even been the treated stuff like the ply we purchased for the floor. ( Good thing too because it has been sitting outside for months now. ) In the photo to the left, Gena is cuttin the headboard that goes over the cabintop. It must have a cambered shape of course, and proved to be difficult to cut with the jigsaw. |
|
| I think the blades are just not
very good for this tyoe of cutting. It's a thought anyway. Fur is pretty tough stuff to cut along the grain, even the table saw couldn't deal with it. |
||
 |
Another thing with wood is if you make a
mistake, you can't weld it back together very well so mistakes should be
kept to a minimum haha!
After these panels are completed, the 2x6's will go on next followed by another layer of ply. This ply must be staggered for strength opposite the other side. Not a hard job here because the door is so offset to starboard. The seams will be calked to the steel once the whole bulkhead is ready to go! |
|
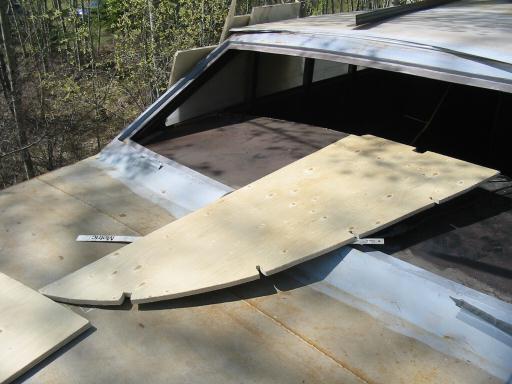
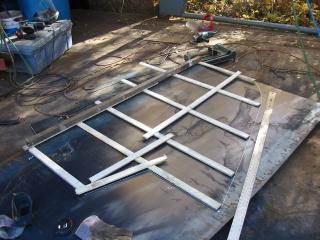
| By hook or by crook we were
determined to complete the installation of the only all wood bulkhead
today. Above can be seen a section of the second layer of plywood cut and ready to try in place. |
|
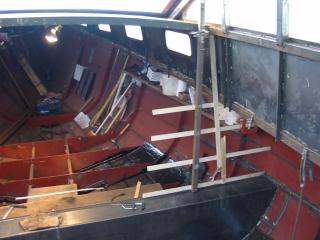
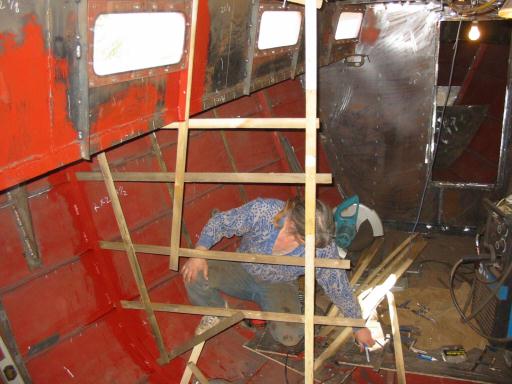
| Because the ply must be staggered, this
piece is much smaller than it's opposite. The stagger is of course to maintain strength throughout the bulkhead, a good practice in any load bearing structure. In the photo to the right, the framing can be seen tapped into place. We can't screw things together until we have all of the sections cut and fit, removed, and the frames to which it will be mounted calked and sealed. The ply will also be glued to the timbers with PL200 for stability and to prevent "creaking." (We really should have done the floor in the house with this stuff! ) |
 |
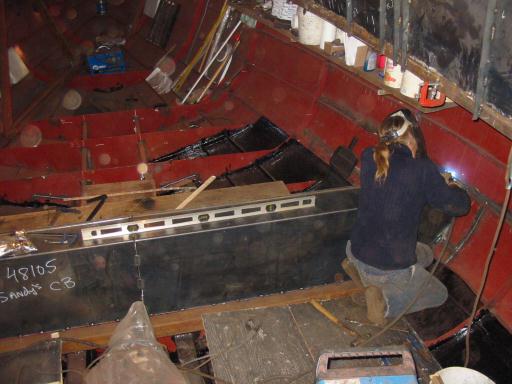
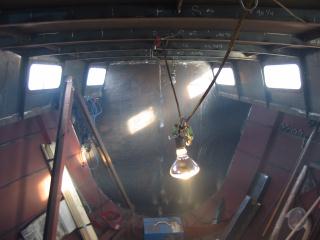
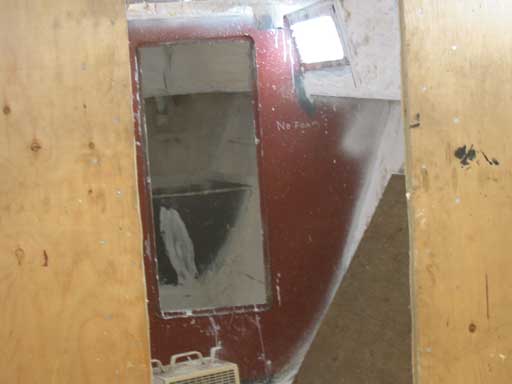
After a final test to make sure all the
bolts were going to fit, the aft plywood and the frames were calked, and
attached.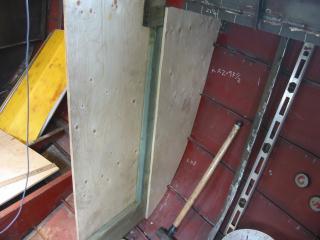 Gena did a test fill with foam between the ply (above photo) just to see how it would work. Eventually it squirted out near the bottom in great amounts haha! Oh well! It's sealed and soundproofed! In the photos to the right one can see the bolts (3/8" x 3-1/2") going through cabintop frame and web frame. |
 Bolts all around!  |
| After all the pieces were in, the nuts were tightened down and the bulkhead became very rigid. | |

![]()
to Individual projects main page