| Project 4 | 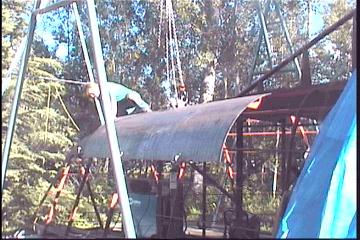 |
Installing RADIUS Plate |
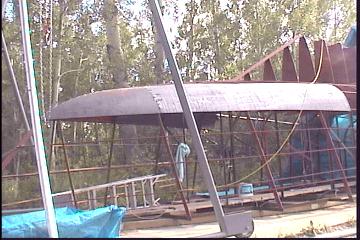
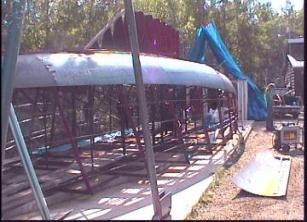
| Finally after a long wait, the radius plate has arrived! Our origional plans of having a 13' long piece for the bow were scratched when the supplier informed us ( after we called 3 weeks later ) that they couldn't roll a piece that long. So we went with 10 footers, which may be a good thing. | |
| The first two pieces, starting
at the bow, were cut from a 10' slab of radius. We placed them on over
the bow, being careful to keep the center lined up with the center of
the radius. (We later on found this not so important ) Marked up an outline for rough cutting so it could be pulled in closer to the frame, then cut it oversize, except where the bow stem touched it. Once the projected radius, the one we decided would be fair, was met, and the bowstem seated close, we cut off the back of the plate to be vertical. |
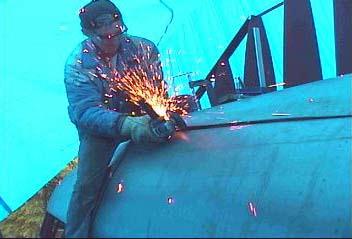
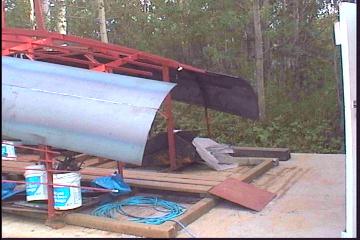
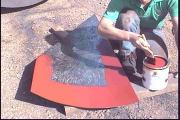 Priming finished radius plate for bow cone |
| Once tacked into place, we started on the opposite side. The short plate was not a problem. The longer plate may be a different story. We have moved it into place ( pic below ) and it seems very rigid, not very yeilding as we thought it would be. Should be able to get away without splitting it down the middle though. Must re-enforce frame 2 as it may buckle under the strain. | |
| Clearly some technique will have to be developed in order to make pleasing results. Of course, to us amateurs, the job looks impossible! I figured it would have been better if the radius curved diagonally across the plate, or if it had been rolled diagonally. This way the plate when centered would tend to follow the curve around the hull more. The waste would be phenomenal though. Pulling it in against it's will seems so brutal! | 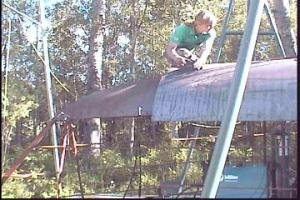 |
| As someone long ago said: You never know 'til
you try! That was the thought for today. We placed the large curved plate up to the frame and marked it's approxiamte position and size. After much humming and hawing, we cut it and put it back up to clamp it on and pull it into position. This proved to be quite difficult ( by our standards anyway! ) but eventually we got it pulled in to obtain the curve. |
 |
| Everything seemed as though it would be an easy job after the first large piece was successfully snug against the stringers, when we noticed that the joint between the first set we had put on yesterday, and the larger peice, was coning outwards. Of course we would have to fix it as it would completely destroy the fairness of the hull. So we continued to pull on the aft end of the plate, until the tackwelds snapped at the joint. At this point things look quite impossible. On top of that we noticed the whole stem back of the bow has gone out of shape. This would be logical as only one side is pulling in. We have decided to to release the plate on the aft side and serve up another on the other side with hopes of using the opposite to pull each in at the same time. Oh well, we have all week to think about it! | |
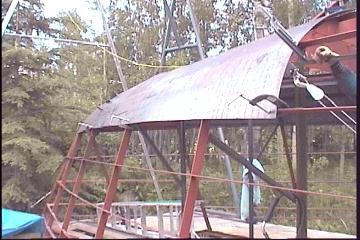
| Today we decided to repair the
hoist car. It wasn't moving very well as the rollers were binding up against
the sides. Also the hoist hook was sliding back and forth pulling it off
center. After welding in some supports on the sides and top, the rollers
could turn freely. (Pic below) On the bottom we used a short piece of large chain attached to each end of though bolt, then hung the hoist from that. At last it works! |
|
 Gena repairing the hoist-car |
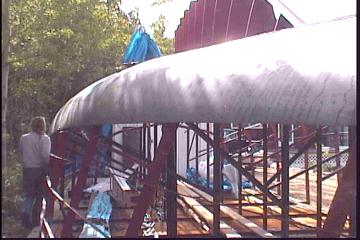
We then placed the
large radius plate on the other side, clamped it in and marked for cutting.
As the forward edge had to be a vertical cut, ( so it could butt against the
forward most plate already mounted ) we marked it and once back down on the
ground, and used a flexible ruler curved to be parallel with drawn line. This way the cup on the plasma cutter could be run along the edge of the ruler for a nice clean cut. |
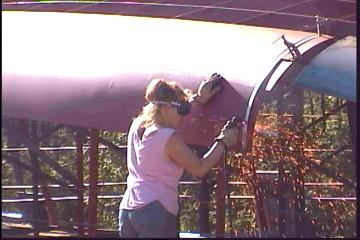
| We only needed to lightly grind it
off, and it fit the other piece as if it were cut from it. Once again we
pulled in the plate and it didn't really want to go. We eventually got them
both in using a comealong, many clamps, and lots of patience. On one side we
noticed along the top was buckling as we hadn't put in any tacks along the
stringer there. That will be watched carefully from here on in as it caused
a distortion in the plate that will have to be straightened out before the
flat plating goes on. Also we had to use the other come-along to pull down the bow stem, as it started lifting, likely due to the pulling up of the plate. This, hopefully, should remedy itself once we have moved further along. To remedy the coned joint situation from Day 30, we cut out the welds in the center, tacked on some scrap flat bar to pull in the forward plate also, pulled it in, and tacked to stringer. ( See the flat bars near bow area tacked on in pic below ) After the two opposite radius sections were pulled in, the bow stem distortion straighted out. One really has to go out and around the hull to check for problems from time to time, as they sneak up on you, and sometimes they make no noise at all! |
|
 Clamping on plate and pulling in with come-along |
|
 |
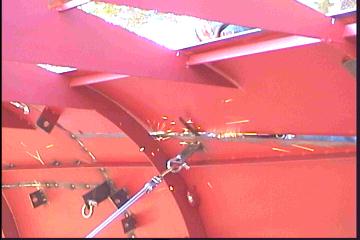
As the plating approaches the
center of the hull, the curves become more acute. It is necessary to split
the plate length-wise, and fair them in together to obtain a better fit.
This proposed two problems: Where to split the plate, i.e.. where the curved split would sit around the radius curve. Whether or not to make it diagonal and if so which way? |
We were thinking it would be much
easier doing these pieces, but forgot the long seam between the two would have
to be pulled inline. Across the top, we had to 'V' in the straight line as a
slow curve may be more difficult once putting on the flat plate. This presented
its' own problem as the lower part of the plate began to buckle outwards. Once
the lower part of the radius plate was brought up and fit in, we were able to
correct that problem. After a couple of hours of pulling and pushing, things
looked up again! Incidentally, there seems to be no further frame distortion,
which is a relief.
A word of advice:
Don't use cheap clamps, no matter how good they look! Ours are all falling
apart, about 3 a day, and have been a major inconvenience.
| Putting on the radius plate opposite the one we finished on Day 32 should have been a cinch as we had the method of the other fresh in mind. It didn't act in the same way and was a whole different experience! We discovered the plate was flat in an area a few inches long, and that caused some strange problems while being curved. Initially all looked fair, but as we pulled the aft end into the frames, the bottom of the plate buckled as it did on the other side. We were ready for that and took measures against it. | ||
| This included pulling in at a higher angle and strategically clamping at stress points. Suddenly we noticed ripples forming a shorter buckling sections in and out, as if the plate had nowhere to go. If you look above the clamps you can see two of them in photo at right. Anyway, this was the result of a flat section in the rolled plate that just happened to be just above the splitting point. |
 |
|
| Luckily, the bottom piece was ok and fair. As can be seen in the top photo, things eventually came in ok. There are still a few problems to iron out ( ..if only we could just iron them out ha ha! ) with that section. The center of the curve has pulled away from the frames as a result of the flat section. This will have to be remedied on the next opportunity available. The very ends of the two are almost too closely butted and may cone out. | ||
 |
Have we learned anything? Perhaps the starting end of the plate before curving and pulling in should be held in place only with clamps, or non-permanent means that would allow for some movement. Or maybe just some tacks around the center. We tended to assume everything was running in ok if it appeared ok on first glance, then start tacking along, until we noticed problems. Then the tacks would have to be cut off etc etc. |
|
| The distortions in the plate can be worked out easily enough, it's just annoying to see it happen! Some obvious things also caused problems over the last couple of days including tacking all down one side only. Sometimes it works, sometimes it doesn't. Overall we're a little wiser to the ways of steel plate. | ||
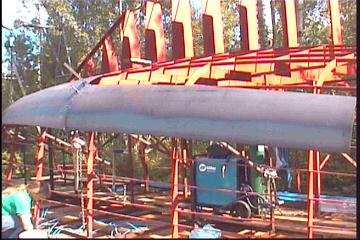
| With this section of radius plate we decided to cut it diagonally so the aft end of the split would be lower that the forward end. We hoped this would facilitate an easier curving of the plate as it does curve in very abruptly at this point. In the picture above it almost looks even, but the actual difference in hieght is 24" at the forward edge, and 15" aft. We did experience some buckling again, and this time no way of holding it in. Putting in a temporary bar to a support frame worked fine. | ||
 |
The coning out at
butt joins continues, and we have decided to leave them until all of the
plating has been done, at which point we'll fair them out. It seems as
though working them in requires some surrounding support. Just 1 or 2 inches either side of the join leave fairness. A more localized method of pulling them in will have to be devised. |
|
| Making them under sized in the center so as they will pull in as the plate on the opposite end is pulled in toward the hull is not the answer. All that did was pull the tacks apart. The plate buckling into a bulge could have been prevented if we had added a second stringer in the radius center, as that would have given enough support to stop the outward (or inward ) pressure in the first place. | ||
 Gena grinding to fit the upper and lower split radius They should butt in fairly close together 1/16" or less |
The top piece on the other hand was quite
enjoyable. We cut it down along the diagonal from the other piece, just
oversize, and pushed it up into place. Then pulled the whole thing in
tight using the come-alongs and some clamps, and marked the edges. We then
took it back down and cut it. Once back up in place, everything was pretty close, just some grinding needed to be done. Likely because of the falling in or out of or imitated curve with the straight-edge. |
|
| We knew the likely place it
would buckle and clamped around the area. Also, we cut a curve along the
top instead of straight lines V'd in to follow the radius. It sure looked
nicer and didn't bow out at all. Now we are thinking of fairing up the
whole top from end to end, so it will flow parallel with the stringers.
The reason we were keeping them straight was so the plate on top up to the
keel wouldn't have to be curved. But we noticed they curved anyway after
being pulled in to the hull!! Also, we tried something new with the butt join of the upper plate and the one before it. By leaving some space between the two, almost 1/8" we allowed some room for it to fair in. There was almost no coning at the joint. It seemed more flexible too as it had some play. We'll try that again on the other side. All in all I would say the diagonal split worked, as long as it will fair into the last radius section(s). Can't wait! |
||
| Today was the absolutely perfect summer day. Hot and sunny, and dry enough to start early in the morning. As a result, a lot was accomplished. | ||
 |
We put on split piece on port side and faired it in. Then trimmed both sides off vertical in preparation for the aft and last 2 radius pieces. We then split the last two plates length-wise to facilitate easy placement, but it turned out that may not have been necessary as the larger lower piece went in very easily. Refreshingly there was no warping or buckling in the plate. The length-wise cut won't be too difficult as the edge is straight and warp-free. | |
| The actual plate is quite a bit
too long, but better safe than sorry! We plan to pull in the mating upper
piece right to the end in an effort to avoid the dreaded "fish-tail" look
just before the transom. This is where the plate wasn't pulled in as to
continue the curve up to the cutoff at the transom. It sounds silly that
this could happen, but after seeing the way the curved plate in particular
acts once past the last frame, it could very easily be missed. The fact that
the transom isn't flat, ( now we know! ) could create an oversized transom
size if not curved properly, which would all too easily want to pull out the
plate back to its natural cylindrical shape. I guess we'll figure that one
out when the time comes... The Australians are right! The steel does get too
hot to handle when left in the sun. By 3:30 PM the heat became quite
unbearable, and we were seduced by the sounds of everyone else having fun in
the lake, so we packed it in for the day, and went for an attempt at sail
boarding. ( Ha ha! That's another story! ) |
||

Serving up the aft radius plate
| Even though the lower part of the aft section went in easily, the top half had to twist some and therefore took some time to seam in. A lot of grinding was in order, as, even though the plate had been pulled in tight to be marked for cutting, the aft part had to be re-cut to over an inch more. | ||
| Once the excess is removed, the
last few inches of the join will likely have to be ground out again to
allow for a continuous curve in to the transom. The other side we tried something new for the top section. As we had cut the plate over size, we decided to pull in the whole piece tight and then cut it out while still up, using the lower plate as a template. This worked quite well and only required half the time grinding and fitting. |
 |
 |
At last the radius plate is all
on! We still have to trim off the excess along the top and bottom as some is
too over size. Next weekend we will be fairing up some coning between some
of the joints. This may require fabrication of a pull-in clamp that will
draw in small sections of the join, to be split, faired in, and re-tacked to
completely remove the cone. |
| This has to be done before serving
up the large flat plate as it may flatten outward some. Surprisingly, the
aft frames stayed in place, contrary to what we thought would happen once
the aft plate was put on. I guess the lower half stabilized the whole thing
and stopped any vertical movement. We are glad to see the whole length radius paneled, and it looks really good! Shortly I will post an enlarged full side view so you can see for your self. |
|
![]()
to Individual projects main page