| Project 5 | 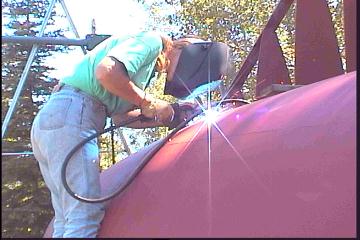 |
Smoothing "cones" in radius plate joins |
| Now for the finer part of
building a steel hull, fairing up those horrible coned out vertical
joints! As you can see in the pic below left, most of the welding was done on the inside as a matter of convenience at the time. This wasn't what caused the coning of the butt joins. The curvature at the joins was almost impossible to predict so we just left them pulled in as far as possible. Now that the whole radius plating is completed, there is more strength in the hull to make suttle changes. At least it seems that way! |
||
 |
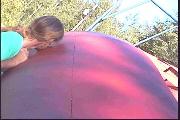
<<
Coned out section before cutting out Checking for fairness>> |
 |
| It also seems that the steel has
yielded somewhat and doesn't want to spring out as it did before. First we used the grinder to cut out a 1/8" slot where the two had previously butted together. In some places, where the cone was more nasty we cut out a bit more. Then a chain was attached to the support framing over each side of the radius join, and a hydraulic jack was used to push in the cone. Once it was pushed in enough, a tack would be placed just above or below the jacks foot to hold the join once again. A couple of times the tacks snapped and we had to start over at that position, but to our surprise, it worked quite well! ( Gena's idea ) Most of the fairing was done by eye, and I must admit, it looks much better now the "humps" are smoothed out. The difference in appearance makes us want to to an even better job of making the whole hull fair and flowing. |
||

| The port side was already pretty close but we faired out the imperfections in the radius butt joins anyway, always room for improvement. | |||||
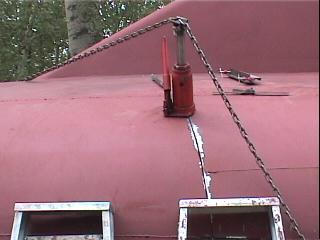
| To the right is a photo of how we used the jack to push in the coned out sections. Between that and tacking first on the inside, then on the outside, the plates faired in nicely. Most of them didn't need to be slot out more than 1/16". A word of warning about thin grinding disks: |
 |
||||
| Make sure the disk is seated flat in the grinder, as some grinders require an inset disk that seats in a cup. Ours flew apart after a couple of minutes of use. One piece went down & hit the concrete, while the other shot about 150 feet into the air ! After that, we placed a thick washer onto the grinder first, the the wheel couldn't pull in and crack. | |
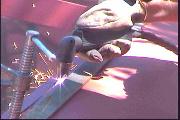
| After the joins were all faired in, we
proceeded to trim off the lengthwise excess we had left on as a precaution.
( Top pic and right ) From what we have heard, trying this with a torch would be out of the question, but with the plasma cutter it's a breeze! |
 |
| Once again we have decided to go with a soft curve to mark the radius to flat plate join. It still would have been difficult to do this before putting up the plate as it always was slightly out of the original position it was marked in. I don't think this will make plating the underside any easier, but it sure will look better ! | |
| Today we concentrated our efforts
on fairing in the radius vertical butt joins. They were pretty close the
ones we did today, but WOW does it ever look better now! As seen in the
photos we used the jack and chain again, as we did the latter part of last
fall, after discovering it worked really well. |
|
| My modest but useful modification came into play today. Last year the problem with the jack was that the chain kept slipping off and the links had to be balanced just perfectly across the head. So I bought a 1" pipe fitting that just barely made it over the head of the jack. Then tapped it for 3 large setscrews, and welded a piece of angle on top to hold the chain. Frustration was non-exsistant today I must say! ( See right ) | 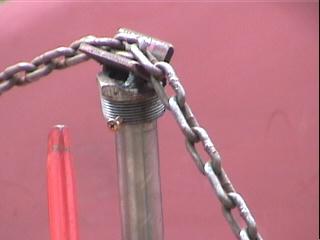 |
| Everything went like clockwork, even the weather that was supposed to be rainy and miserable held until just minutes after our last weld, and we had the boat covered and equipment put away. It then poured for hours after. | |
![]()
to Individual projects main page