| Project 7 | 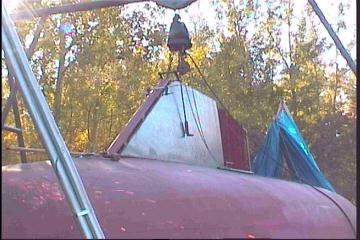 |
Keel plating |
| The keel plate demands that a
template be used for the first time! While Gena welded fill along the bow and ground it smooth, I worked at my first template. A piece of 3/8" playwood was cut into strips and glued/screwed together to make 12' long templates. This is then used to "trace" the curve at the bottom of the keel plate, cut, and layed over the plate to cut. This all worked out nicely and the curve was correct. We'd both forgotten though how heavy 1/4" plate is! The sounds of bones cracking as we flipped up the 12'x4.5' piece were never heard in the chiropractors office! |
 |
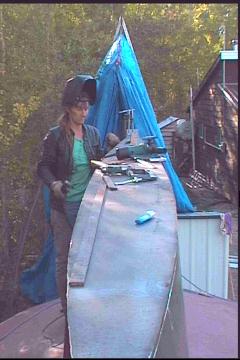
The top edge was marked and cut as was the forward edge of the keel. As most of this was my responsibility, it took pretty much all day before it was ready to tack in. Gena (left) did a fine job on the bow which took her all day. Here in Canada this time of year the sun is gone shortly after seven so our day ran out. I wish all days were as perfect as today, no wind, lots of sun to see while welding and not cold at all. We can only hope :o) |
| Clamps, clamps, and more
clamps! That plate just didn't want to agree with the keel frames!
Because the plate is curving inward at the front of the keel to the 1/2
pipe, and the plate aft of that is curving in a different direction,
pulling it in was not an easy job. Thick tacks had to be placed in front
of the clamps to stop them from slipping off, and many clamps gave their
lives today in the effort. Eventually, with the help of a hammer,
victory was at hand. The next step, and a necessary one as the keel couldn't possibly be left like this for a week, was to put on the aft keel plate. |
||
 After battening curve and cut, template is tested |
 Using template to cut the bottom of keel plate |
 Pulling up cut plate to mark other lines for cutting |
| As can be seen in the pics above, a template of the curve was marked, then cut with a jigsaw (carefully!), and tested back in place. Once a good fit has been accomplished ( the first was perfect brag brag brag!! ) the template is used to cut "the real thing", which is hoisted into place for more marking. This piece wasn't nearly as bad because there was very little compound curvature involved. | ||

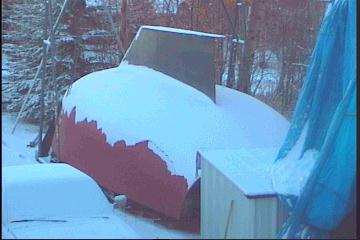
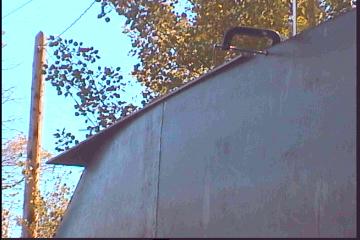
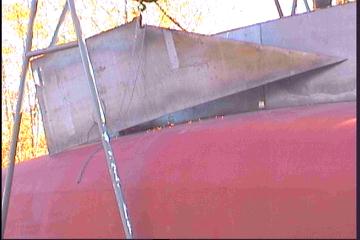
Here's a view of the keel and boat from the "passers by" view!
| And now for something
completely different! Half inch plate is very heavy, even though the peice was only 18" wide and 12' long. A template may have been a good idea, but such a small piece couldn't be much of a problem. The plate clamp didn't seem to have much of an appetite for 1/2" as it just wouldn't bite down. The marked curve, once brought back down, was easy enough to mimic with a piece of flatbar for the plasma cutter guide. |
||
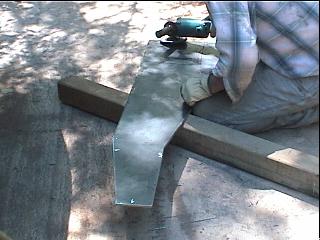
| Plasma cutting
plate so thick, on the other hand, is much slower and more difficult
than the thinner stuff. I had trouble staying vertical with the torch,
which with thin plate doen't present much of a problem. The 1/2" needed
to be ground down for an hour to take out my bevel. Ooops! |
 Plasma cutting my first 1/2" plate |
|
| The lesson here would be to watch the cut from directly above as often as possible, or you'll be doing lots of grinding! Or your partner in our case, poor Gena! (pic below) | ||
 |
Once back up in place, the plate had to be pulled down on each end with come alongs and clamps. For some reason, our steel supplier sold us 1/2" plate with a nice curve to it on one piece, and the other with a nasty kink. This all wasn't immediately obvious as it was under other plate etc. | |
| From now on we'll
check things out more carefully before having it carted home. This may
be a natural thing thick plate does, we don't know... The flat end of the plate has been bevelled right down to 1/8" to provide a deep V for mating the other piece of plate aft. (tomorrow) Anyway, all went in fine and the fit wasn't bad. The plate on the side of the keel has such a suttle curve, and the keel bottom looks great in place! |
||
| Today was much like yesterday, with the exception of the rudder support box bottom plate being added on. This piece extends past the aft end of the keel. Once the plate was up into position and marked for cutting, the extensions center was determined by using a plumb-bob down the the aft-stembar center. This is where the rudder will come out of the bottom of the boat. Keeping this absolutely vertical would be the logical thing to do as the aft end center of the keel is levelled vertical. | |
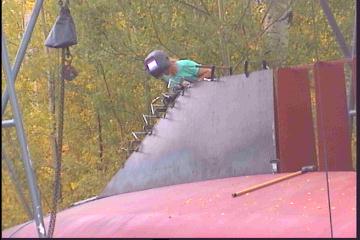
 Gena inspecting welds |
Unfortunately my
cutting of 1/2" plate still needs some practice, so the squared off piece
aft came out somewhat fanned, like a sparrows tail. We decided to leave it
this way so trimming could be done after the plate was up, and the
position checked for centering. Welding presents problems in the keel, as
it is a relatively tight space inside. Even though it can't be seen in the
photo to left, the other (left) side of side keel plating isn't on yet.
This is to allow for maximum welding of the keel bottom plate to the
frames. In some places, these would be totally inaccessable, ie fore and
aft parts of keel. As much welding as possible will be done before closing up the other side. The rest that can be reached will be done from the inside, ( with a shopvac drawing out the smokey air, we hope!) |
| The parts that can't be reached must be cut as slots to be welded in from the outside. Lining these up will be important. That will have to wait until next weekend. | |

| When something has been already
done once, ie the opposite side of this plate in photo, usually things
move a bit quicker and more smoothly. Not the case here. I guess I was just having a bad plasma cutting day. The cheaper after-market electrodes recieved the blame. They just don't feel right! You have to be a plasma cutter to understand.... The cup that holds the tip away from the steel, as well as the insulative tip holder are now toast as a result of flaring and plasma arcing everywhere. Now I sit and think about it, they may have been damaged last weekend when I was trying to cut with only 40, then 30, 20 & 10 pounds of air pressure. ( I forgot to turn the damned air compressor on! ) Seems like an expensive mistake that's for sure! |
||
 |
Anyway, my
sloppy cutting job lead to much grinding and unhappiness on the part of
Georgena. Then once in place, the curve didn't fit. Up we hoisted again to fix the mistakes I had made. (I offered to do the grinding as it was my mess, I would clean it up) This piece is also more complicated as we now can't see through from the other side to see if things are ok. Pulling in won't be assisted from the inside with come-alongs, it'll all have to be done from outside. |
|
| By the time we finally had it in
place (Not pulled in at the front, just in place! ) the day was over. A
new day tomorrow and we're sure things will go better. |
||

| The morning country silence was broken only by the singing of birds, breeze in the leaves, and us grinding and hammering a 300 lb piece of steel! | ||
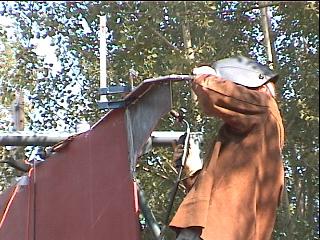
 A close up view of the edge of plate at keel front, .."clamp cup" |
As can be seen in the photo at left, The only way we could secure clamps was to make a "cup" for the screw end to sit in. Or else they would just slide off. On the other side, we tacked on a piece of 1/4" rod that would hold the foot side of the clamps. After the piece was clamped into place, we could be assured of a fairly accurate mark to trim off the top. This was all done while the plate was still tacked on the bottom to save time. | |
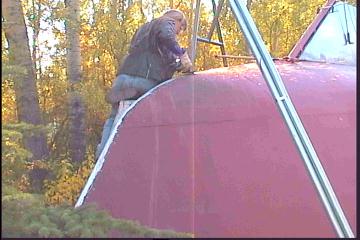
| I must admit that the position
I was in, flopped over the keel, wasn't my favorite.....for plasma
cutting... guys get your minds out of the gutter! The frames had to be ground in by small amounts to continue fairness, especially near where the first frame meets the split-pipe at the front. This isn't an exact dimension in the plans so modifications had to be made. 3/16" was the deepest. |
||
 |
After the day was through, the
front of the keel was whole. The welding will have to wait until next
weekend, Thanksgiving, here in Canada.
Taken October 5, -10 degrees Brrrr!!
|
|
| Cold for the start of October
anyway! The plate must have contracted quite a bit for that to happen as
there was 7 or 8 tacks and all of them broke. It was a rude awakening
and made us think of the winter to come, without working on our boat. Unfortunately, we are not as far along as we had hoped we would be. The boat is still upside down! |
||
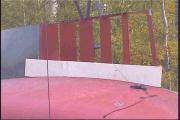
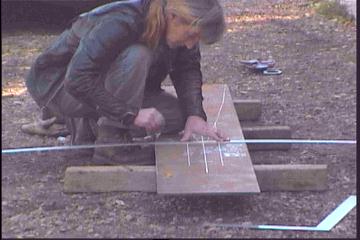
| As luck would have it, today
was a beautiful day to put on our last piece of hull plating! ..And my cutting was much improved, thanks (partially) to a new cup, manufacturers replacement tips and electrodes for the plasma cutter. They are finicky things plasma cutters. Another lesson learned: Don't use aftermarket parts, it'll cost in the long run!! .. ( About $400 we figure ) The cutting from the template on the other side didn't have to be altered at all and once the plate patterned from it was in place, everything fit perfectly. The top was then trimmed away to fit underneath the half inch plate. After we were sure of the fit, the plate was marked where the frames butted in, the moved away to cut slots in the keel plate. This must be done at this point as there is no way Gena could fit up inside to weld the frames on to the plate. ( She's skinny, but not that skinny! ) |
|
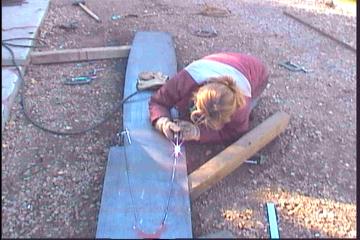
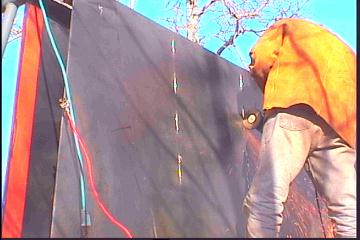
This way the welding can be done from the outside. ( See first pic at top of page ) Unfortunately, at about this time the wind started picking up. Luckily I had the foresight to buy a few yards of canvas material, which Gena hung over herself secured by old mag-mount antenna magnets. This blocked the wind off for a good weld. ( pic to right ) |
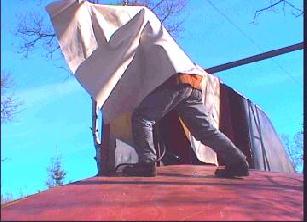 |
| ( Actually it wasn't canvas, it was drapery material.... that looked like canvas. I don't know who would want to use that for draperies! We should hang them up in our living room afterwards, complete with burn holes, what a conversation piece! ) | |
 |
Pictured to the left is an
extreme close-up of my plasma cut of the plate bottom to hull curve. Keep
in mind the plate is only 1/4" thick so it looks messier than it is.I
still want to cut slower as the other tips couldn't go fast, thus
resulting in the slag hanging down. Very little grinding was needed with
this cut. Finally we have all the plate in place. Now it's time for much welding (Georgena) and grinding. (Me) |
Adding rudder base to aft of keel
| This little box at the aft end
of the keel is what holds the rudder in place and must be quite sturdy. Keeping the 1/2 inch at correct height is also very important as this will house the lower bearing "block" and everything must be straight. |
||
| This part must
be whole bottom of the coated before the The center point was plumbed to down to aft stembar We at first thought side plates in place the aft of the keel was painted, it |
 1/2" across top and 3/8" off keel aft |
done now as the keel must be finish- boat is turned over! of the extension ensure accuracy center. that with the large that it would make ugly, but once it looked just fine :o) |
| Gena did a lot of intense
welding for strength, the last thing we'd need is our rudder falling off
in rough seas 1000 miles from nowhere! We've read lots of stories where
that did happen, mostly due to not enough
maintenance but sometimes just the shear stresses the sea can put on a
rudder can snap it right off. Some welding had to be left at the extreme end for after turn over, painting it won't be a problem there as it is a risen part. |
 |
|
| The welds where the plate meets the keel sides had to be built up and smoothed to a longer taper...just for looks | ||
![]()
to Individual projects main page